Valve Clearance Adjustment
- To change the valve clearance, remove the camshafts (see Camshaft Removal in the Engine Top End chapter) and valve lifters.
- Replace the shim with one of a different thickness.
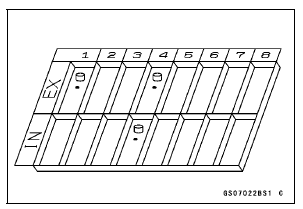
NOTE
Mark and record the locations of the valve lifters and shims so that they can be reinstalled in their original positions.
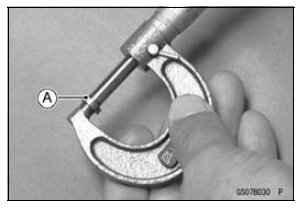
- Clean the shim to remove any dust or oil.
- Measure the thickness of the removed shim [A].
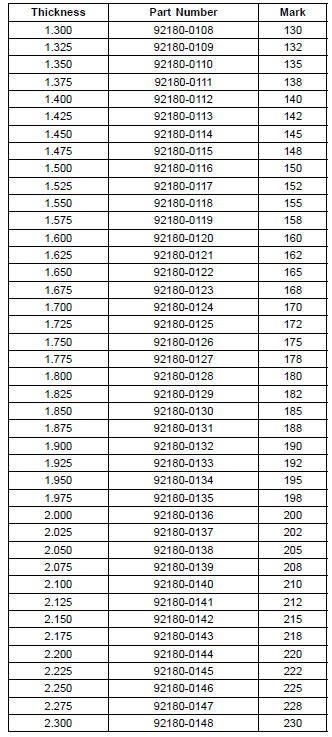
- Select a new shim thickness calculation as follows.
a + b – c = d
[a] Present Shim Thickness
[b] Measured Valve Clearance
[c] Specified Valve Clearance (Mean Value = 0.195 mm (Exhaust), 0.185 mm (Intake))
[d] Replace Shim Thickness
Example (Exhaust): 1.600 + 0.28 – 0.195 = 1.685 mm
Exchange the shim for the 1.675 size shim.
Adjustment Shims
NOTICE
Be sure to remeasure the clearance after selecting a shim. The clearance can be out of the specified range because of the shim tolerance.
If there is no valve clearance, use a shim that is a few sizes smaller, and remeasure the valve clearance.
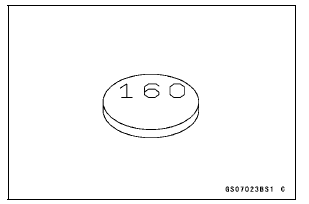
- When installing the shim, face the marked side toward the valve lifter. At this time, apply engine oil to the shim or the valve lifter to keep the shim in place during camshaft installation.
NOTICE
Do not put shim stock under the shim. This may cause the shim to pop out at high rpm, causing extensive engine damage.
Do not grind the shim. Thismay cause it to fracture, causing extensive engine damage.
- Apply molybdenum disulfide oil solution to the valve lifter surface and install the lifter.
- Install the camshafts (see Camshaft Installation in the Engine Top End chapter).
- Recheck the valve clearance and readjust if necessary.
- Install the removed parts (see appropriate chapters).
Test yourself
A quick Kawasaki Ninja ZX-10R quiz: every answer comes with an explanation and a link to the manual page.