Brake System
Brake Pedal Repair Procedures
In this manual: Brake System
22steps
~132min
4/5difficulty
Done 0 of 22
Removal
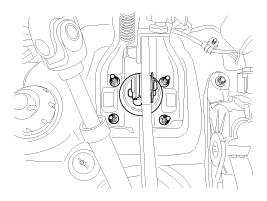
- Remove the lower crash pad panel. (Refer to Body - Airbag).
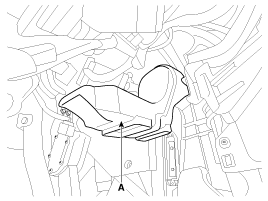
- Remove the shower duct (A).
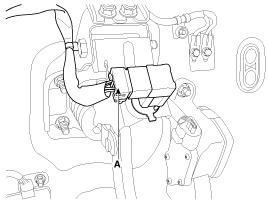
- Disconnect the stop lamp switch connector (A).
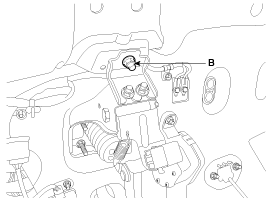
- Remove the brake pedal mounting nut (B).
Tightening torque: 9.8 ~ 14.7 N·m
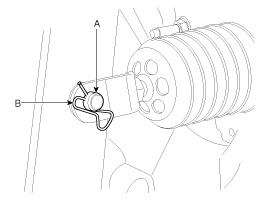
- Remove the lock pin (A) and the flat head pin (B).
- Remove the nuts securing the brake pedal assembly, then remove the brake pedal assembly.
Tightening torque: 12.7 - 15.6 N·m
Inspection
- Inspect the bushing for wear.
- Inspect the brake pedal for bending or twisting.
- Inspect the brake pedal return spring for damage.
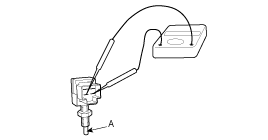
- Inspect the stop lamp switch.
- Connect a circuit tester to the stop lamp switch connector and check for continuity when the stop lamp switch plunger is pressed and when it is released.
- The stop lamp switch is normal if there is no continuity when the plunger (A) is pressed.
Adjustment
Brake Light Switch Clearance Adjustment
If the clearance between the brake light switch and the bracket is not 1.0 ~ 2.0 mm (0.04 ~ 0.08 in.), perform the following procedure.- Remove the shower duct (A).
- Disconnect the stop lamp switch connector (A).
- Release the stopper plate by carefully pressing the hooks (B), then pull the stopper plate (A) in the direction of the arrow (C).
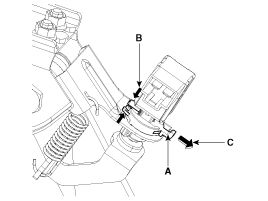
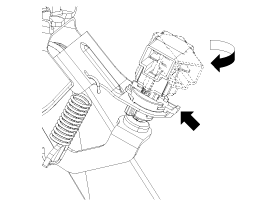
- Turn the stop lamp switch 45° counterclockwise and remove it.
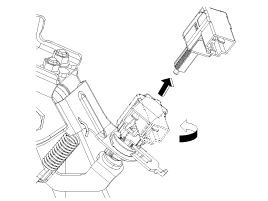
- Hold the brake pedal arm and fully insert the stop lamp switch, concealing the contact part.
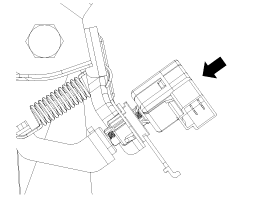
- After inserting, rotate the lock switch (A) 45° clockwise, then assemble the lock plate (B) by pressing it.
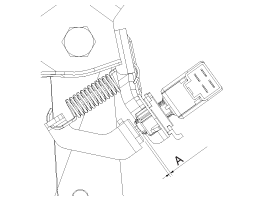
- Check the clearance between the stop lamp switch and the bracket.
Brake light switch clearance: 1.0 ~ 2.0 mm (0.04 ~ 0.08 in.)
- Connect the stop lamp switch connector.
- Install the shower channel (A).
Installation
- Installation is the reverse of removal.

- Before installing the pin, apply grease to the cotter pin.
- When installing, use a new clip.
- Adjust the brake pedal height and free play.
- Check the brake pedal operation.
Test yourself
A quick Kia Cadenza VG Owner's Manual quiz: every answer comes with an explanation and a link to the manual page.
Was this page helpful?