Cooling Fan Repair procedures
Removal
Shut off the High Voltage circuit.
(Refer to Hybrid Control System - “High Voltage Shutoff Procedure”)
Remove the high voltage battery front cover.
(Refer to High Voltage Battery System - "Case")
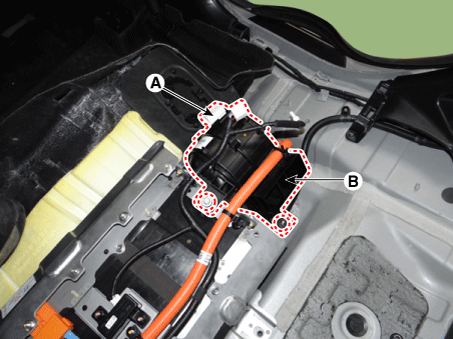
Disconnect the cooling fan connector (A).
Remove the cooling fan (B) after loosening the mounting bolt and nuts.
cooling fan mounting nut / bolt :
7.8 - 11,8 N·m
Installation
Install the cooling fan in the reverse order of removal.
Inspection
Connect the KDS/GDS to the Data Link Connector (DLC).
Connect the oscilloscope probe to the BMS extension connectors.
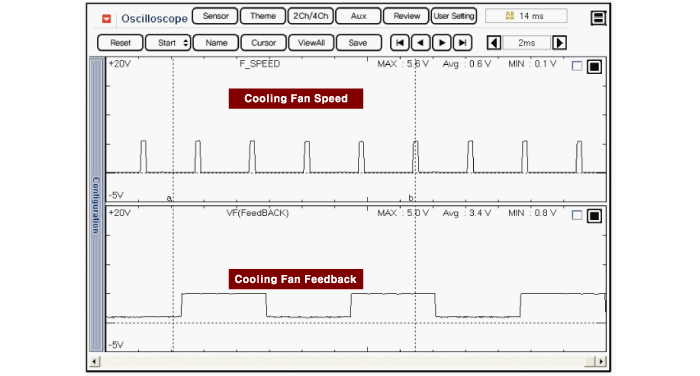
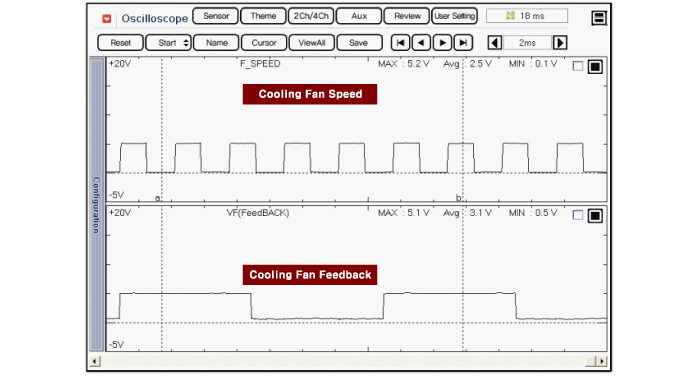
Cooling Fan Speed Waveform:
BMS Extension Connector B01-S(20)
Cooling Fan Feedback Waveform:
BMS Extension Connector B01-S(4)
Turn the ignition switch ON.
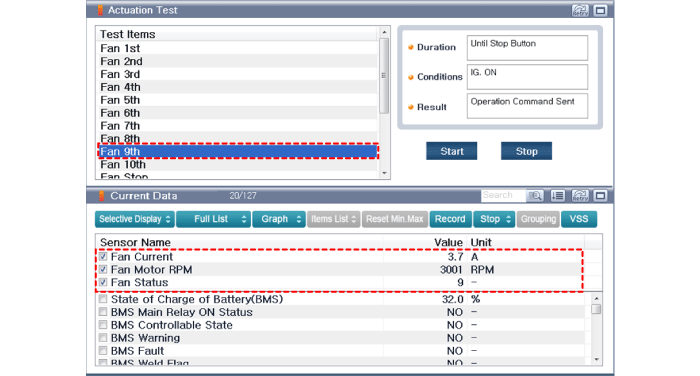
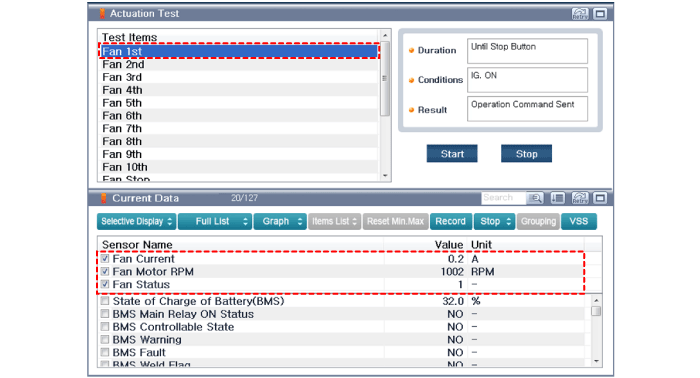
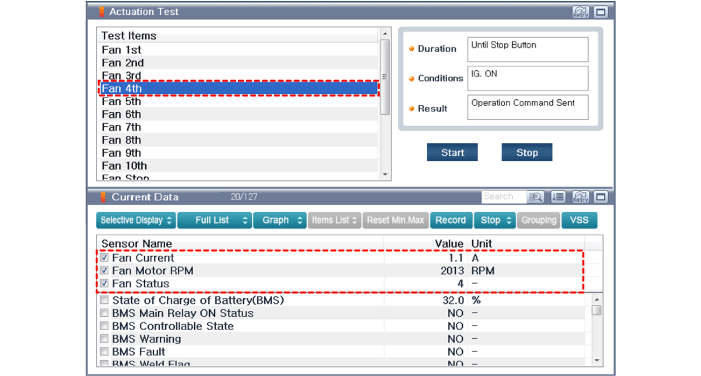
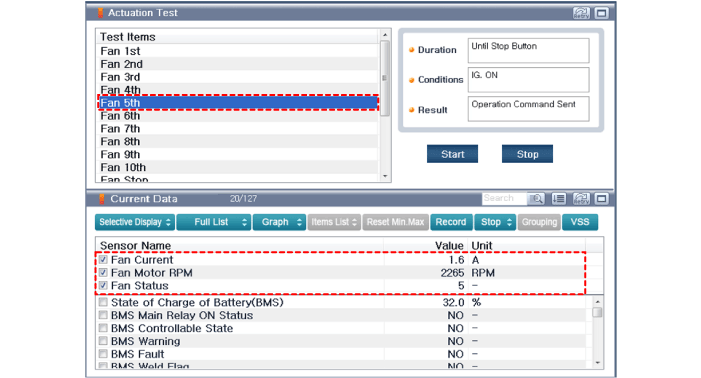
Check “Fan Status”, “Current” "Waveform" and waveforms in each cooling fan operation mode by using “Actuation Test” function in KDS/GDS.
Duty
Duty (%) Fan Speed (rpm) 10 - 20 1,000 30 1,300 40 1,600 50 1,900 60 2,200 70 2,500 80 2,800 90 3,100 95 3,850
[Cooling Fan at 1st]
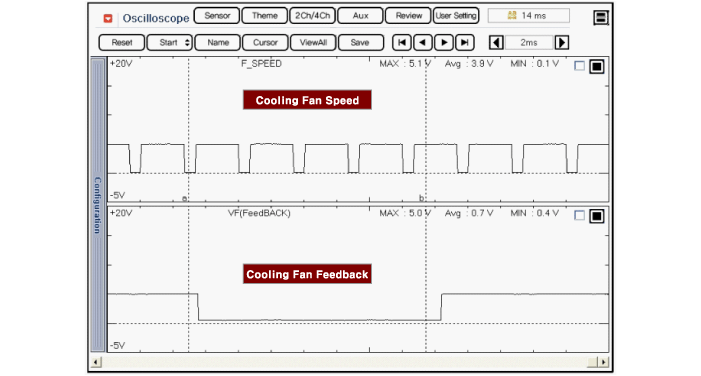
[Cooling Fan at 2st]
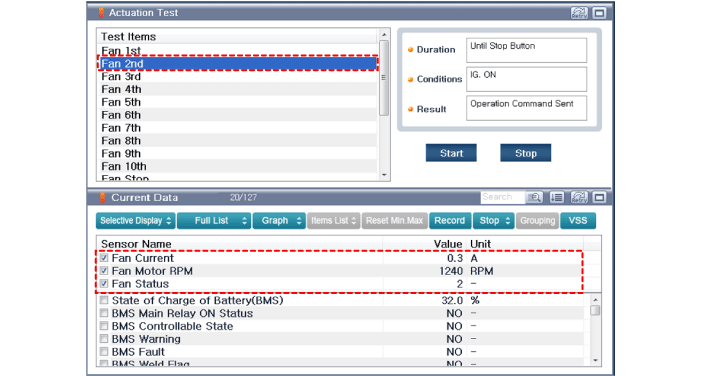
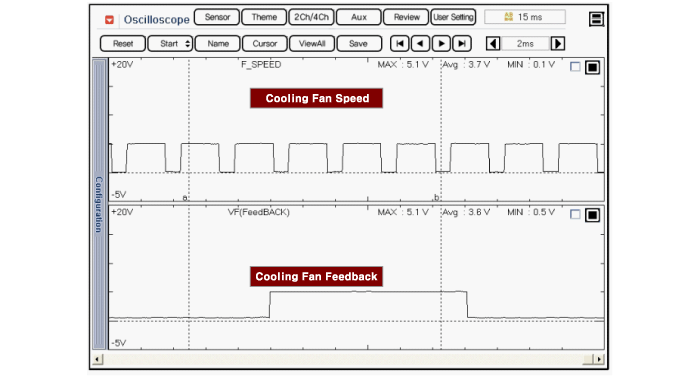
[Cooling Fan at 3st]
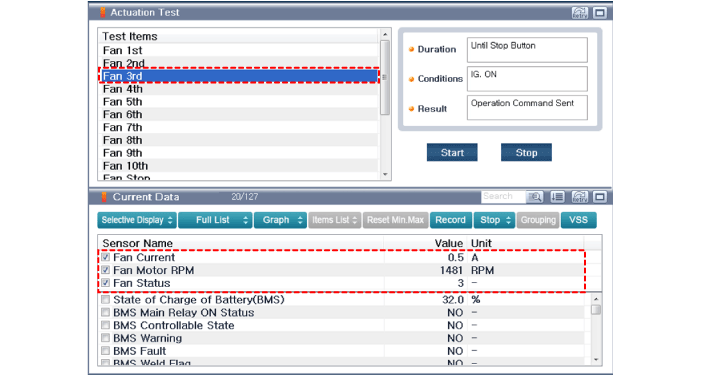
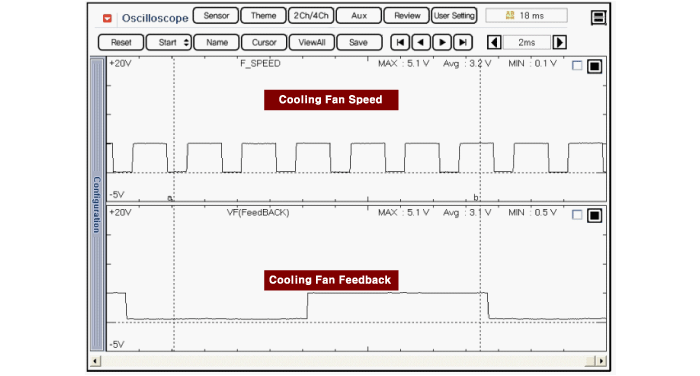
[Cooling Fan at 4st]

[Cooling Fan at 5st]
[Cooling Fan at 6st]

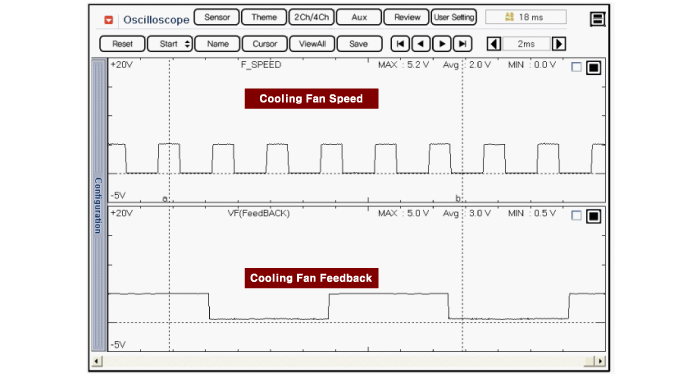
[Cooling Fan at 7st]
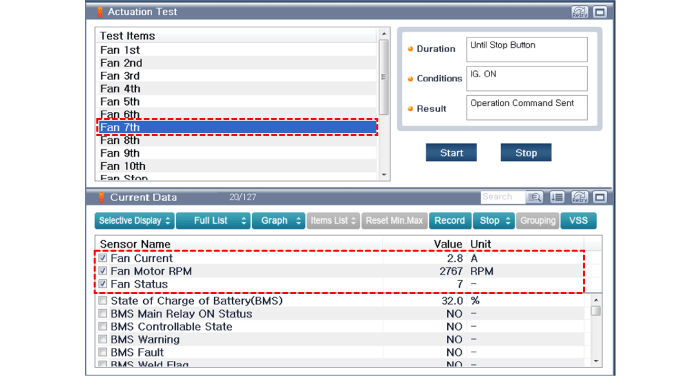
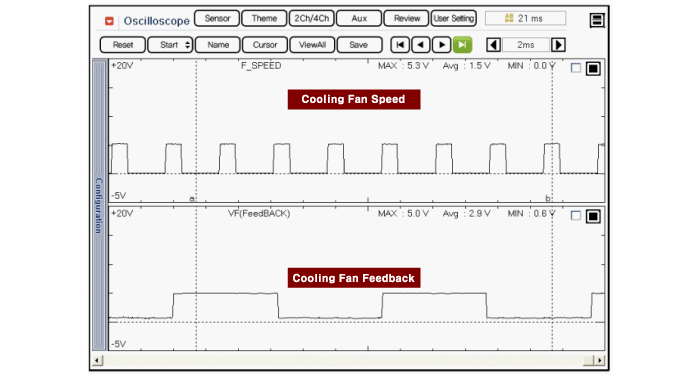
[Cooling Fan at 8st]
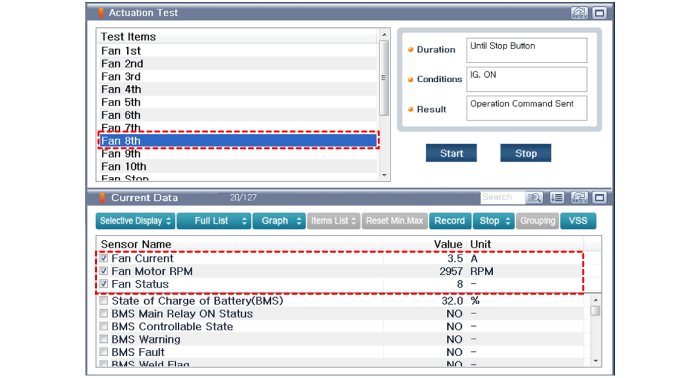
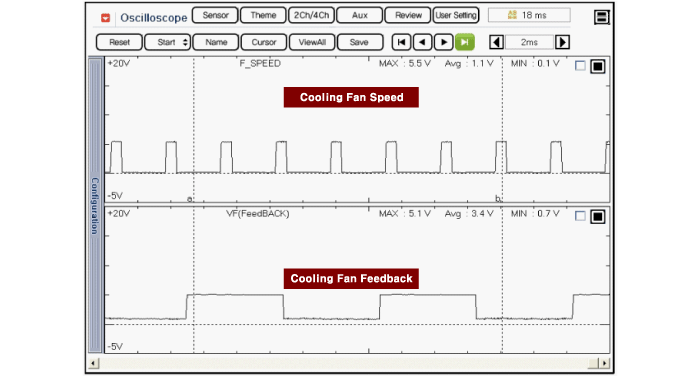
[Cooling Fan at 9st]