Intake Actuator Repair procedures
Inspection
Switch "OFF" the ignition.
Disconnect the intake actuator connector.
Verify that the intake actuator operates to the fresh position when connecting 12V to terminal 3 and grounding terminal 4.
Verify that the intake actuator operates to the recirculation position when connected in reverse.
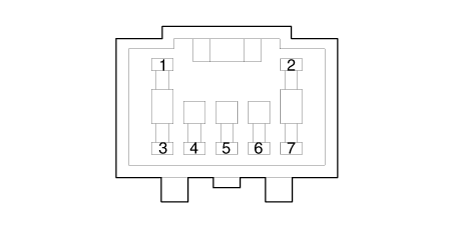
1. -
2. -
3. Fresh air
4. Sensor (+ 5V)5. Feedback signal
6. Sensor ground
7. Recirculated airConnect the intake actuator connector.
Switch "ON" the ignition.
Check the voltage between terminals 5 and 6.
Specification
Door position Voltage (V) Error detecti Fresh air 0.3 ± 0.15 Low voltage : 0.1V or less Recirculated air 4.7 ± 0.15 High voltage : 4.9V or more
It will feedback the current position of the actuator to controls.
If the intake actuator does not operate well, substitute with a known-good intake actuator and check for proper operation.
Replace the intake actuator if it is proved that there is a problem with it.
Replacement
Disconnect the negative (-) battery terminal.
Remove the main crash pad assembly.
(Refet to Body - "Main Crash Pad Assembly")
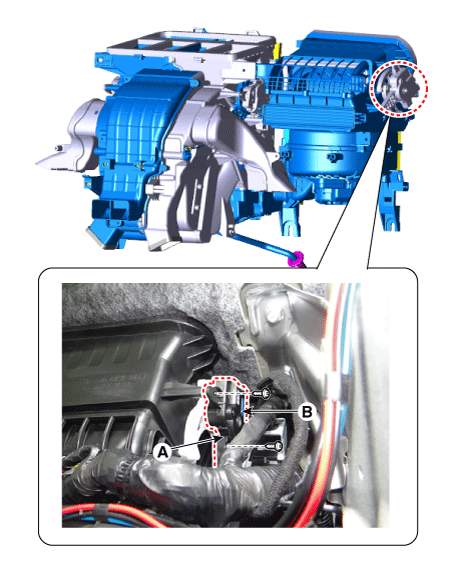
Disconnect the connector (A) and then remove the intake actuator (B) after loosening the screws.
Install in the reverse order of removal.