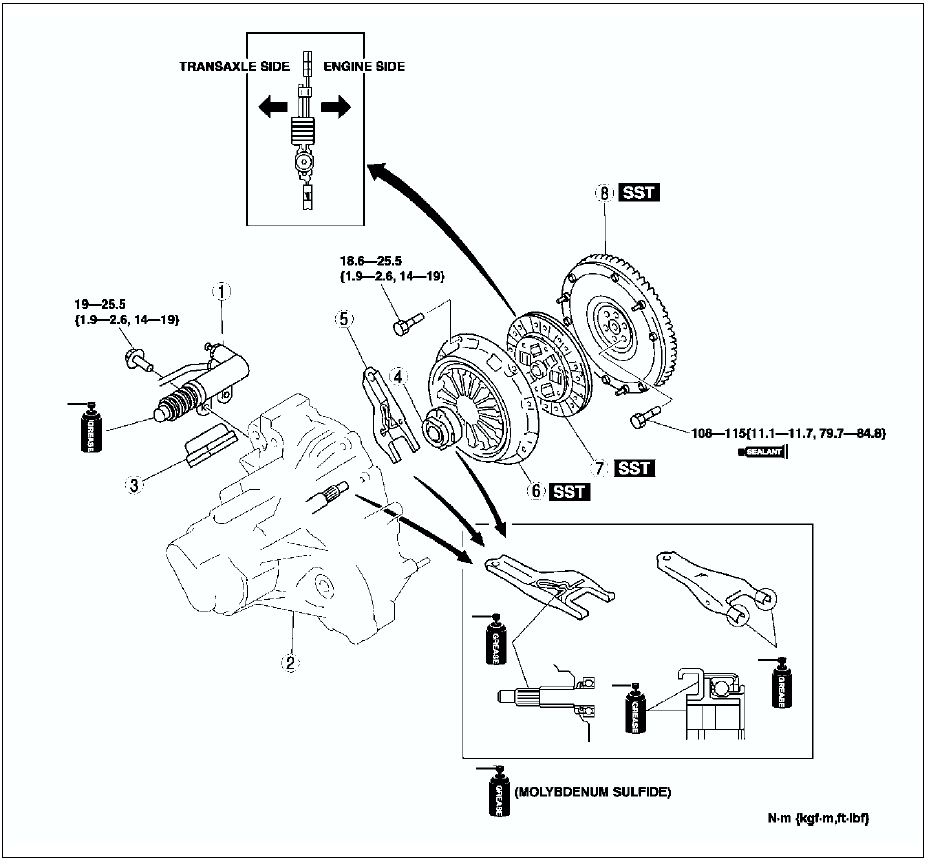
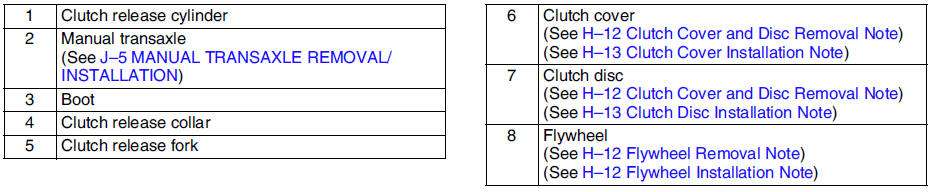
Clutch unit removal/installation
1. Remove in the order indicated in the table.
2. Install in the reverse order oremoval.
Clutch Cover and Disc Removal Note
1. Install the SSTs.
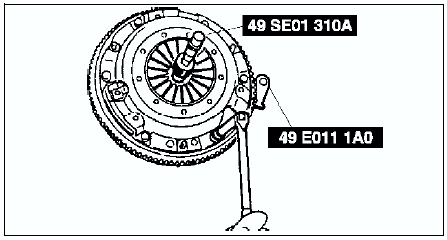
2. Loosen each bolt one turn at a time in a crisscross pattern until spring tension is released.
3. Remove the clutch cover and disc.
Flywheel Removal Note1. Hold the flywheel using the SST.
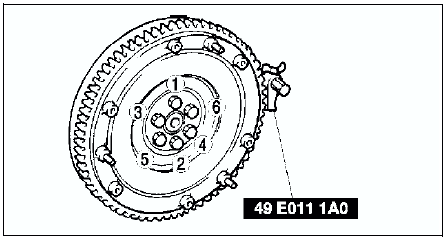
2. Remove the bolts evenly and gradually in a crisscross pattern.
3. Remove the flywheel.
Flywheel Installation Note1. Install the flywheel to the crankshaft.
2. When reusing the bolts, clean threads and hole, then apply locking compound to the threads.
Note- No locking compound is needed when using new bolts.
3. Hand-tighten the flywheel lock bolts.
4. Install the SSTto the flywheel.
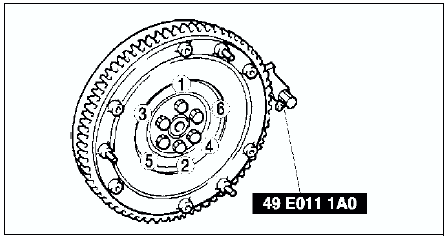
5. Gradually tighten the flywheel lock bolts in a crisscross pattern.
Tightning torqueClutch Disc Installation Note Hold the clutch disc position using the SST
108-115 N·m {11.1-11.7 kgf·m, 79.7-84.8 ft·lbf}
.
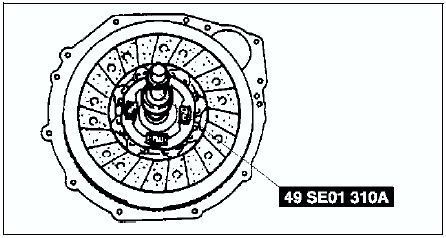
Clutch Cover Installation Note
1. Install the SSTs.
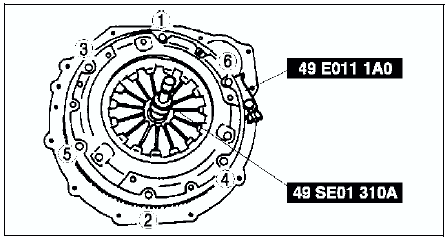
2. Tighten the bolts evenly and gradually in a crisscross pattern.
Tightening torque 18.6-25.5 N·m {1.9-2.6 kgf·m, 14-19 ft·lbf}
Test yourself
A quick Mazda 6 quiz: every answer comes with an explanation and a link to the manual page.