Door Assembly
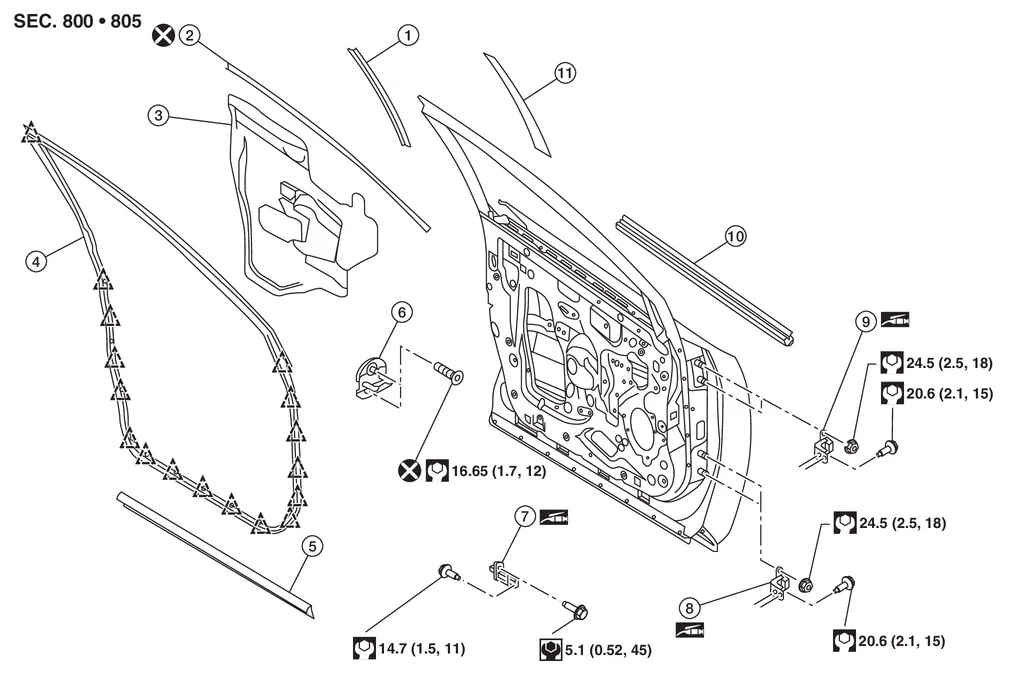
| 1. | Front door sash rear tape | 2. | Front door sash | 3. | Vapor barrier |
| 4. | Front door weather strip | 5. | Front door seal | 6. | Front door striker |
| 7. | Front door check link | 8. | Front door lower hinge | 9. | Front door upper hinge |
| 10. | Front door inside seal | 11. | Front door outside tape |  |
Clip |
REMOVAL
Remove front door finisher. Refer to Removal and Installation.
Remove front door vapor barrier.
Disconnect the front door harness connector (body side).
Remove front door check link bolt (body side).
Remove front door hinge nuts (door side) and front door assembly.
INSTALLATION
Installation is in the reverse order of removal.
ADJUSTMENT
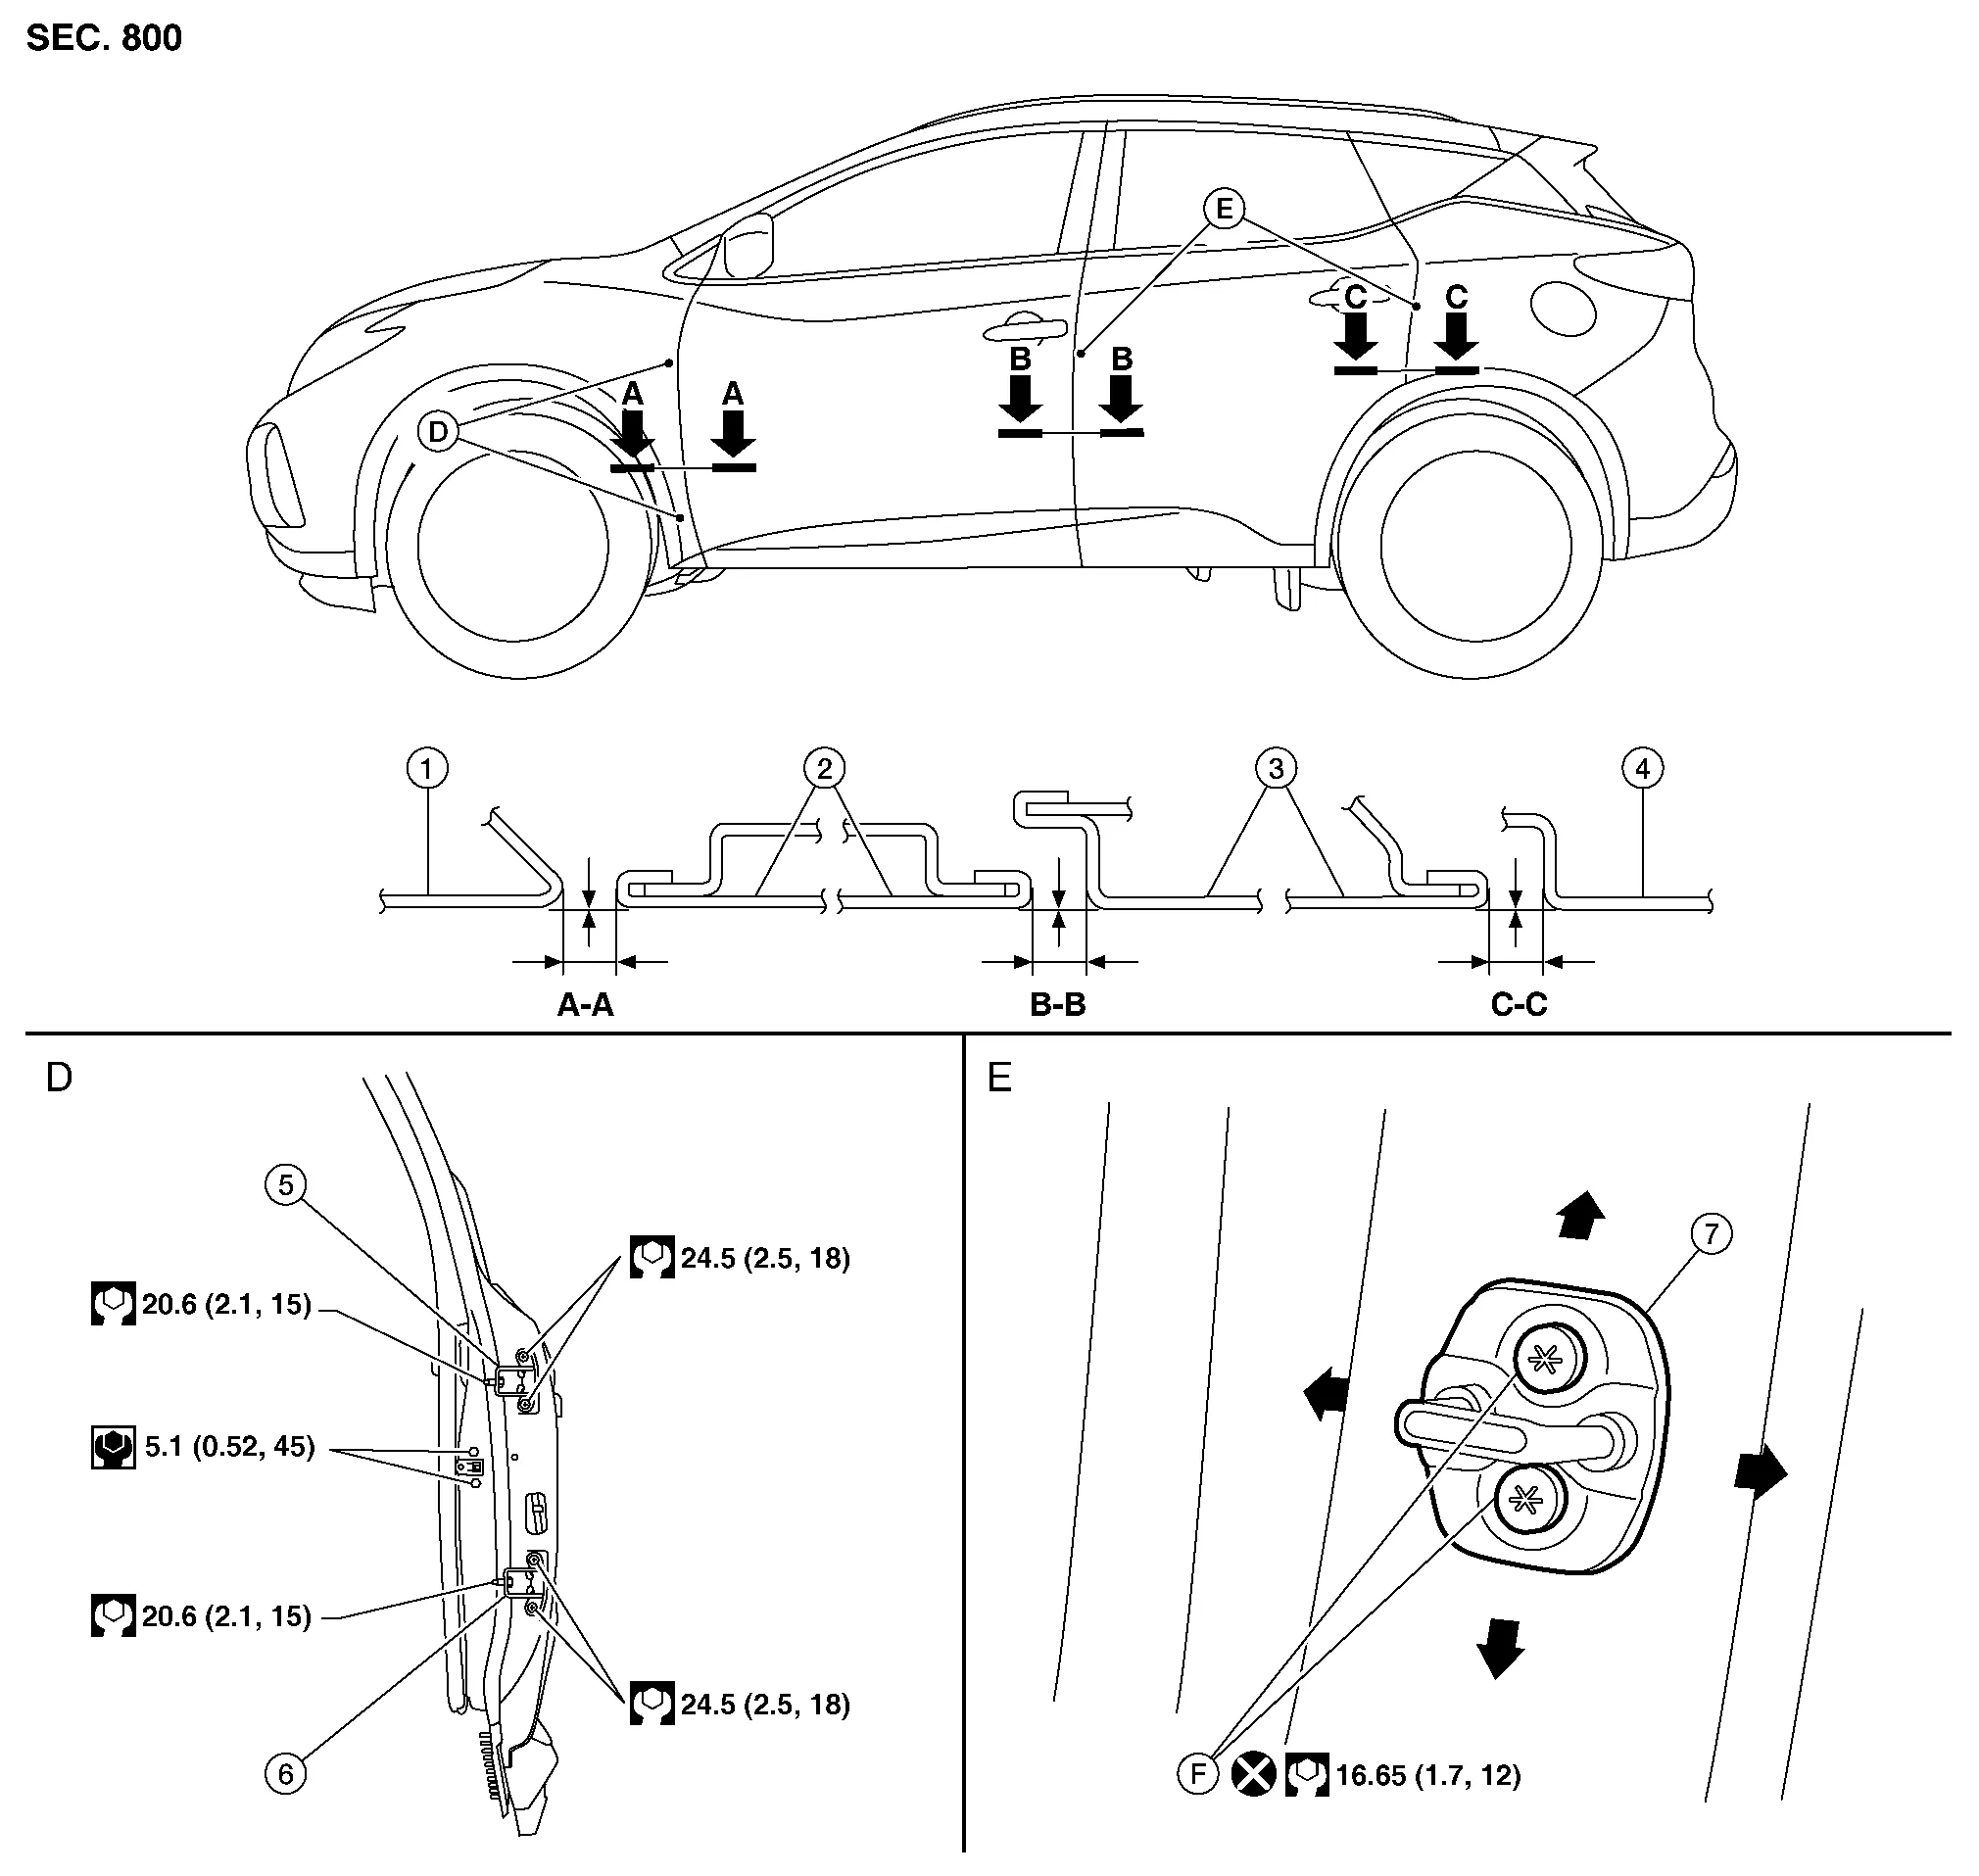
| 1. | Front fender | 2. | Front door | 3. | Rear door |
| 4. | Body side outer | 5. | Front door upper hinge | 6. | Front door lower hinge |
| 7. | Door striker | F. | Front door striker bolts |
Check clearance and surface height between front door and each part by visual inspection and tactile feel.
If clearance and surface height are out of specification, adjust them according to adjustment procedure.
Unit: mm (in)
| Portion | Section | Measurement | Standard |
|---|---|---|---|
| Front fender - Front door | A – A | Clearance | 3.5 ± 1.0 (0.14 ± 0.04) |
| Surface height | ± 1.0 (± 0.04) | ||
| Front door - Rear door | B – B | Clearance | 4.0 ± 1.0 (0.16 ± 0.04) |
| Surface height | ± 1.0 (± 0.04) | ||
| Rear door - Body side outer | C – C | Clearance | 3.2 ± 1.0 (0.13 ± 0.04) |
| Surface height | ± 1.0 (± 0.04) |
Remove front fender. Refer to Removal and Installation.
Loosen front door hinge nuts (door side).
Adjust surface height of front door according to specifications provided.
Temporarily tighten front door hinge nuts (door side).
Loosen front door hinge bolts (body side).
Raise front door at rear end to adjust clearance of front door according to specifications provided.
After adjustment, tighten bolts and nuts to specified torque.
Install front fender. Refer to Removal and Installation.