Tie-rod balljoints - removal and refitting
Removal
1. Remove the roadwheel on the side concerned.
2. Slacken the balljoint nut, release the ball-pin using a balljoint separator and remove the nut. Extract the balljoint from the steering arm (see illustration).
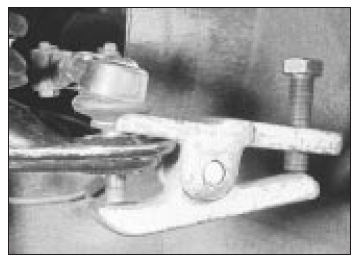
Tie-rod balljoint separator in use It is better practice to leave the balljoint nut loosely fitted
3. Slacken the clamp bolt which secures the balljoint to the threaded adjustment pin. Mark the position of the balljoint on the adjustment pin with paint or tape, then unscrew the balljoint from the pin.
4. Note that the balljoints are handed. The right-hand balljoint is marked R; the left-hand balljoint has no marking.
Refitting
5. Screw in the new balljoint onto the adjustment pin to approximately the same position as was occupied by the old one.
Secure it with the clamp bolt.
6. Connect the balljoint to the steering arm.
Secure it with a new self-locking nut, tightened to the specified torque.
7. Refit the roadwheel, lower the vehicle and tighten the wheel bolts.
8. Check the front wheel alignment and adjust if necessary. No harm will result from driving the vehicle a short distance to have the alignment checked.
Test yourself
A quick Opel Corsa quiz: every answer comes with an explanation and a link to the manual page.