Exterior parts removal and installation
the left and right side frame covers are installed symmetrically and therefore the removal/installation procedure for one side is the same as that for the other side.
- Remove the bolt (1).
- Remove the side frame cover (2).
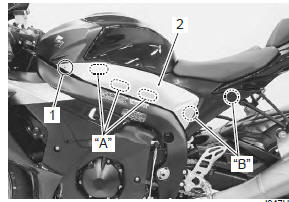
Velcro fastening Bushing
InstallationInstallation is in the reverse order of removal.
Front seat Removal- Remove the side frame covers.
- Remove the front seat by removing the bolts.
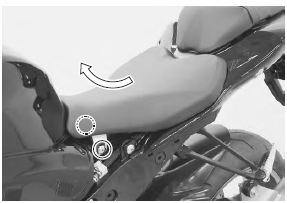
Installation
- Slide the seat hooks into the seat hook retainers on the frame and tighten the bolts.

- Install the side frame covers.
Remove the rear seat or seat tail cover with the ignition key.
Rear seat
Seat tail cover
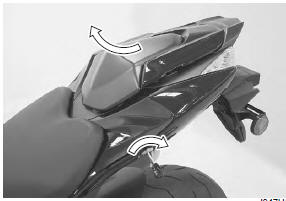
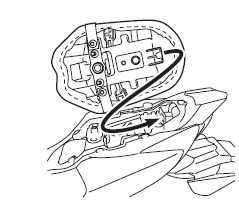
Installation
Slide the hook into the hook retainer and push down firmly until the rear seat/seat tail cover snaps into the locked position.
Windscreen Removal
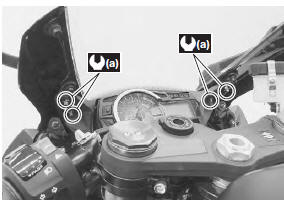
- Loosen the rear view mirror mounting nuts.
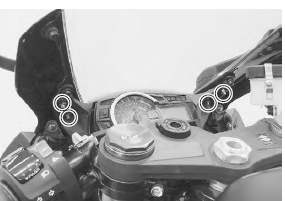
- Remove the windscreen (1) by removing the screws.

Installation
Install the windscreen in the reverse order of removal.
Pay attention to the following point:
- insert two nuts into the hole of cowling brace.
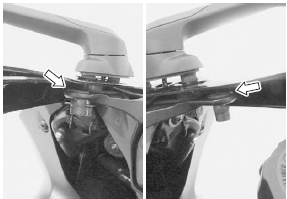
- Insert four nuts (top and bottom ones) into the windscreen.
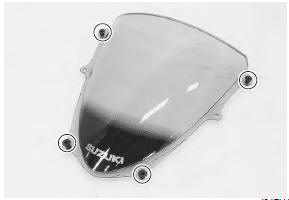
- Tighten the screws.
Note the screws “a” are 3 mm shorter than the others
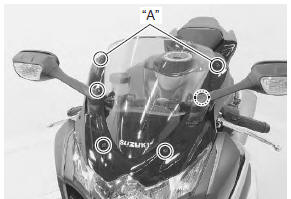
- Tighten the rear view mirror mounting nuts to the specified torque.
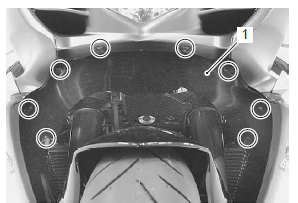
Body cowling cover Removal
- Remove the fasteners (8 pcs.).
- Remove the body cowling cover (1).
Installation
Install the body cowling cover in the reverse order of removal.
Side cowling Removal- Remove the fasteners and cowling bracket (1).
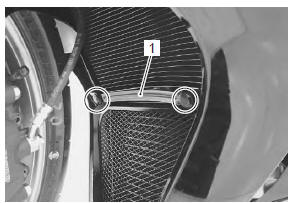
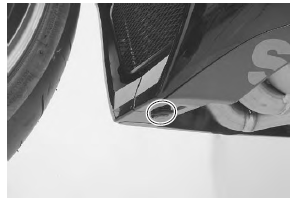
- Remove the bolts.
- Remove the side cowling (2). (Lh/rh)
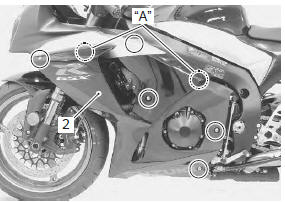
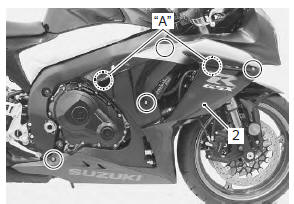
Bushing
InstallationInstall side cowling in the reverse order of removal.
Pay attention to the following points:
- when installing the right side cowling, make sure that the fuel tank drain hose and breather hose are routed properly. Refer to “fuel tank drain hose and breather hose routing diagram” in section 1g .
- When installing the bracket, set the punch mark “a” to the front and upper side.
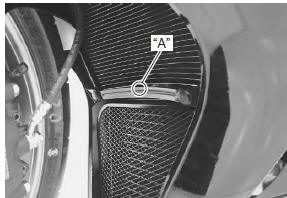
Inner under cowling Removal Note
the left and right inner under cowlings are installed symmetrically and therefore the removal/installation procedure for one side is the same as that for the other side.
- Remove the side cowling.
- Remove the inner under cowling (1).
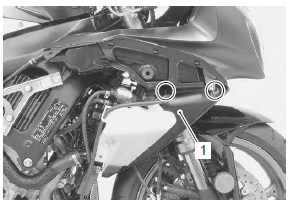
Installation
Install the inner under cowling in the reverse order of removal.
Body cowling Removal- Remove the body cowling cover.
- Remove the left and right side cowlings.
- Remove the inner under cowlings.
- Remove the rear view mirror.
- Remove the windscreen.
- Remove the combination meter. Refer to “combination meter removal and installation” in section 9c .
- Disconnect the turn signal lead wire couplers (1).

- Disconnect the steering damper lead wire coupler (2).
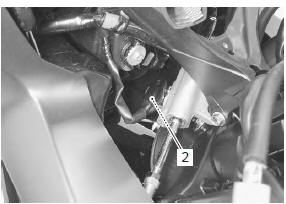
- Disconnect the lead wire couplers (3).
- Remove the air intake pipe bolts.
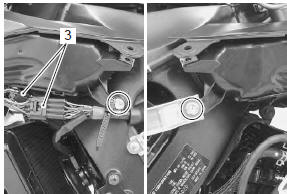
- Remove the screws.

- Remove the body cowling assembly (4) forward.
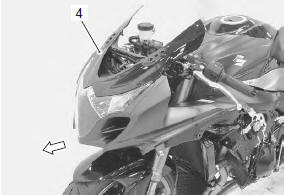
- Disassemble the body cowling assembly. Refer to “headlight removal and installation” in section 9b .
Install the body cowling in the reverse order of removal.
Pay attention to the following point:
- adjust the headlight beam if necessary. Refer to “headlight beam adjustment” in section 9b .
- Remove the body cowling.
- Remove the intake pipes (1). (Lh & rh)
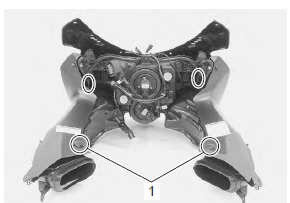
Installation
Install the intake pipes in the reverse order of removal.
Cowling brace Removal- Remove the body cowling.
- Remove the cowling brace (1).
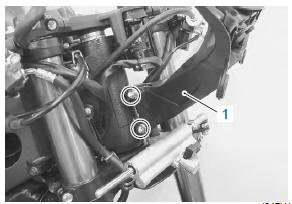
Installation
Install the cowling brace in the reverse order of removal.
Pay attention to the following point:
- tighten the cowling brace mounting bolts (1) to the specified torque.
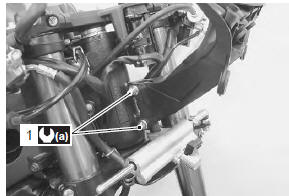
Frame cover Removal
- Remove the front and rear seats.
- Remove the bolts and fasteners.
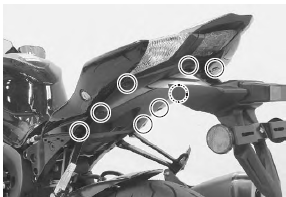
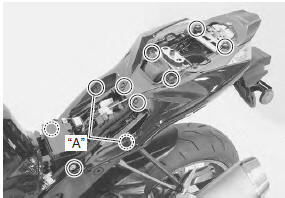
Bushing
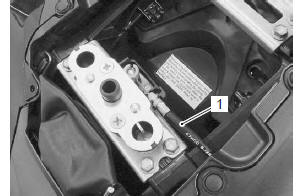
- Disconnect the seat lock cable (1).
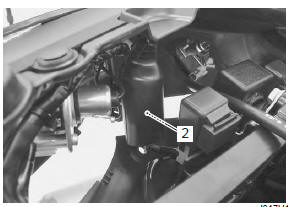
- Disconnect the rear combination light coupler (2).
- Remove the frame cover assembly from the frame.
- Disassemble the frame cover assembly. Refer to “rear combination light removal and installation” in section 9b .
Install the frame cover assembly in the reverse order of removal.
Front fender RemovalRefer to “front fork removal and installation” in section 2b .
InstallationRefer to “front fork removal and installation” in section 2b .
Rear fender RemovalRefer to “rear fender construction” .
InstallationRefer to “rear fender construction” .
Test yourself
A quick Suzuki GSX-R 1000 quiz: every answer comes with an explanation and a link to the manual page.