Brake
Front brake caliper disassembly and assembly
In this manual: Brake
~2min read
Refer to “front brake caliper removal and installation” .
Notethe right and left calipers are installed symmetrically and therefore the disassembly procedure for one side is the same as that for the other side.
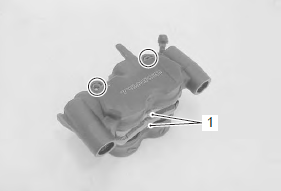
Disassembly- Remove the brake pads (1) and spring from the caliper by removing the pad mounting pins.
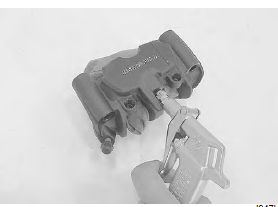
- Place a rag over the pistons to prevent them from popping out and then force out the pistons using compressed air.
Caution do not use high pressure air to prevent piston damage.
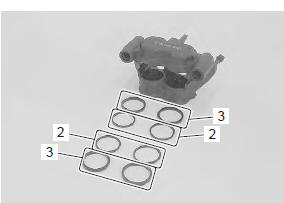
- Remove the dust seals (2) and piston seals (3) from both sides of the caliper.
Assembly
Assemble the caliper in the reverse order of disassembly. Pay attention to the following points:
- wash the caliper bores and pistons with specified brake fluid. Particularly wash the dust seal grooves and piston seal grooves.
- wash the caliper components with fresh brake fluid before reassembly. Never use cleaning solvent or gasoline to wash them.
- Do not wipe the brake fluid off after washing the components.
- When washing the components, use the specified brake fluid. Never use different types of fluid or cleaning solvent such as gasoline, kerosine or the others.

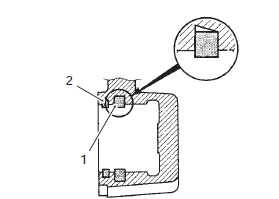
- Apply the brake fluid to piston seals (1) and dust seals (2).
Caution replace the piston seals (1) and dust seals (2) with new ones.
Bf: brake fluid (dot 4)- Install the piston seals as shown in the figure.Install the piston seals as shown in the figure.
- When installing the spring to the caliper, bring its wider pawl “a” facing top side.

Wider pawl Top side
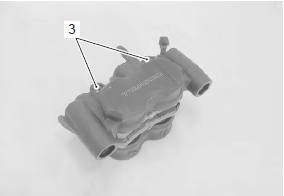
- Install the brake pads and temporarily tighten the pad mounting pins (3).
Test yourself
A quick Suzuki GSX-R 1000 quiz: every answer comes with an explanation and a link to the manual page.
Was this page helpful?