Steering
Handlebar removal and installation
In this manual: Steering
12steps
~72min
3/5difficulty
Done 0 of 12
Removal

Installation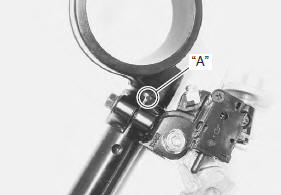
 : Grease 99000–25010 (suzuki
super grease “a” or equivalent)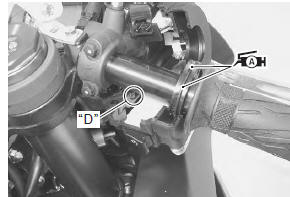
 : Handle grip bond (handle
grip bond (commercially available))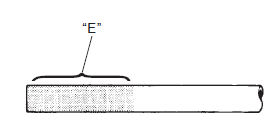
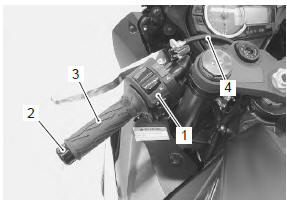
- Remove the following parts from the left handlebar.
- left handlebar switch box (1)
- handlebar balancer (2)
- grip rubber (3)
- clutch cable (4)
- Remove the following parts from the right handlebar.
- right handlebar switch box (5)
- handlebar balancer (6)
- throttle grip (7)
- front brake master cylinder (8)
Caution do not turn the front brake master cylinder upside down.
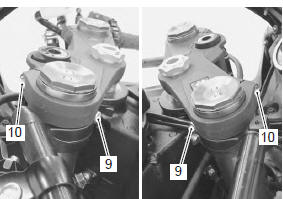
- Loosen the handlebar clamp bolts (9) and front fork upper clamp bolts (10).
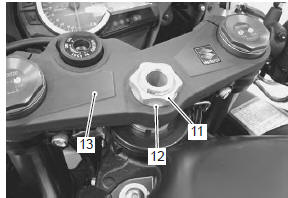
- Remove the steering stem head nut (11) and washer (12).
- Remove the steering stem upper bracket assembly (13).
place a rag under the steering stem upper bracket to prevent scratching the body cowling and the combination meter.
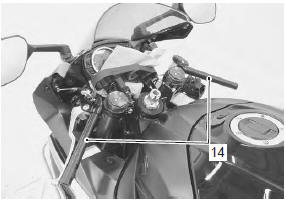
- Remove the handlebars (14) upward.
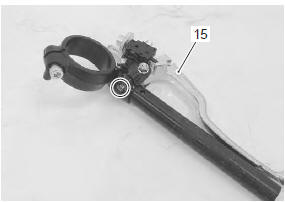
- Remove the clutch lever assembly (15) from the left handlebar.
Installation
Install the handlebars in the reverse order of removal.
Pay attention to the following points:
- when installing the clutch lever assembly to the left handlebar, align the slit of lever holder with the punch mark “a”.
- Install the handlebars temporarily to the front forks.
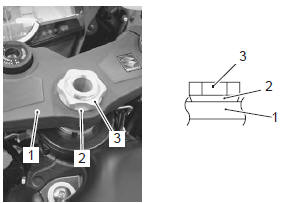
- Install the upper bracket (1), washer (2) and steering stem head nut (3) temporarily.
Note face the chamfer side of the washer downward.
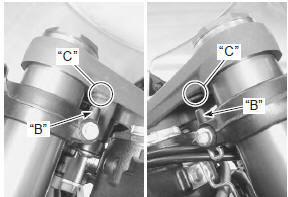
- Insert the protrusion “b” of the handlebar into the hole “c” of the steering stem upper bracket.
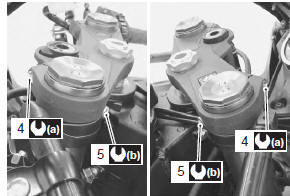
- Tighten the front fork upper clamp bolts (4) and handlebar clamp bolts (5) to the specified torque.
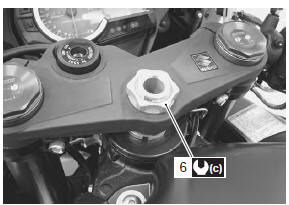
- Tighten the steering stem head nut (6) to the specified torque.
- Install the front brake master cylinder. Refer to “front brake master cylinder assembly removal and installation” in section 4a .
- Apply grease to the end of the throttle cables and cable pulley.
: Grease 99000–25010 (suzuki super grease “a” or equivalent)
- Insert the projection “d” of the right handlebar switch box into the hole of the right handlebar.
- Apply a handle grip bond “e” onto the left handlebar before installing the handlebar grip.
: Handle grip bond (handle grip bond (commercially available))
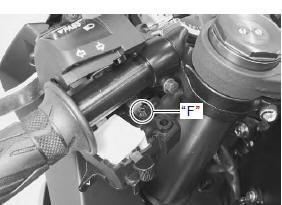
- Insert the projection “f” of the left handlebar switch box into the hole of the left handlebar.
- After installing the steering, the following adjustments are required before driving.
- Throttle cable routing (refer to “throttle cable routing diagram” in section 1d )
- clutch cable routing (refer to “throttle cable routing diagram” in section 1d )
- throttle cable play (refer to “throttle cable play inspection and adjustment” in section 1d )
- clutch cable play (refer to “clutch cable play inspection and adjustment” in section 0b )
Test yourself
A quick Suzuki GSX-R 1000 quiz: every answer comes with an explanation and a link to the manual page.
Was this page helpful?