Disassembly
1. REMOVE HOOD TO RADIATOR SUPPORT SEAL
(a) Using a clip remover, remove the 7 clips and hood to radiator support seal. NOTICE: If the clips are damaged or fall off, replace them with new clips. |
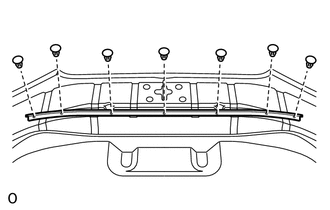 |
2. REMOVE HOOD INSULATOR
(a) Using a clip remover, remove the 10 clips. NOTICE: If the clips are damaged or fall off, replace them with new clips. |
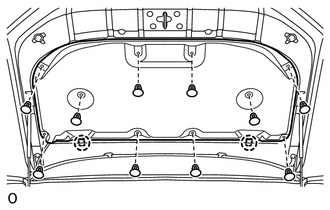 |
(b) Detach the 2 claws to remove the hood insulator.
3. REMOVE HOOD BULGE (w/ Hood Bulge)
(a) Remove the 4 nuts. |
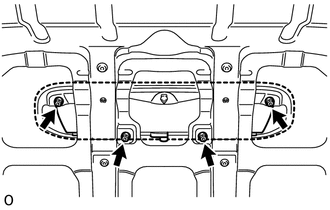 |
(b) Detach the 3 clips from the back side of the hood panel. |
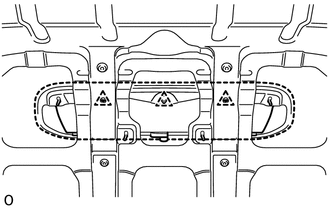 |
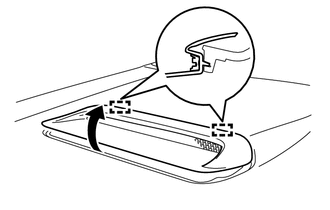
(c) Using a moulding remover, detach the 2 guides to remove the hood bulge together with the hood air intake guide as shown in the illustration. |
 |
4. REMOVE HOOD AIR INTAKE GUIDE (w/ Hood Bulge)
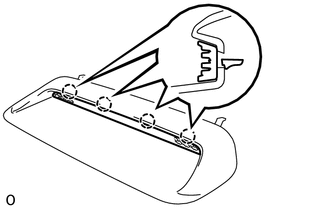
(a) Detach the 4 claws to remove the hood air intake guide. |
 |
5. REMOVE NO. 1 HOOD BULGE PROTECTOR (w/ Hood Bulge)
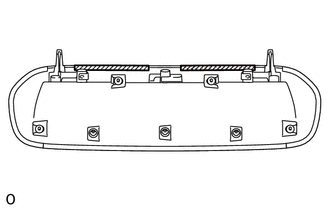
(a) Remove the 2 No. 1 hood bulge protectors. |
 |
6. REMOVE NO. 2 HOOD BULGE PROTECTOR (w/ Hood Bulge)
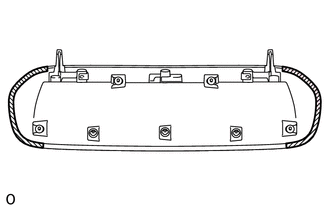
(a) Remove the 2 No. 2 hood bulge protectors. |
 |
7. REMOVE NO. 3 HOOD BULGE PROTECTOR (w/ Hood Bulge)
(a) Remove the No. 3 hood bulge protector. |
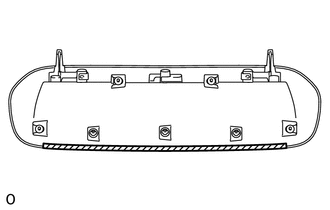 |
8. REMOVE WASHER NOZZLE SUB-ASSEMBLY

9. DISCONNECT WASHER HOSE ASSEMBLY
(a) Detach the 5 clamps to disconnect the washer hose assembly. |
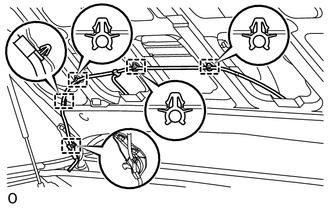 |
10. REMOVE HOOD SUPPORT ASSEMBLY LH
11. REMOVE HOOD SUPPORT ASSEMBLY RH
HINT:
Use the same procedure for the LH side and RH side.
Test yourself
A quick Toyota 4Runner quiz: every answer comes with an explanation and a link to the manual page.