Front Brake Flexible Hose
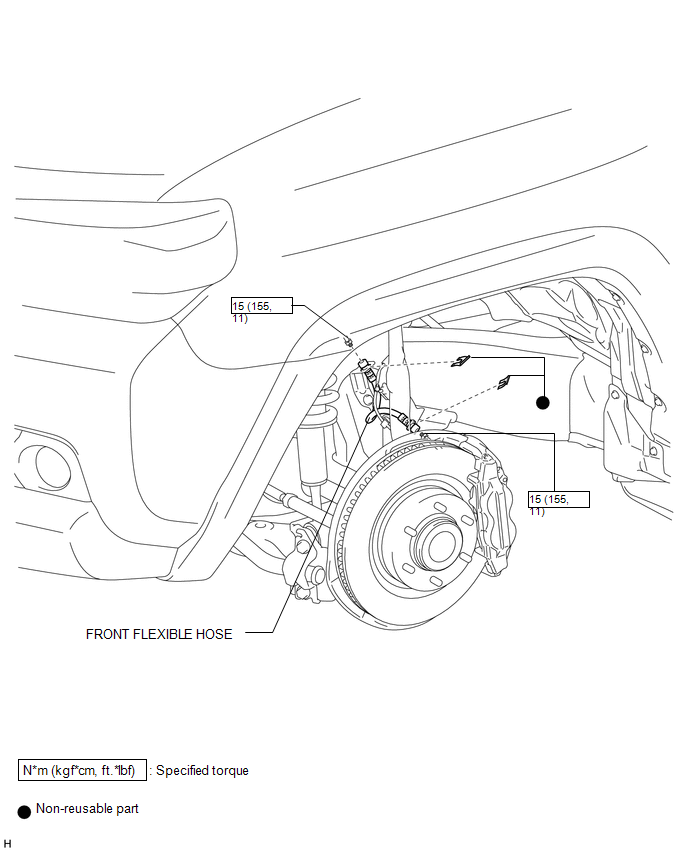
Removal REMOVAL CAUTION / NOTICE / HINT
HINT:
- Use the same procedure for the RH and LH sides.
- The procedure listed below is for the LH side.
1. REMOVE FRONT WHEEL
2. DRAIN BRAKE FLUID
NOTICE:
Wash off brake fluid immediately if it comes in contact with any painted surface.
3. REMOVE FRONT FLEXIBLE HOSE
(a) Remove the 2 clips. |
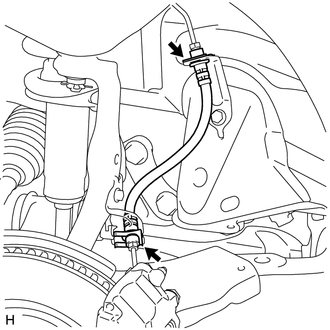 |
(b) Disconnect the brake tube from the front flexible hose with a union nut wrench while holding the front flexible hose with a wrench and remove the front flexible hose.
NOTICE:
- Do not bend or damage the brake tube.
- Do not allow any foreign matter such as dirt and dust to enter the brake tube from the connecting point.
HINT:
- Use the same procedure for the RH and LH sides.
- The procedure listed below is for the LH side.
1. INSTALL FRONT FLEXIBLE HOSE
(a) Using a union nut wrench, connect the brake tube to the front flexible hose while holding the front flexible hose with a wrench to install the front flexible hose.
Torque:
15 N·m {155 kgf·cm, 11 ft·lbf}
NOTICE:
- Do not bend or damage the brake tube.
- Do not allow any foreign matter such as dirt and dust to enter the brake tube from the connecting point.
- Use the formula to calculate special torque values for situations where a union nut wrench is combined with a torque wrench (See page
 ).
(b) Install 2 new clips to the front flexible hose.
2. BLEED BRAKE LINE
3. INSTALL FRONT WHEEL
Test yourself
A quick Toyota 4Runner quiz: every answer comes with an explanation and a link to the manual page.