Horn
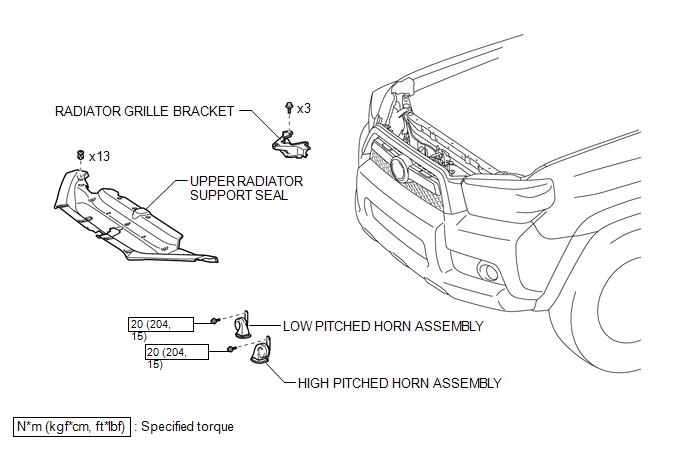
Inspection INSPECTION PROCEDURE
1. INSPECT HIGH PITCHED HORN ASSEMBLY
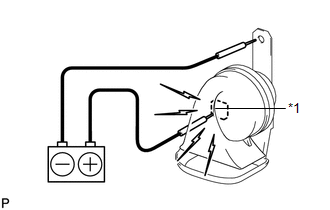
(a) Apply battery voltage and check the operation of the horn according to the table below.
OK:
Measurement Condition | Specified Condition |
|---|---|
Battery positive (+) → Terminal 1 Battery negative (-) → Body ground |
High pitched horn sounds |
If the result is not as specified, replace the high pitched horn assembly.
Text in Illustration*1 |
Terminal 1 |
2. INSPECT LOW PITCHED HORN ASSEMBLY
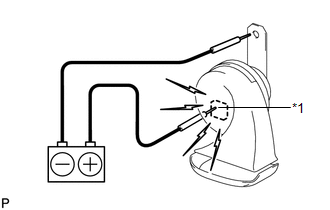
(a) Apply battery voltage and check the operation of the horn according to the table below.
OK:
Measurement Condition | Specified Condition |
|---|---|
Battery positive (+) → Terminal 1 Battery negative (-) → Body ground |
Low pitched horn sounds |
If the result is not as specified, replace the low pitched horn assembly.
Text in Illustration*1 |
Terminal 1 |
1. REMOVE UPPER RADIATOR SUPPORT SEAL

2. REMOVE HIGH PITCHED HORN ASSEMBLY
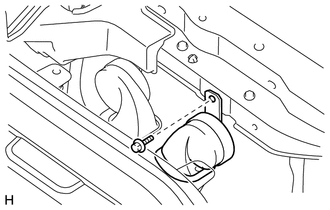
(a) Disconnect the connector.
(b) Remove the bolt and high pitched horn assembly.
3. REMOVE RADIATOR GRILLE BRACKET
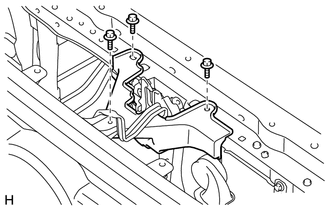
(a) Remove the 3 bolts and radiator grille bracket.
4. REMOVE LOW PITCHED HORN ASSEMBLY
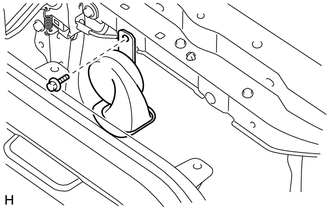
(a) Disconnect the connector.
(b) Remove the bolt and low pitched horn assembly.
Installation INSTALLATION PROCEDURE1. INSTALL LOW PITCHED HORN ASSEMBLY
(a) Install the low pitched horn assembly with the bolt.
Torque:
20 N·m {204 kgf·cm, 15 ft·lbf}
(b) Connect the connector.
2. INSTALL RADIATOR GRILLE BRACKET
(a) Install the radiator grille bracket with the 3 bolts.
3. INSTALL HIGH PITCHED HORN ASSEMBLY
(a) Install the high pitched horn assembly with the bolt.
Torque:
20 N·m {204 kgf·cm, 15 ft·lbf}
(b) Connect the connector.
4. INSTALL UPPER RADIATOR SUPPORT SEAL

Test yourself
A quick Toyota 4Runner quiz: every answer comes with an explanation and a link to the manual page.