Integration Relay
1. REMOVE NO. 1 RELAY BLOCK COVER
(a) Remove the No. 1 relay block cover.
2. INSPECT NO. 1 INTEGRATION RELAY
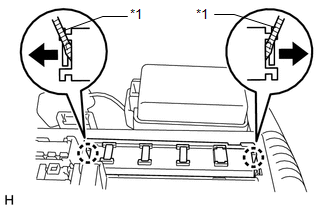
(a) Using a screwdriver, detach the 2 claws and disconnect the No. 1 integration relay from the engine room junction block. HINT: Tape the screwdriver tip before use. Text in Illustration
|
 |
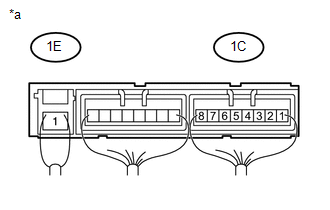
(b) Measure the resistance according to the value(s) in the table below. Standard Resistance:
If the result is not as specified, replace the No. 1 integration relay. Text in Illustration
|
 |
(c) Attach the 2 claws to install the No. 1 integration relay to the engine room junction block.
3. INSTALL NO. 1 RELAY BLOCK COVER
(a) Install the No. 1 relay block cover.
Test yourself
A quick Toyota 4Runner quiz: every answer comes with an explanation and a link to the manual page.