Light Control Rheostat
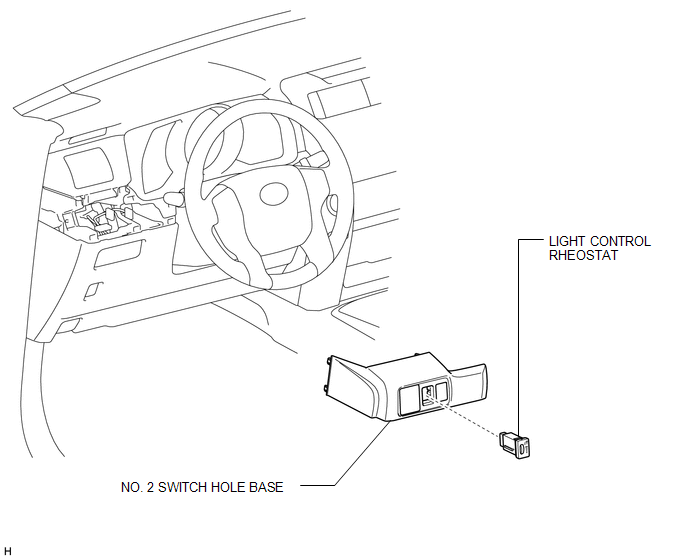
Inspection INSPECTION PROCEDURE
1. INSPECT LIGHT CONTROL RHEOSTAT (w/o TAIL Cancel Switch)
(a) Measure the resistance according to the value(s) in the table below.
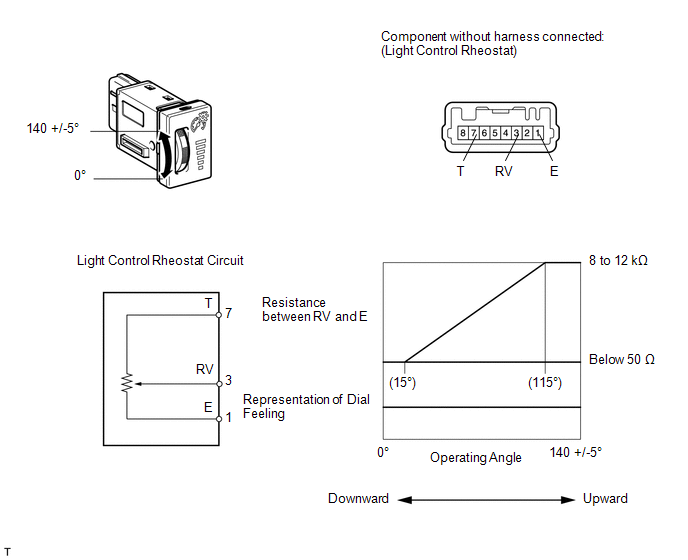
Standard Resistance:
Tester Connection | Switch Condition | Specified Condition |
|---|---|---|
7 (T) - 1 (E) |
Always |
8 to 12 kΩ |
3 (RV) - 1 (E) |
Light control rheostat fully turned upward → fully turned downward |
8 to 12 kΩ → Below 50 Ω |
If the result is not as specified, replace the rheostat.
2. INSPECT LIGHT CONTROL RHEOSTAT (w/ TAIL Cancel Switch)
(a) Measure the resistance according to the value(s) in the table below.
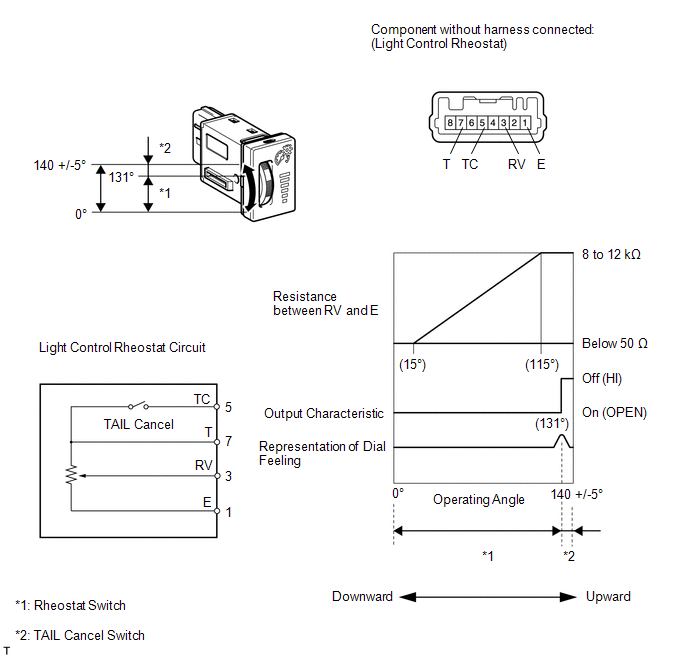
Standard Resistance:
Tester Connection | Switch Condition | Specified Condition |
|---|---|---|
7 (T) - 1 (E) |
Always |
8 to 12 kΩ |
5 (TC) - 7 (T) |
TAIL cancel switch off → on |
Below 50 Ω → 8 to 12 kΩ |
3 (RV) - 1 (E) |
Light control rheostat fully turned upward → fully turned downward |
8 to 12 kΩ → Below 50 Ω |
If the result is not as specified, replace the rheostat.
Installation INSTALLATION PROCEDURE1. INSTALL LIGHT CONTROL RHEOSTAT
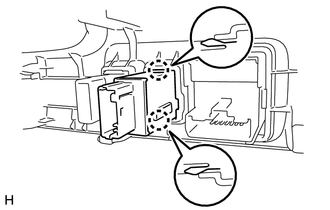
(a) Attach the 2 claws to install the rheostat.
2. INSTALL NO. 2 SWITCH HOLE BASE

Removal REMOVAL PROCEDURE
1. REMOVE NO. 2 SWITCH HOLE BASE

2. REMOVE LIGHT CONTROL RHEOSTAT
(a) Detach the 2 claws and remove the rheostat. |
 |
Test yourself
A quick Toyota 4Runner quiz: every answer comes with an explanation and a link to the manual page.