Removal
1. REMOVE SIDE STEP ASSEMBLY LH

2. REMOVE STABILIZER CONTROL VALVE PROTECTOR
3. DRAIN SUSPENSION FLUID
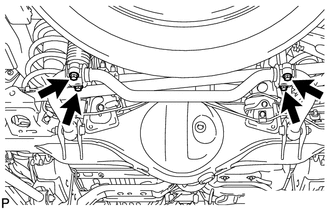
4. REMOVE REAR STABILIZER LOWER BRACKET
(a) Remove the 4 bolts and 2 rear stabilizer lower brackets. |
 |
5. REMOVE REAR STABILIZER BAR SUB-ASSEMBLY
(a) Remove the 2 bolts, 2 nuts and rear stabilizer bar. NOTICE: Turn the bolts while holding the nuts. |
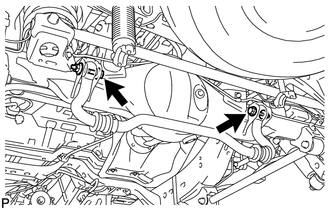 |
(b) Remove the 2 stabilizer bushes from the rear stabilizer bar.
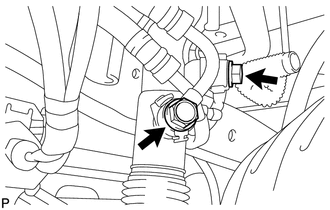
6. DISCONNECT REAR STABILIZER CONTROL TUBE ASSEMBLY
(a) Remove the 2 union bolts and 2 pressure port gaskets and disconnect the rear stabilizer control tube from the rear stabilizer control cylinder. |
 |
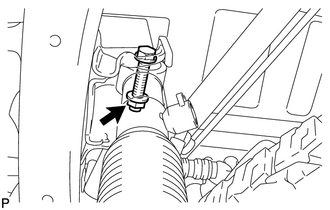
7. REMOVE REAR STABILIZER CONTROL CYLINDER
(a) Remove the bolt, nut and rear stabilizer control cylinder. NOTICE: Do not hold the rear stabilizer control cylinder by the cylinder boot. HINT: Turn the nut while holding the bolt. |
 |
(b) Remove the 2 bleeder plug caps from the rear stabilizer control cylinder.
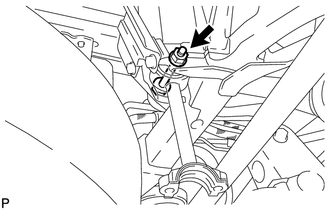
8. REMOVE REAR STABILIZER LINK ASSEMBLY
(a) Remove the bolt, nut and rear stabilizer link assembly. HINT: Turn the nut while holding the bolt. |
 |
Test yourself
A quick Toyota 4Runner quiz: every answer comes with an explanation and a link to the manual page.