Rear Lower Arm
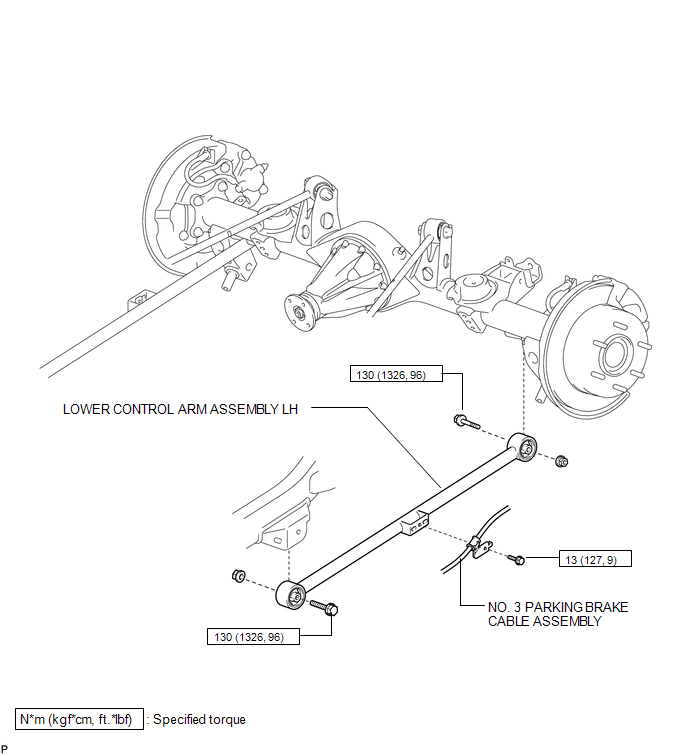
Removal REMOVAL CAUTION / NOTICE / HINT
HINT:
- Use the same procedure for the RH and LH sides.
- The procedure listed below is for the LH side.
1. REMOVE REAR WHEEL
2. DISCONNECT NO. 3 PARKING BRAKE CABLE ASSEMBLY
(a) Remove the bolt and disconnect the No. 3 parking brake cable assembly.
3. REMOVE LOWER CONTROL ARM ASSEMBLY LH
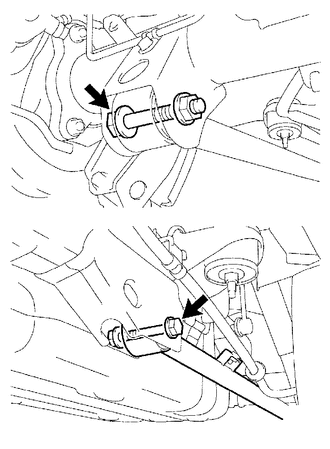
(a) Remove the nut and bolt from the rear axle housing. HINT: Turn the bolt while holding the nut. |
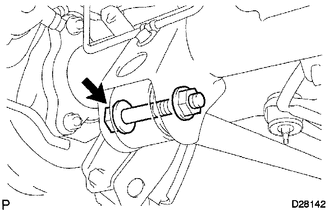 |
(b) Remove the nut, bolt and lower control arm assembly. HINT: Turn the bolt while holding the nut. |
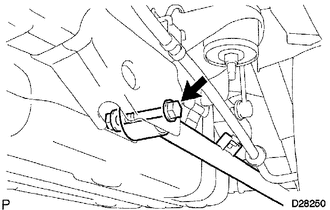 |
HINT:
- Use the same procedure for the RH and LH sides.
- The procedure listed below is for the LH side.
- A bolt without a torque specification is shown in the standard bolt chart (See page
 ).
1. TEMPORARILY INSTALL LOWER CONTROL ARM ASSEMBLY LH
(a) Temporarily install the lower control arm assembly with the bolt and nut. Text in Illustration
HINT: Install the lower control arm assembly as shown in the illustration. |
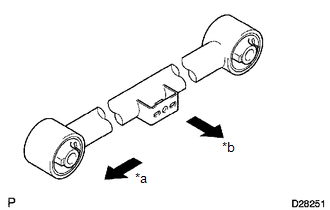 |
(b) Temporarily install the lower control arm assembly to the rear axle housing with the nut and bolt.
2. CONNECT NO. 3 PARKING BRAKE CABLE ASSEMBLY
(a) Connect the No. 3 parking brake cable assembly with the bolt.
Torque:
13 N·m {127 kgf·cm, 9 ft·lbf}
3. INSTALL REAR WHEEL
Torque:
for aluminum wheel :
103 N·m {1050 kgf·cm, 76 ft·lbf}
for steel wheel :
112 N·m {1142 kgf·cm, 83 ft·lbf}
4. STABILIZE SUSPENSION
5. TIGHTEN LOWER CONTROL ARM ASSEMBLY LH
(a) Tighten the 2 bolts. Torque: 130 N·m {1326 kgf·cm, 96 ft·lbf} HINT: While holding the nut, turn the bolt. |
 |
Test yourself
A quick Toyota 4Runner quiz: every answer comes with an explanation and a link to the manual page.