Removal
1. REMOVE FRONT DOOR LOWER FRAME BRACKET GARNISH RH
(a) Detach the 2 clips and remove the front door lower frame bracket garnish RH. |
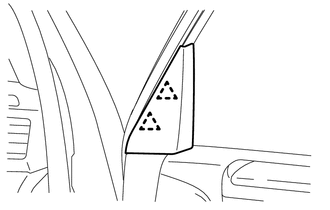 |
2. REMOVE DOOR NO. 2 INSIDE HANDLE BEZEL RH
(a) Using a moulding remover, detach the 3 claws and remove the No.2 inside handle bezel RH as shown in the illustration. |
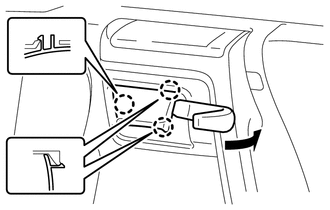 |
3. REMOVE FRONT DOOR TRIM BOARD SUB-ASSEMBLY RH
(a) Detach the 4 claws and 2 door armrest caps. |
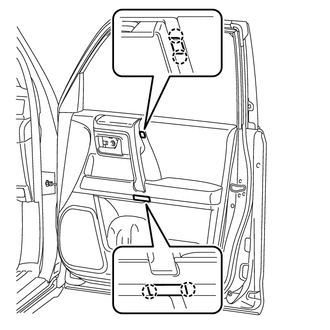 |
(b) Remove the 3 screws. |
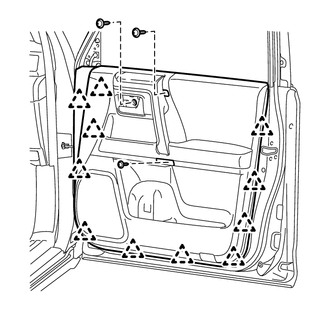 |
(c) Detach the 11 clips.
(d) Pull out the front door trim board sub-assembly RH in the direction indicated by the arrow as shown in the illustration. Text in Illustration
|
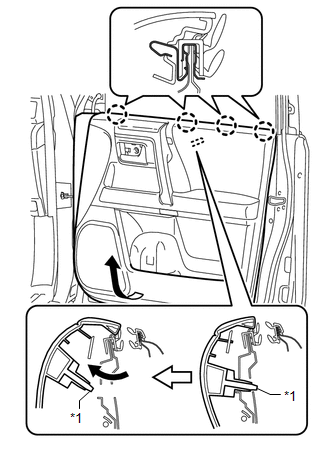 |
(e) Raise the front door trim board sub-assembly RH to detach the 4 claws and remove the front door trim board sub-assembly RH together with the front door inner glass weatherstrip RH.
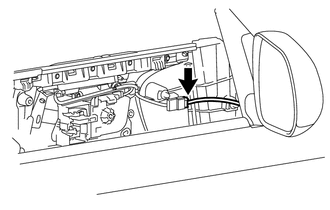
(f) Disconnect the connector. |
 |
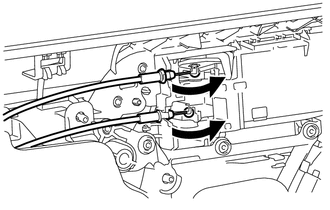
(g) Disconnect the front door lock remote control cable assembly and front door inside locking cable assembly. |
 |
4. REMOVE FRONT DOOR INNER GLASS WEATHERSTRIP RH
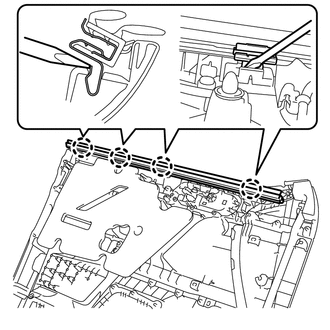
(a) Using a screwdriver, detach the 4 claws and remove the front door inner glass weatherstrip RH from the front door trim board sub-assembly RH as shown in the illustration. |
 |
5. REMOVE DOOR CONTROL SWITCH ASSEMBLY
(a) Disconnect the door control switch connector. |
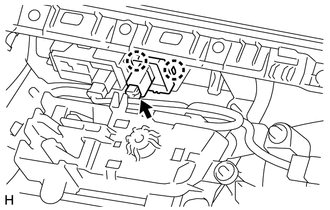 |
(b) Detach the 2 claws and remove the door control switch assembly.
Test yourself
A quick Toyota 4Runner quiz: every answer comes with an explanation and a link to the manual page.