Removal
HINT:
- Use the same procedure for the RH and LH sides.
- The procedure listed below is for the LH side.
1. REMOVE REAR NO. 2 SEAT ASSEMBLY
(a) Remove the rear No. 2 seat assembly (See page  ).
2. REMOVE REAR NO. 1 FLOOR STEP COVER
3. REMOVE QUARTER SCUFF PLATE LH
4. REMOVE REAR DOOR SCUFF PLATE LH
5. REMOVE REAR DOOR OPENING TRIM WEATHERSTRIP LH
6. REMOVE REAR NO. 1 SEAT OUTER LAP BELT ANCHOR COVER
7. REMOVE NO. 1 LUGGAGE COMPARTMENT TRIM HOOK
8. REMOVE FRONT DECK SIDE TRIM COVER LH
9. REMOVE DECK TRIM SIDE PANEL ASSEMBLY LH
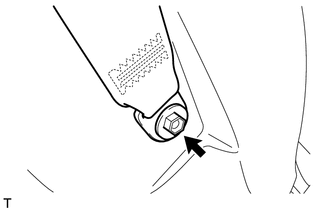
(a) Remove the bolt and disconnect the rear No. 1 seat outer belt floor anchor. |
 |
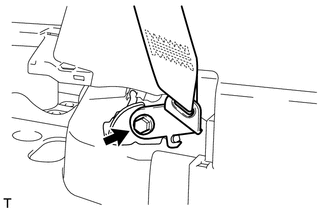
(b) Remove the bolt and disconnect the rear No. 2 seat outer belt floor anchor. |
 |
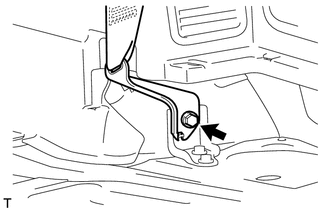
(c) for RH Side: Remove the bolt and disconnect the rear No. 2 seat outer belt floor anchor. |
 |
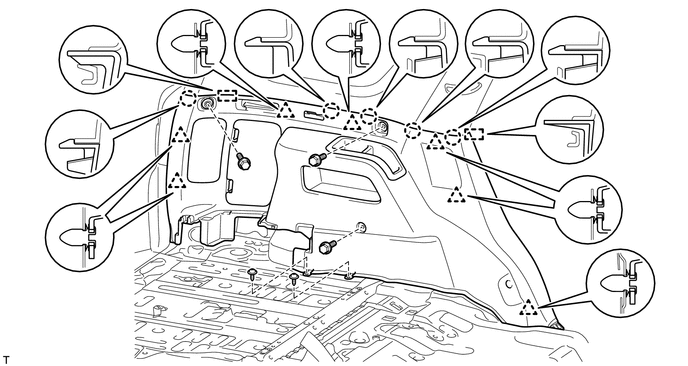
(d) Remove the 3 bolts and 2 screws.
(e) Detach the 7 clips, 5 claws and 2 guides and remove the deck trim side panel.
10. REMOVE REAR NO. 2 WINDOW SIDE GARNISH ASSEMBLY LH
11. REMOVE REAR WINDOW SIDE GARNISH ASSEMBLY LH
12. REMOVE REAR NO. 2 SEAT OUTER BELT ASSEMBLY LH
(a) Remove the bolt and rear No. 2 seat outer belt shoulder anchor. |
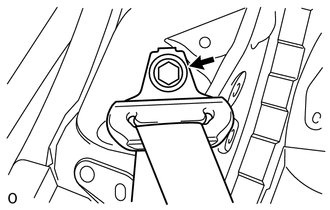 |
(b) Remove the 2 bolts and rear No. 2 seat outer belt assembly. |
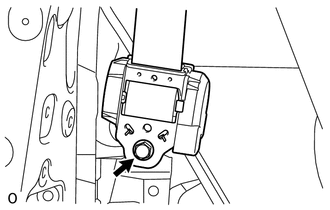 |
13. REMOVE REAR SEAT OUTER BELT ANCHOR PLATE SUB-ASSEMBLY LH
(a) Remove the bolt and anchor plate. |
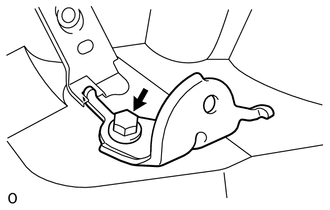 |
14. REMOVE SEAT BELT ANCHOR PLATE ASSEMBLY
(a) Remove the 2 bolts and anchor plate. |
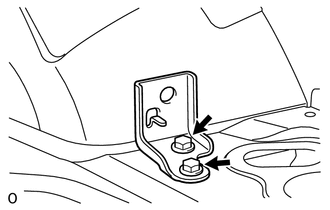 |
Test yourself
A quick Toyota 4Runner quiz: every answer comes with an explanation and a link to the manual page.