Stabilizer Control Ecu
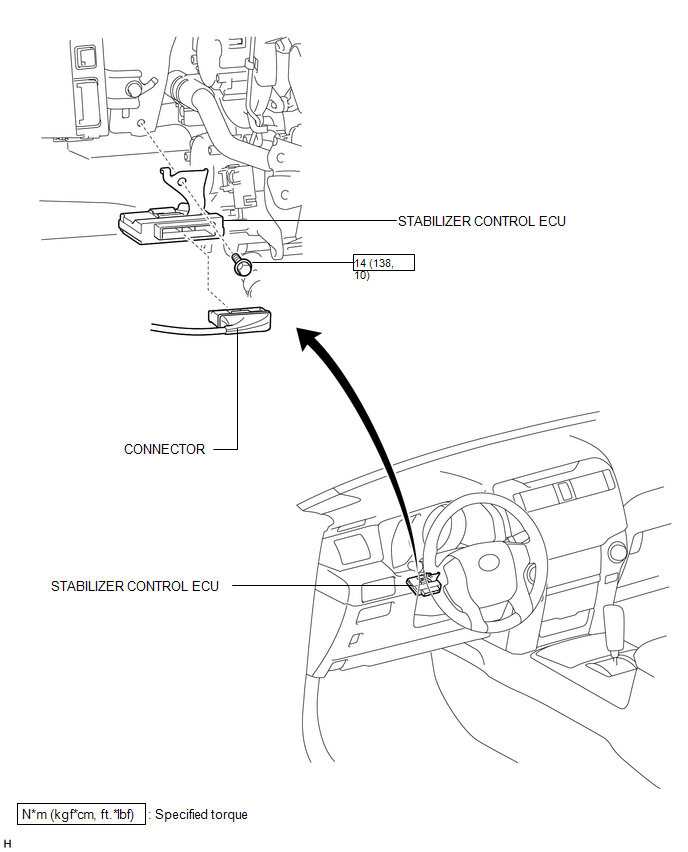
Removal REMOVAL PROCEDURE
1. DISCONNECT CABLE FROM NEGATIVE BATTERY TERMINAL
CAUTION:
Wait at least 90 seconds after disconnecting the cable from the negative (-) battery terminal to disable the SRS system.
NOTICE:
When disconnecting the cable, some systems need to be initialized after the cable is reconnected (See page  ).
2. REMOVE LOWER NO. 1 INSTRUMENT PANEL AIRBAG ASSEMBLY
(a) Remove the lower No. 1 instrument panel airbag assembly (See page ).
3. REMOVE STABILIZER CONTROL ECU
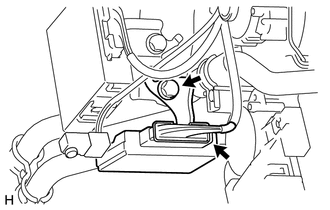
(a) Disconnect the connector.
(b) Remove the bolt and stabilizer control ECU.
NOTICE:
- Avoid any impact to the stabilizer control ECU.
- Replace the stabilizer control ECU with a new one if it is dropped.
1. INSTALL STABILIZER CONTROL ECU
(a) Install the stabilizer control ECU with the bolt.
Torque:
14 N·m {138 kgf·cm, 10 ft·lbf}
NOTICE:
- Replace the stabilizer control ECU with a new one if it is dropped.
- Make sure the bracket rotation stopper touches the installation position.
(b) Connect the connector.
NOTICE:
Securely connect the connector.
2. INSTALL LOWER NO. 1 INSTRUMENT PANEL AIRBAG ASSEMBLY
(a) Install the lower No. 1 instrument panel airbag assembly (See page  ).
3. CONNECT CABLE TO NEGATIVE BATTERY TERMINAL
NOTICE:
When disconnecting the cable, some systems need to be initialized after the cable is reconnected (See page ).
Test yourself
A quick Toyota 4Runner quiz: every answer comes with an explanation and a link to the manual page.