Roof Antenna
Components
COMPONENTS
ILLUSTRATION
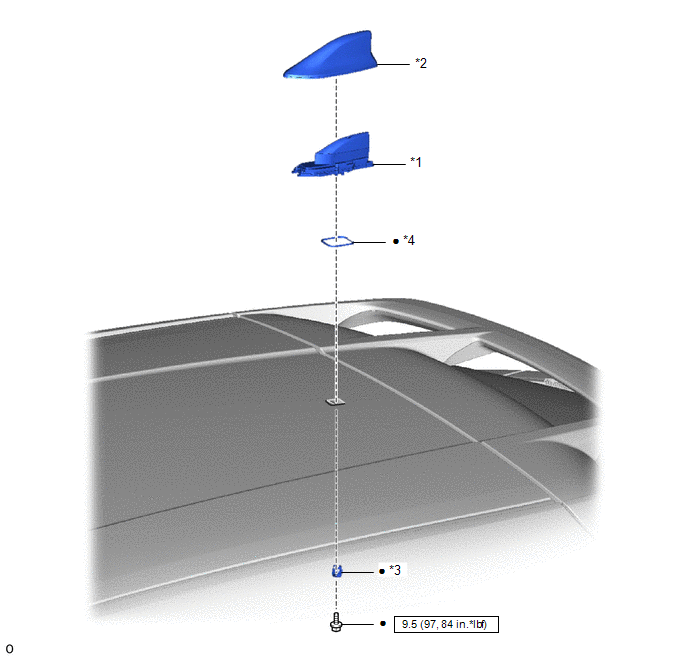
*1 |
ROOF ANTENNA ASSEMBLY |
*2 |
ANTENNA OUTER COVER |
*3 |
BRACKET |
*4 |
GASKET |
 |
N*m (kgf*cm, lbf*in): Specified torque |
● |
Non-reusable part |
Removal
REMOVAL
PROCEDURE
1. REMOVE ROOF HEADLINING
Click here
2. REMOVE ROOF ANTENNA ASSEMBLY
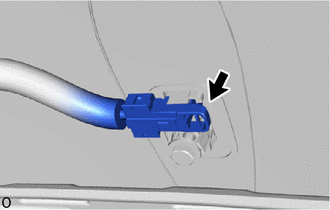
(a) Disconnect the connector. |
 |
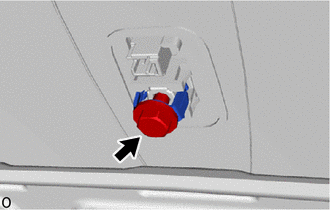
(b) Remove the bolt and bracket. |
 |
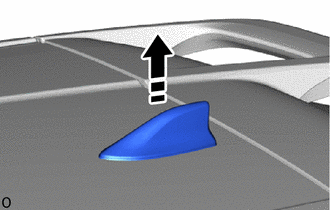
(c) Remove the roof antenna assembly with antenna outer cover, as shown in the illustration.
 |
Remove in this direction |
(d) Release the claws and guides to remove the roof antenna assembly, as shown in the illustration.
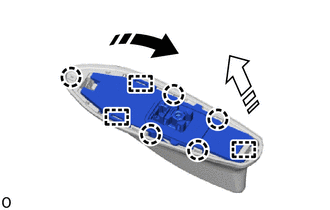
|
Remove in this direction (1) |
 |
Remove in this direction (2) |
(e) If reusing the roof antenna assembly
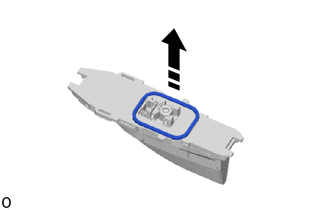
|
Remove in this direction |
(1) Remove the gasket as shown in the illustration.
Installation
INSTALLATION
PROCEDURE
1. INSTALL ROOF ANTENNA ASSEMBLY
(a) If reusing the roof antenna assembly
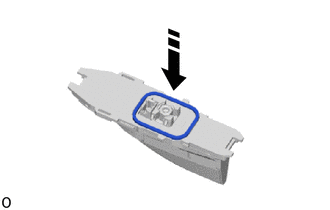
 |
Install in this direction |
(1) Install a new gasket, as shown in the illustration.
(b) Engage the guides and claws to install the roof antenna assembly, as shown in the illustration.
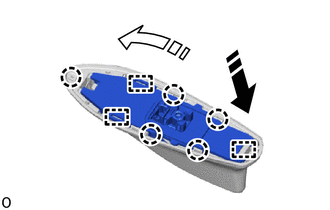
|
Install in this direction (1) |
 |
Install in this direction (2) |
(c) Install the roof antenna assembly with antenna outer cover, as shown in the illustration.
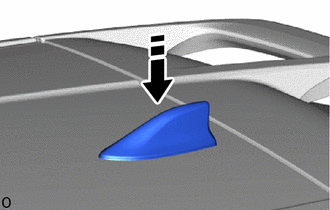
|
Install in this direction |
(d) Install a new bracket with a new bolt.
Torque:
9.5 N·m {97 kgf·cm, 84 in·lbf}
(e) Connect the connector.
2. INSTALL ROOF HEADLINING
Click here