Air Conditioning Panel
Removal
REMOVAL
COMPONENTS (REMOVAL)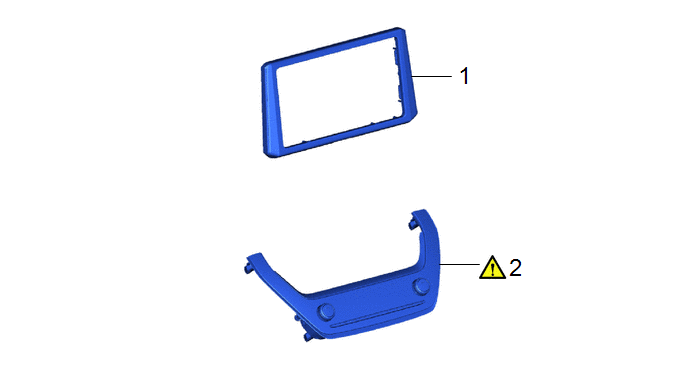
Procedure | Part Name Code |  |  |  |
|
|---|---|---|---|---|---|
1 |
CENTER INSTRUMENT CLUSTER FINISH PANEL SUB-ASSEMBLY |
55405B |
- |
- |
- |
2 |
AIR CONDITIONING CONTROL ASSEMBLY |
55900 |
 |
- |
- |
PROCEDURE
1. REMOVE CENTER INSTRUMENT CLUSTER FINISH PANEL SUB-ASSEMBLY
Click here
2. REMOVE AIR CONDITIONING CONTROL ASSEMBLY
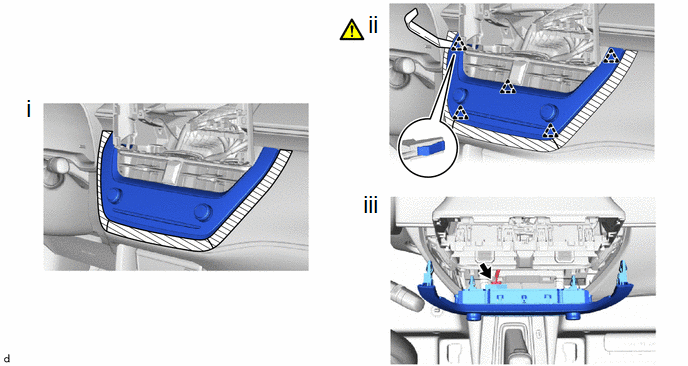
(1) Apply protective tape to the area shown in the illustration.
(2) Using a moulding remover A, disengage the clips to separate the air conditioning control assembly.
(3) Disconnect the connector to remove the air conditioning control assembly.
Inspection
INSPECTION
PROCEDURE
1. INSPECT AIR CONDITIONING CONTROL ASSEMBLY
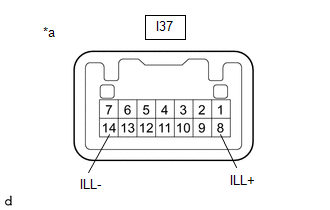
(a) Check the illumination.
(1) Apply auxiliary battery voltage to the air conditioning control assembly and check that the illumination. OK:
If the result is not as specified, replace the air conditioning control assembly. |
|
Installation
INSTALLATION
COMPONENTS (INSTALLATION)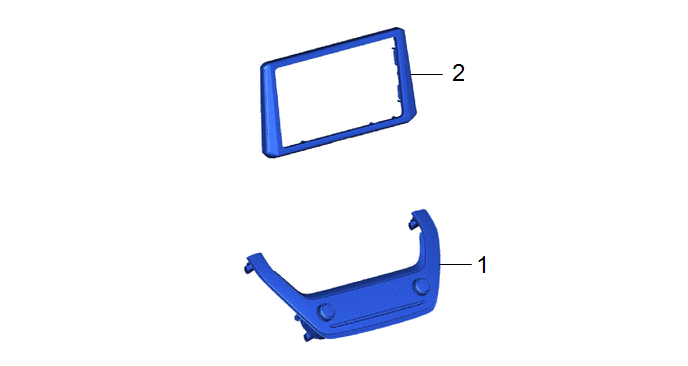
Procedure | Part Name Code |  |  |  |
|
|---|---|---|---|---|---|
1 |
AIR CONDITIONING CONTROL ASSEMBLY |
55900 |
- |
- |
- |
2 |
CENTER INSTRUMENT CLUSTER FINISH PANEL SUB-ASSEMBLY |
55405B |
- |
- |
- |
PROCEDURE
1. INSTALL AIR CONDITIONING CONTROL ASSEMBLY
2. INSTALL CENTER INSTRUMENT CLUSTER FINISH PANEL SUB-ASSEMBLY