Installation
INSTALLATION
COMPONENTS (INSTALLATION)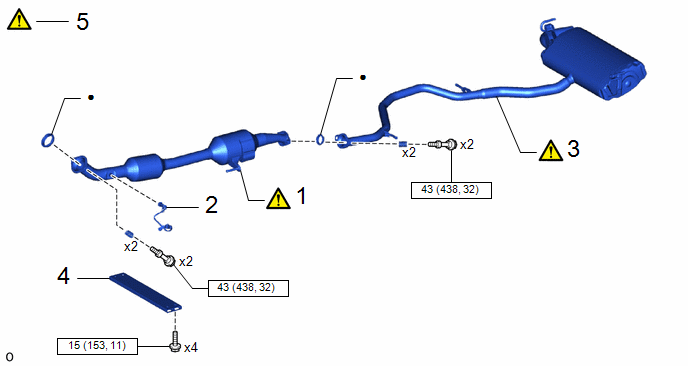
Procedure | Part Name Code |  |  |  |
|
|---|---|---|---|---|---|
1 |
FRONT EXHAUST PIPE ASSEMBLY |
17410 |
 |
- |
- |
2 |
NO. 2 AIR FUEL RATIO SENSOR |
89467B |
- |
- |
- |
3 |
TAIL EXHAUST PIPE ASSEMBLY |
17430 |
|
- |
- |
4 |
FRONT FLOOR CENTER BRACE |
57533B |
- |
- |
- |
5 |
INSPECT FOR EXHAUST GAS LEAK |
- |
|
- |
- |
 |
N*m (kgf*cm, ft.*lbf): Specified torque |
● |
Non-reusable part |
PROCEDURE
1. INSTALL FRONT EXHAUST PIPE ASSEMBLY (TWC: Rear Catalyst)
|
Click here |
2. INSTALL NO. 2 AIR FUEL RATIO SENSOR
Click here
3. INSTALL TAIL EXHAUST PIPE ASSEMBLY
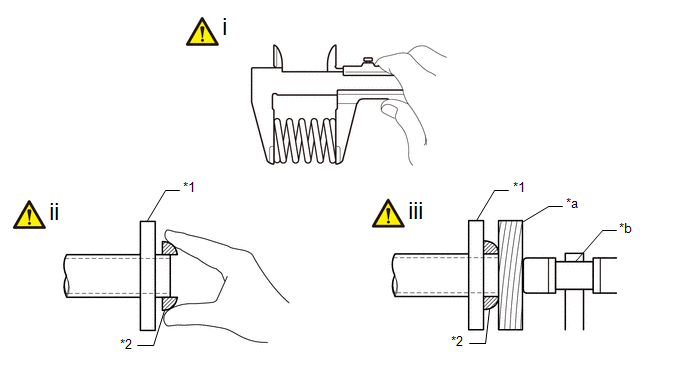
*1 |
Front Exhaust Pipe Assembly |
*2 |
Gasket |
*a |
Wooden Block |
*b |
Plastic Hammer |
(1) Using a vernier caliper, measure the free length of the compression springs.
Standard Length |
40 mm (1.57 in.) |
Minimum Free Length |
38.5 mm (1.52 in.) |
If the free length is less than the minimum, replace the compression spring.
(2) Temporarily install a new gasket to the front exhaust pipe assembly.
(3) Using a plastic hammer and wooden block, tap in the gasket until its surface is flush with the front exhaust pipe assembly.
NOTICE:
- Be careful with the installation direction of the gasket.
- Do not reuse the gasket.
- Do not damage the gasket.
- Do not push in the gasket by using the exhaust pipes when connecting them.
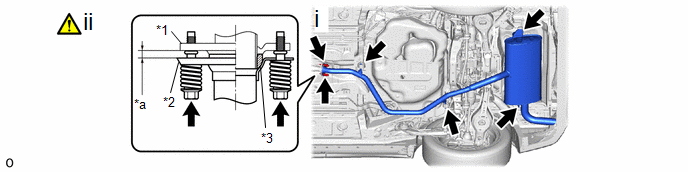
*1 |
Front Exhaust Pipe Assembly |
*2 |
Tail Exhaust Pipe Assembly |
*3 |
Gasket |
- |
- |
*a |
Space between Flanges: 6.5 mm (0.256 in.) |
- |
- |
(1) Connect the tail exhaust pipe assembly to the 3 exhaust pipe supports.
(2) Install the tail exhaust pipe assembly to the front exhaust pipe assembly with the 2 compression springs and 2 bolts.
Torque:
43 N·m {438 kgf·cm, 32 ft·lbf}
(3) After installation, check that the space between the flanges of the tail exhaust pipe assembly and front exhaust pipe assembly is consistent front-to-rear and left-to-right.
4. INSTALL FRONT FLOOR CENTER BRACE
Click here
5. INSPECT FOR EXHAUST GAS LEAK
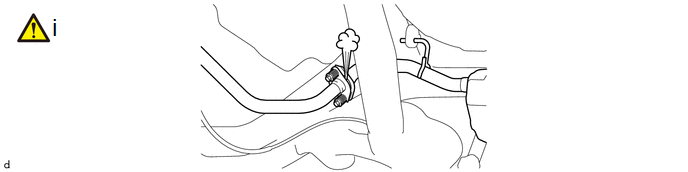
(1) If gas is leaking, tighten the areas necessary to stop the leak. Replace damaged parts as necessary.
Click here