Installation
INSTALLATION
COMPONENTS (INSTALLATION)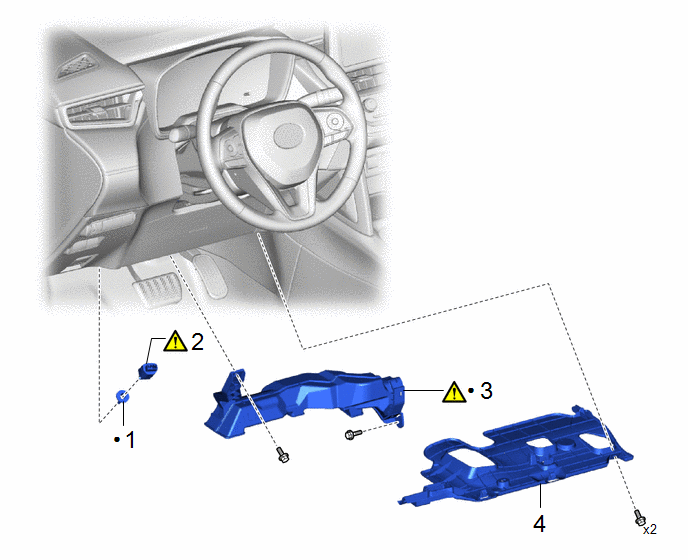
Procedure | Part Name Code |  |  |  |
|
|---|---|---|---|---|---|
1 |
STOP LIGHT SWITCH MOUNTING ADJUSTER |
84345 |
- |
- |
- |
2 |
STOP LIGHT SWITCH ASSEMBLY |
84340 |
 |
- |
- |
3 |
NO. 1 AIR DUCT |
87211 |
|
- |
- |
4 |
NO. 1 INSTRUMENT PANEL UNDER COVER SUB-ASSEMBLY |
55606 |
- |
- |
- |
● |
Non-reusable part |
- |
- |
PROCEDURE
1. INSTALL STOP LIGHT SWITCH MOUNTING ADJUSTER
2. INSTALL STOP LIGHT SWITCH ASSEMBLY
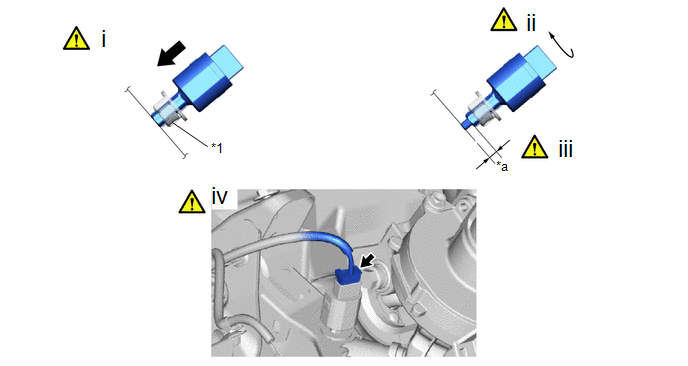
*1 |
Stop light switch mounting adjuster |
- |
- |
*a |
Protrusion Amount Measurement Area |
- |
- |
(1) Insert the stop light switch assembly to the stop light switch mounting adjuster until the switch body slightly touches the brake pedal.
NOTICE:
Do not depress the brake pedal.
(2) Turn the stop light switch assembly clockwise by approximately one fourth of a rotation.
Torque:
1,5 N·m {15 kgf·cm, 13 in·lbf}
(3) Check the protrusion amount of the shaft.
Protrusion amount of the shaft:
Area | Measurement | Area | Measurement |
|---|---|---|---|
a |
0.5 to 2.6 mm (0.0197 to 0.102 in.) |
- |
- |
(4) Connect the connector.
NOTICE:
Check that the stop light does not come on when the brake pedal is not depressed.
3. INSTALL NO. 1 AIR DUCT
|
Click here |
4. INSTALL NO. 1 INSTRUMENT PANEL UNDER COVER SUB-ASSEMBLY