Removal
REMOVAL
COMPONENTS (REMOVAL)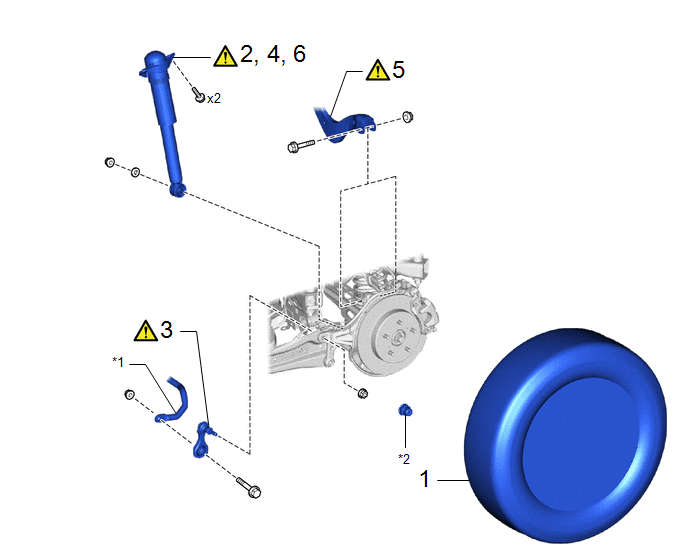
Procedure | Part Name Code |  |  |  |
|
|---|---|---|---|---|---|
1 |
REAR WHEEL |
- |
- |
- |
- |
2 |
LOOSEN REAR SHOCK ABSORBER ASSEMBLY |
48540E |
 |
- |
- |
3 |
REAR STABILIZER LINK ASSEMBLY |
48840A |
|
- |
- |
4 |
SEPARATE REAR SHOCK ABSORBER ASSEMBLY |
48540E |
|
- |
- |
5 |
REAR UPPER CONTROL ARM ASSEMBLY |
48790 |
|
- |
- |
6 |
REMOVE REAR SHOCK ABSORBER ASSEMBLY |
48540E |
|
- |
- |
*1 |
REAR STABILIZER BAR |
*2 |
CAP |
Procedure | Part Name Code | | | |
|
|---|---|---|---|---|---|
7 |
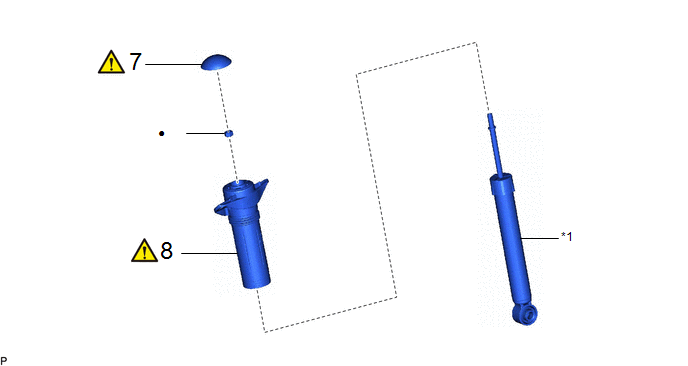
REAR SHOCK ABSORBER CAP |
48554A |
|
- |
- |
8 |
REAR SUSPENSION SUPPORT ASSEMBLY |
48760B |
|
- |
- |
*1 |
REAR SHOCK ABSORBER ASSEMBLY |
- |
- |
● |
Non-reusable part |
★ |
Precoated part |
The necessary procedures (adjustment, calibration, initialization, or registration) that must be performed after parts are removed and installed, or replaced during rear shock absorber assembly removal/installation are shown below.
Necessary Procedures After Procedure PerformedReplaced Part or Performed Procedure | Necessary Procedure | Effect/Inoperative Function when Necessary Procedure not Performed | Link |
|---|---|---|---|
Rear wheel alignment adjustment |
for HEV Model:
|
|
|
for Gasoline Model:
|
|
|
|
for Gasoline Model AWD:
|
Dynamic torque control AWD system |
|
|
Suspension, tires, etc. |
Rear television camera assembly optical axis (Back camera position setting) |
Parking Assist Monitor System |
|
Initialize headlight ECU subassembly LH |
Automatic headlight beam level control system |
|
HINT:
- Use the same procedure for the RH side and LH side.
- The following procedure is for the LH side.
PROCEDURE
1. REMOVE REAR WHEEL
Click here
2. LOOSEN REAR SHOCK ABSORBER ASSEMBLY
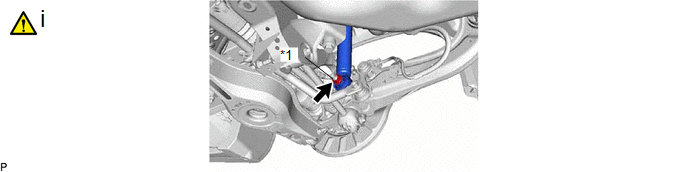
*1 |
Rear Axle Carrier Pin |
- |
- |
(1) Loosen the nut of the rear shock absorber assembly.
NOTICE:
Hold the rear axle carrier pin while rotating the nut.
3. REMOVE REAR STABILIZER LINK ASSEMBLY
|
Click here |
4. SEPARATE REAR SHOCK ABSORBER ASSEMBLY
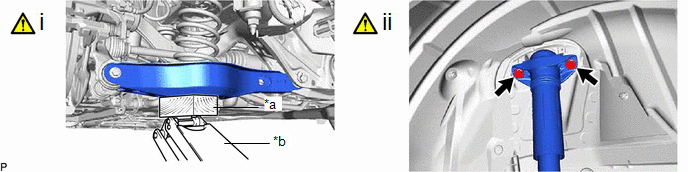
*a |
Wooden Block |
*b |
Jack |
(1) Using a jack and a wooden block, support the rear No. 2 suspension arm assembly.
NOTICE:
- When jacking up the rear No. 2 suspension arm assembly , be sure to jack it up slowly.
- Make sure to perform this operation with the vehicle kept as low as possible.
(2) Remove the 2 bolts and separate the rear shock absorber assembly from the vehicle.
5. SEPARATE REAR UPPER CONTROL ARM ASSEMBLY
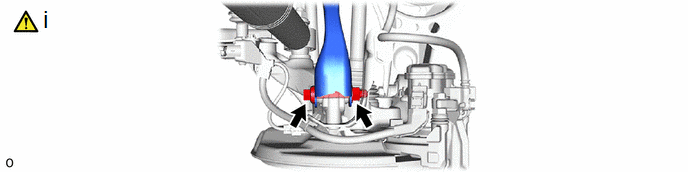
(1) Remove the bolt and nut, and separate the rear upper control arm assembly from the rear axle carrier sub-assembly.
NOTICE:
Loosen the bolt with the nut secured.
6. REMOVE REAR SHOCK ABSORBER ASSEMBLY
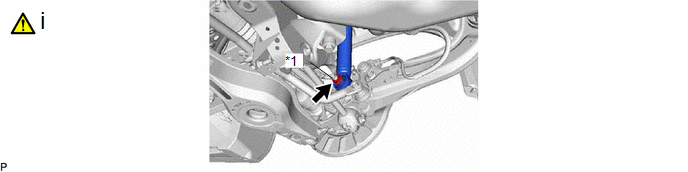
*1 |
Rear Axle Carrier Pin |
- |
- |
(1) Remove the nut, plate washer and rear shock absorber assembly from the rear axle carrier subassembly.
NOTICE:
Hold the rear axle carrier pin while rotating the nut.
7. REMOVE REAR SHOCK ABSORBER CAP
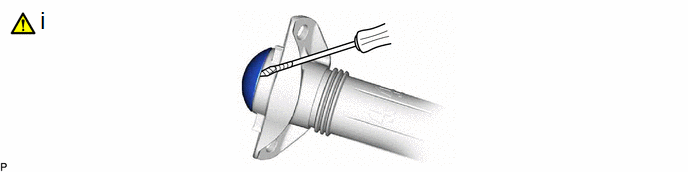
(1) Using a screwdriver with its tip wrapped with protective tape, remove the rear shock absorber cap from the rear shock absorber assembly.
8. REMOVE REAR SUSPENSION SUPPORT ASSEMBLY
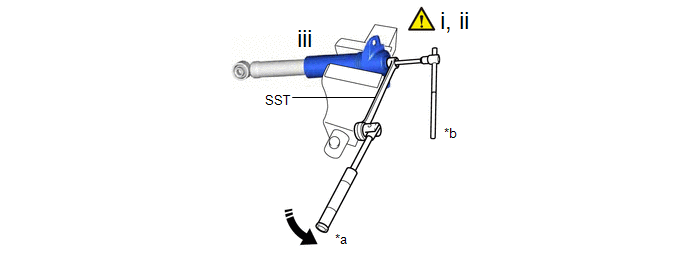
*a |
Turn |
*b |
Hold |
(1) Secure the rear shock absorber assembly in a vise using aluminum plates.
NOTICE:
Do not overtighten the vise.
(2) Using SST and a 6 mm hexagon socket wrench, hold the rear shock absorber rod and remove the rear support to rear shock absorber nut.
SST: 09729-00170
(3) Remove the rear suspension support assembly from the rear shock absorber assembly.