Removal
REMOVAL
COMPONENTS (REMOVAL)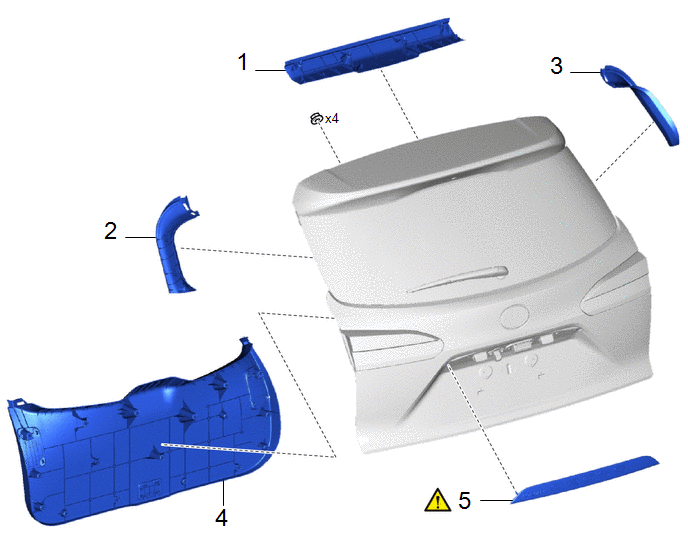
Procedure | Part Name Code |  |  |  |
|
|---|---|---|---|---|---|
1 |
BACK DOOR TRIM UPPER PANEL ASSEMBLY |
64790B |
- |
- |
- |
2 |
BACK DOOR SIDE GARNISH LH |
67938A |
- |
- |
- |
3 |
BACK DOOR SIDE GARNISH RH |
67937B |
- |
- |
- |
4 |
BACK DOOR TRIM PANEL ASSEMBLY |
64780A |
- |
- |
- |
5 |
BACK DOOR OUTSIDE GARNISH SUB-ASSEMBLY |
- |
 |
- |
- |
PROCEDURE
1. REMOVE BACK DOOR TRIM UPPER PANEL ASSEMBLY
Click here
2. REMOVE BACK DOOR SIDE GARNISH LH
Click here
3. REMOVE BACK DOOR SIDE GARNISH RH
(a) Use the same procedure as for the LH side.
4. REMOVE BACK DOOR TRIM PANEL ASSEMBLY
Click here
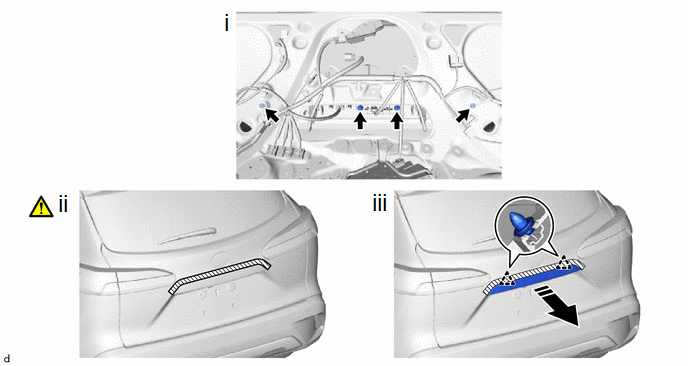
5. REMOVE BACK DOOR OUTSIDE GARNISH SUB-ASSEMBLY
 |
Remove in this Direction |
- |
- |
(1) Remove the 4 nuts.
(2) Apply protective tape around the back door outside garnish sub-assembly as shown in the illustration.
(3) Disengage the clips to remove the back door outside garnish sub-assembly as shown in the illustration.