Removal
REMOVAL
COMPONENTS (REMOVAL)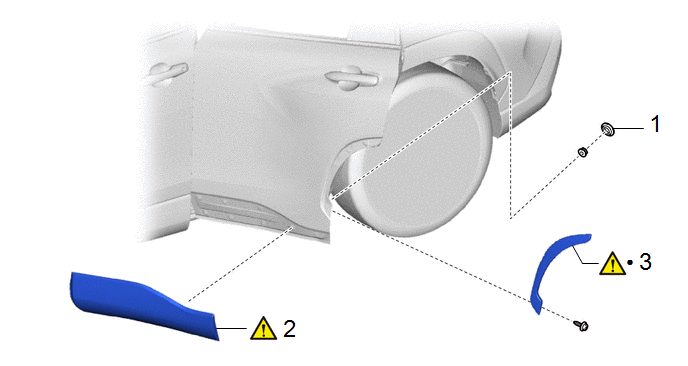
Procedure | Part Name Code |  |  |  |
|
|---|---|---|---|---|---|
1 |
HOLE PLUG |
- |
- |
- |
- |
2 |
REAR DOOR OUTSIDE LOWER MOULDING SUB-ASSEMBLY |
75078 |
 |
- |
- |
3 |
REAR DOOR OUTSIDE MOULDING SUB-ASSEMBLY |
75076 |
|
- |
- |
● |
Non-reusable part |
- |
- |
HINT:
- Use the same procedure for the RH side and LH side.
- The following procedure is for the LH side.
PROCEDURE
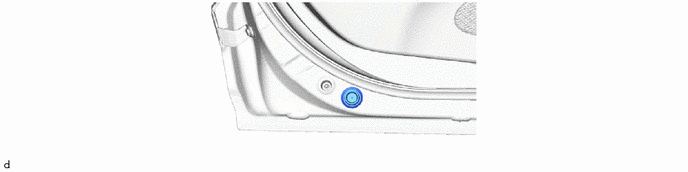
1. REMOVE HOLE PLUG
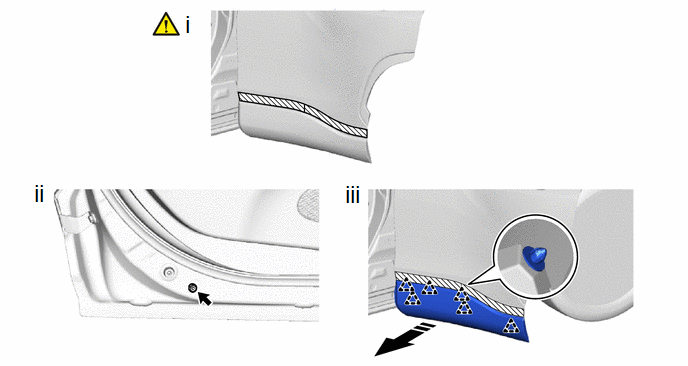
2. REMOVE REAR DOOR OUTSIDE LOWER MOULDING SUB-ASSEMBLY
 |
Remove in this Direction |
- |
- |
(1) Apply protective tape around the rear door outside lower moulding sub-assembly as shown in the illustration.
(2) Remove the nut.
(3) Disengage the clips to remove the rear door outside lower moulding sub-assembly as shown in the illustration.
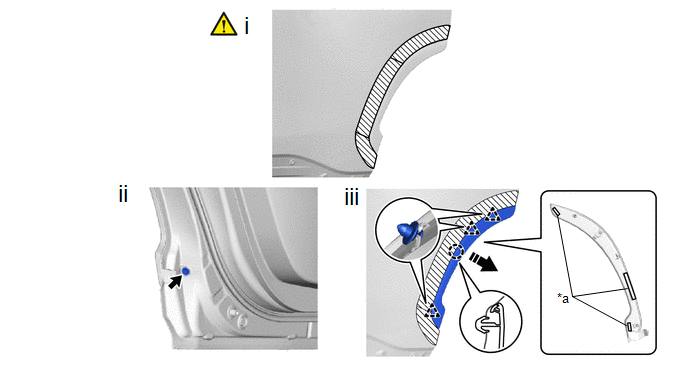
3. REMOVE REAR DOOR OUTSIDE MOULDING SUB-ASSEMBLY
*a |
Double-sided Tape |
- |
- |
|
Remove in this Direction |
- |
- |
(1) Apply protective tape around the rear door outside moulding sub-assembly as shown in the illustration.
(2) Remove the screw.
(3) Disengage the clips and claw, separate the double-sided tape to remove the rear door outside moulding sub-assembly as shown in the illustration.