Vehicle Exterior
Removal
In this manual: Vehicle Exterior
~1min read
REMOVAL
COMPONENTS (REMOVAL)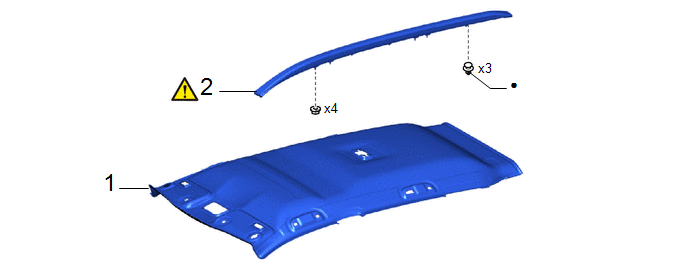
Procedure | Part Name Code |  |  |  |
|
|---|---|---|---|---|---|
1 |
ROOF HEADLINING ASSEMBLY |
63310 |
- |
- |
- |
2 |
ROOF RACK ASSEMBLY |
63470B |
 |
- |
- |
● |
Non-reusable part |
- |
- |
HINT:
- Use the same procedure for the RH side and LH side.
- The following procedure is for the LH side.
PROCEDURE
1. REMOVE ROOF HEADLINING ASSEMBLY
Click here
2. REMOVE ROOF RACK ASSEMBLY
|
NOTICE: When removing the roof rack assembly, if the double-sided tape is difficult to remove, heat the vehicle body and roof rack assembly using a heat light. |
Standard:
Item | Temperature |
|---|---|
Vehicle Body |
40 to 60 °C |
Roof Rack Assembly |
20 to 30 °C |
CAUTION:
- Do not touch the heat light and heated parts.
- Touching the heat light may result in burns.
- Touching heated parts for a long time may result in burns.
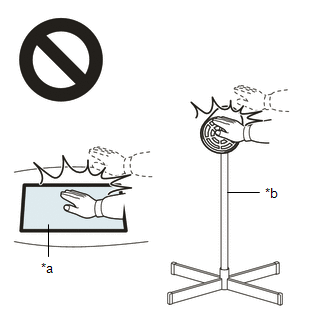
*a |
Heated Part |
*b |
Heat Light |
NOTICE:
Do not heat the vehicle body and roof rack assembly.
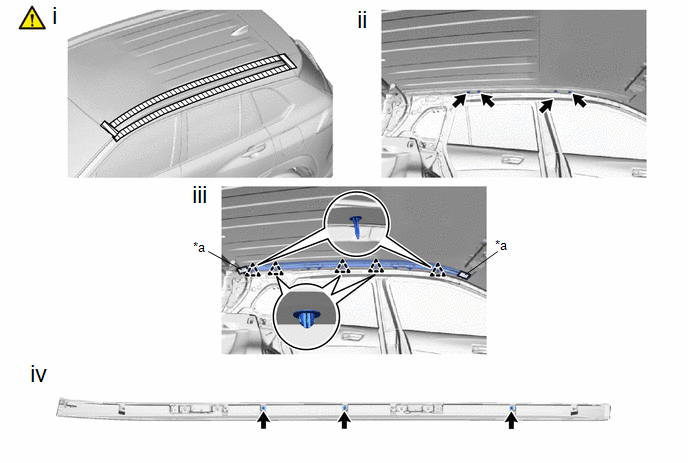
*a |
Double-sided Tape |
- |
- |
(1) Apply protective tape around the roof rack assembly.
(2) Remove the 4 nuts.
(3) Disengage the clips and separate the double-sided tape to remove the roof rack assembly.
(4) Remove the 3 clips.
Was this page helpful?