Steering column
Repair
In this manual: Steering column
10steps
~60min
3/5difficulty
Done 0 of 10
1. Steering off center repair procedure
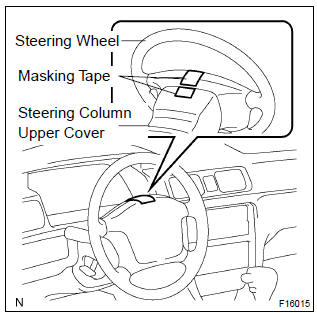
Draw a new line on the masking tape or the steering wheel as shown in the illustration.
Measure the distance between the 2 lines on the masking tape of the steering wheel.
Convert the measured distance to steering angle. Hint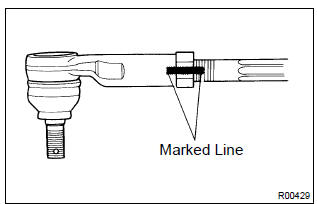
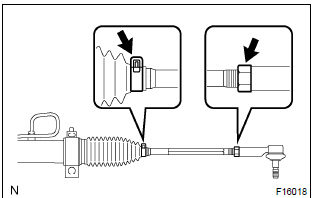
Tighten the rh and lh lock nuts by the specified torque. Notice
- Inspect steering wheel off center.
- Apply masking tape on the top center of the steering wheel and steering column upper cover.
- Driving the vehicle on a straight line for 100 meters at a constant speed of 56 km/h, and hold the steering wheel to maintain the course.
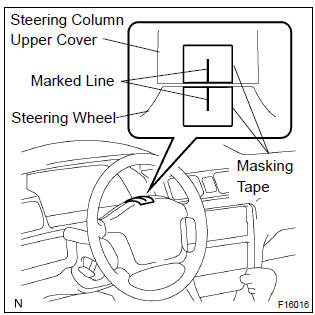
- Draw a line on the masking tape as shown in the illustration.
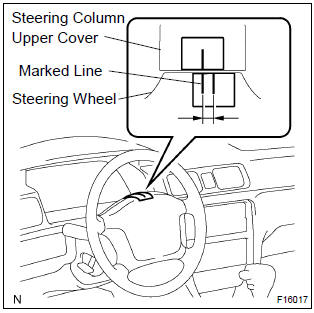
- Turn the steering wheel to its straight position.
: refer to the upper surface of the steering wheel, steering spoke and srs airbag line for the straight position.
Measured distance 1 mm (0.04 In.) = Steering angle approximately 1 deg.
: make a note of the steering angle.
- adjust steering angle.
: the adjustment method for steering angle varies depending on the models. Check whether it is type a or b.
- Draw a line on the rh and lh tie rod and rack ends where it can easily be seen.
- Using a paper gauge, measure the distance from rh and lh tie rod ends to the rack end screws.
:
- measure the rh side and lh side.
- Make a note of the measured values.
- Remove the rh and lh boot clips from the rack boots.
- Loosen the rh and lh lock nuts.
- Turn the rh and lh rack end by the same amount (but in different directions) according to the steering angle.
Torque: 74 N·m
: make sure that the difference in length between rh and lh tie rod ends and rack end screws are within 1.5 Mm (0.059 In.).
- Install the rh and lh boot clips.
Test yourself
A quick Toyota Corolla quiz: every answer comes with an explanation and a link to the manual page.
Was this page helpful?