Brake control
Installation
In this manual: Brake control
~1min read
1. INSTALL BRAKE PEDAL SUPPORT ASSEMBLY
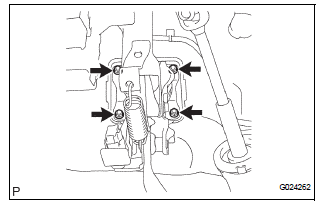
(a) Install the brake pedal support sub-assembly with the 4 nuts.
Torque: 16 N*m (160 kgf*cm, 12 ft.*lbf) (b) Install the clip and clevis pin to the brake pedal lever.
(c) Using needle-nose pliers, install the tension spring.
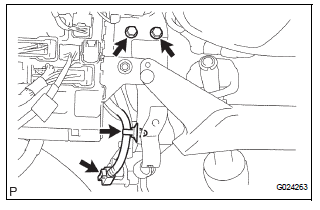
(d) Install the 2 bolts to the brake pedal bracket No. 3.
Torque: 19 N*m (194 kgf*cm, 14 ft.*lbf) (e) Install the stop light switch harness clamp to the brake pedal support sub-assembly.
(f) Connect the stop light switch connector.
2. FULLY TIGHTEN BRAKE PEDAL SHAFT
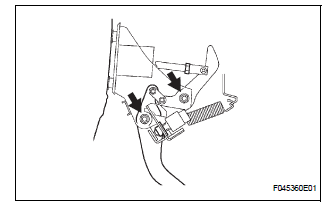
(a) Fully tighten the 2 brake pedal shafts.
Torque: 34 N*m (350 kgf*cm, 25 ft.*lbf)
3. INSTALL INSTRUMENT PANEL SAFETY PAD INSERT SUB-ASSEMBLY NO. 1
(a) Install the instrument panel safety pad insert subassembly No. 1 with the 4 bolts.
4. INSTALL INSTRUMENT PANEL FINISH PANEL SUBASSEMBLY LOWER LH
(a) Install the instrument panel finish panel subassembly lower LH with the 2 bolts.
5. INSTALL COWL SIDE TRIM BOARD LH
6. INSTALL FRONT DOOR SCUFF PLATE LH
7. INSPECT BRAKE PEDAL HEIGHT (See page BR-9)
8. CHECK PEDAL FREE PLAY (See page BR-10)
9. CHECK PEDAL RESERVE DISTANCE (See page BR- 10)
Test yourself
A quick Toyota Sienna quiz: every answer comes with an explanation and a link to the manual page.
Was this page helpful?