Reassembly
1. INSTALL NO. 1 COOLER THERMISTOR
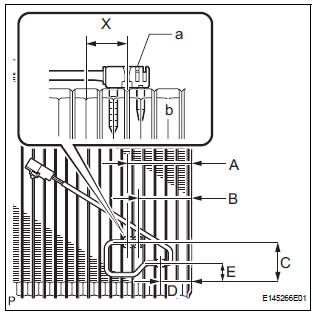
(a) Install the No. 1 cooler thermistor as shown in the illustration. 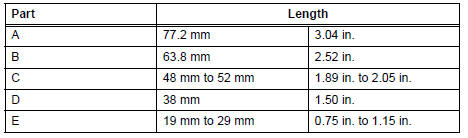
NOTICE:
- Be sure to insert the thermistor only once because reinserting it will not allow it to be firmly secured.
- When reusing the evaporator, insert the thermistor one row next to the one that had been used previously (X in the illustration).
- After inserting the thermistor, do not apply excessive force to the wire.
- Directly insert the thermistor until the edge of plastic case "a" comes into contact with evaporator "b".
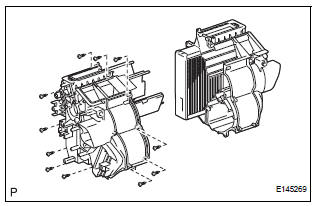
(b) Install the 11 screws.
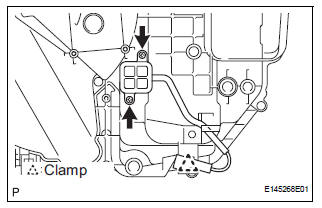
(c) Install the 2 screws.
(d) Engage the clamp.
2. INSTALL NO. 1 AIR DUCT
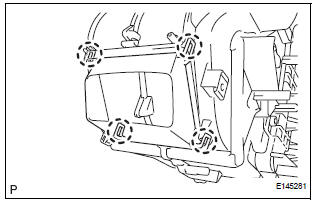
(a) Engage the 4 claws and install the No. 1 air duct.
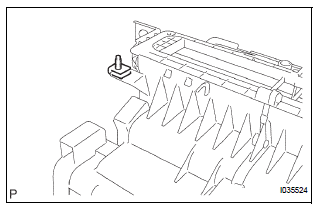
3. INSTALL NO. 4 AIR CONDITIONING RADIATOR BRACKET
4. INSTALL NO. 1 AIR CONDITIONING RADIATOR BRACKET
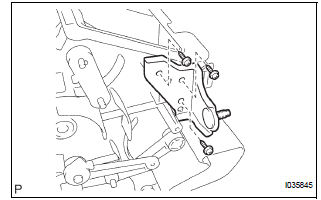
(a) Install the No. 1 air conditioning radiator bracket with the 3 screws.
5. INSTALL NO. 2 AIR CONDITIONING RADIATOR BRACKET

(a) Install the No. 2 air conditioning radiator bracket with the 2 screws.
6. INSTALL COOLER EXPANSION VALVE
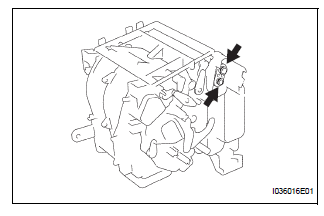
(a) Sufficiently apply compressor oil to 2 new O-rings and the fitting surface of the No. 1 cooler evaporator sub-assembly.
Compressor oil: ND-OIL 8 or equivalent
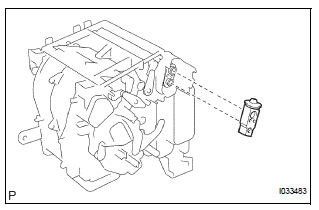
(b) Install the cooler expansion valve to the No. 1 cooler evaporator sub-assembly.
7. INSTALL AIR CONDITIONING TUBE ASSEMBLY
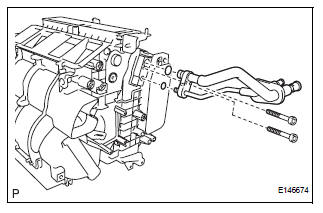
(a) Sufficiently apply compressor oil to 2 new O-rings and the fitting surface of the air conditioning tube assembly.
Compressor oil: ND-OIL 8 or equivalent
(b) Install the 2 O-rings on the air conditioning tube assembly.
(c) Using a hexagon wrench 4.0 mm (0.15 in.), install the air conditioning tube assembly with the 2 hexagon bolts.
Torque: 3.5 N*m (35 kgf*cm, 30 in.*lbf)
8. INSTALL HEATER RADIATOR UNIT SUB-ASSEMBLY
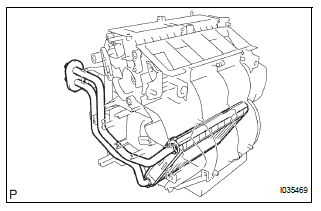
(a) Install the heater radiator unit sub-assembly to the air conditioning radiator assembly.
9. INSTALL NO. 3 AIR CONDITIONING RADIATOR BRACKET
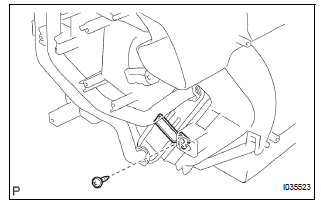
(a) Install the No. 3 air conditioning radiator bracket with the screw.
10. INSTALL NO. 1 HEATER CLAMP
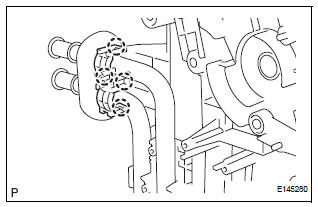
(a) Engage the 4 claws and install the No. 1 heater clamp.
11. INSTALL NO. 2 AIRMIX DAMPER SERVO SUBASSEMBLY (for Automatic Air Conditioning System)
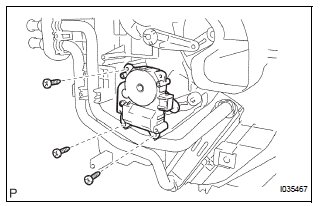
(a) Install the No. 2 airmix damper servo sub-assembly with the 3 screws.
12. INSTALL AIRMIX DAMPER SERVO SUB-ASSEMBLY

(a) Install the airmix damper servo sub-assembly with the 3 screws.
13. INSTALL MODE DAMPER SERVO SUB-ASSEMBLY

(a) Install the mode damper servo sub-assembly with the 3 screws.
14. INSTALL BLOWER ASSEMBLY
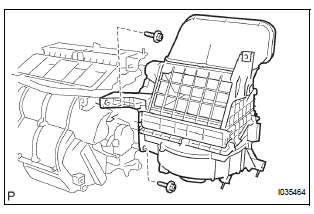
(a) Install the blower assembly with the 2 screws.
Test yourself
A quick Toyota Sienna quiz: every answer comes with an explanation and a link to the manual page.