Brake control
Removal
In this manual: Brake control
~1min read
4special tools
HINT: Remove the RH by the same procedure as the LH side.
1. REMOVE REAR WHEEL
2. SEPARATE SKID CONTROL SENSOR WIRE
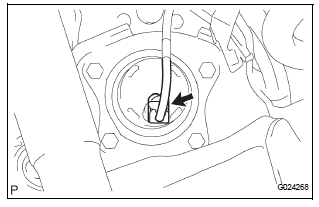
(a) Disconnect the connector from the skid control sensor.
3. REMOVE REAR BRAKE DRUM SUB-ASSEMBLY (for Drum Type)
(a) Place matchmarks on the rear brake drum subassembly and the axle hub.
(b) Remove the rear brake drum sub-assembly.
4. REMOVE REAR DISC BRAKE CALIPER ASSEMBLY LH (for Disc Type)
(a) Remove the 2 bolts and rear brake caliper assembly LH.
5. REMOVE REAR DISC (for Disc Type)
(a) Place matchmarks on the rear disc and the axle hub.
(b) Remove the rear disc.
6. REMOVE REAR AXLE HUB & BEARING ASSEMBLY LH (See page AH-16)
7. REMOVE REAR SPEED SENSOR
(a) Mount the rear axle hub in a soft jaw vise.
NOTICE: Replace the axle hub assembly if it is dropped or a strong shock is given to it.
(b) Using a pin punch and hammer, drive out the 2 pins and remove the 2 attachments from SST.
(c) Using SST and 2 bolts (Diameter: 12 mm, pitch: 1.5 mm), remove the skid control sensor from the rear axle hub.
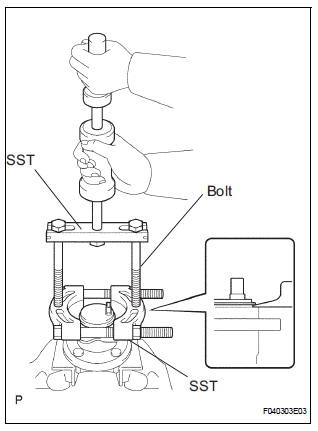
SST 09520-00031 (09520-00040), 09521-00020, 09950-00020
NOTICE:
- If a damage is inflicted to the sensor rotor is damaged, replace the axle hub assembly.
- Do not scratch the contacting surface of the axle hub and speed sensor.
Test yourself
A quick Toyota Sienna quiz: every answer comes with an explanation and a link to the manual page.
Was this page helpful?