Sliding roof
Removal
In this manual: Sliding roof
11steps
~66min
3/5difficulty
Done 0 of 11
1. REMOVE ROOF HEADLINING ASSEMBLY
2. REMOVE SLIDING ROOF SIDE GARNISH LH
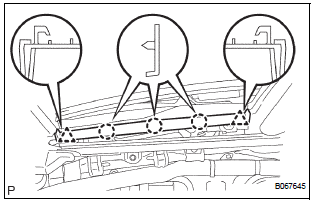
- Disengage the 3 claws.
- Disengage the rear clip.
- Disengage the front clip.
- Remove the slide garnish by pulling it rearward.
3. REMOVE SLIDING ROOF SIDE GARNISH RH
HINT: Use the same procedures described above for the LH side.
4. REMOVE SLIDING ROOF GLASS SUB-ASSEMBLY
- Using a torx wrench (T25), remove the 4 screws and sliding roof glass.
5. REMOVE SLIDING ROOF HOUSING ASSEMBLY
- Disconnect the 4 hoses and drive gear wire harness connector.
- Remove the 8 bolts and 4 brackets.
- Remove the 6 nuts and housing.
6. REMOVE SLIDING ROOF DRIVE GEAR SUBASSEMBLY
- Remove the 2 bolts and drive gear.
7. REMOVE SUNSHADE TRIM SUB-ASSEMBLY
8. REMOVE ROOF DRIP CHANNEL REAR
9. REMOVE SLIDING ROOF DRIVE CABLE LH
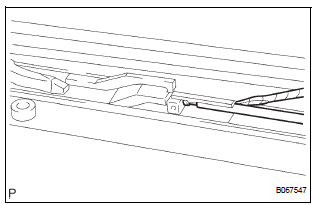
- Remove the 4 guide clips.
- Using a screwdriver, separate the link rod from the link holder, as shown in the illustration.
HINT: Tape the screwdriver tip before use
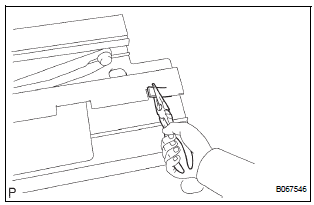
- Using long nose pliers, level the part indicated in the illustration.
- Pull out the deflector lifter link and drive cable together.
10. REMOVE SLIDING ROOF DRIVE CABLE RH
HINT: Use the same procedures described above for the LH side.
11. REMOVE ROOF WIND DEFLECTOR PANEL SUBASSEMBLY
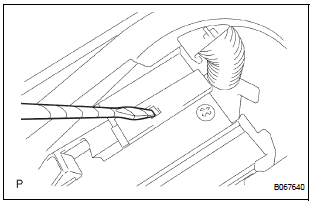
- Using a screwdriver, disengage the claw of the panel, as shown in the illustration.
HINT: Tape the screwdriver tip before use.
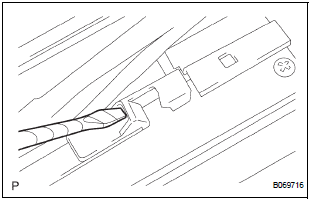
- Using a screwdriver, push hard the part indicated in the illustration to remove the panel.
HINT: Tape the screwdriver tip before use.
12. REMOVE SLIDING ROOF HOUSING PANEL
- Remove the 2 screws and housing panel.
13. ADJUST FULLY CLOSE POSITION
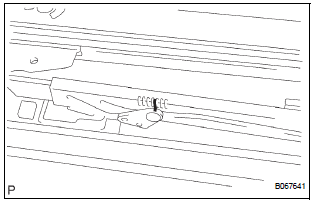
- Using a screwdriver, slide the drive cable of the sliding roof to align the matchmarks.
HINT: Tape the screwdriver tip before use.
Test yourself
A quick Toyota Sienna quiz: every answer comes with an explanation and a link to the manual page.
Was this page helpful?