Removal
1. REMOVE ENGINE ASSEMBLY WITH TRANSAXLE
HINT: See page EM-26
2. REMOVE OIL LEVEL GAUGE GUIDE SUBASSEMBLY (See page EM-39) 3. REMOVE NO. 1 OIL PIPE (See page EM-77) 4. REMOVE OIL PIPE (See page EM-77) 5. REMOVE CRANKSHAFT PULLEY (See page EM-79) 6. SEPARATE OIL COOLER PIPE
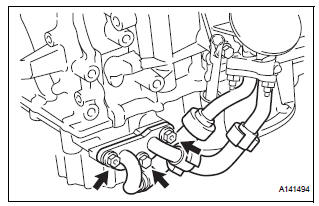
(a) Remove the bolt and 2 nuts, and disconnect the oil cooler pipe from the oil pan sub-assembly.
(b) Remove the gasket from the oil pan sub-assembly.
7. REMOVE WATER INLET HOUSING (See page CO-12) 8. REMOVE CYLINDER HEAD COVER SUB-ASSEMBLY (for Bank 1) (See page EM-82) 9. REMOVE CYLINDER HEAD COVER SUB-ASSEMBLY (for Bank 2) (See page EM-82) 10. REMOVE NO. 2 OIL PAN SUB-ASSEMBLY (See page EM-82) 11. REMOVE OIL STRAINER SUB-ASSEMBLY (See page EM-83) 12. REMOVE OIL PAN SUB-ASSEMBLY (See page EM- 83) 13. REMOVE TIMING CHAIN COVER SUB-ASSEMBLY
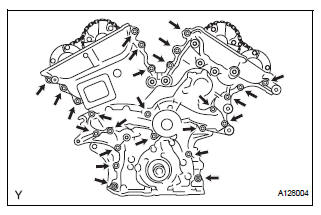
(a) Remove the 23 bolts and 2 nuts as shown in the illustration.
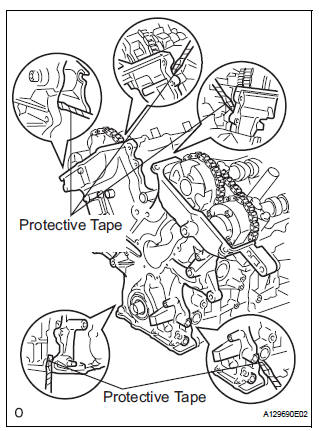
(b) Remove the timing chain cover by prying between the timing chain cover and cylinder head or cylinder block with a screwdriver.
NOTICE: Be careful not to damage the contact surfaces of the cylinder head, cylinder block and chain cover.HINT: Tape the screwdriver tip before use.
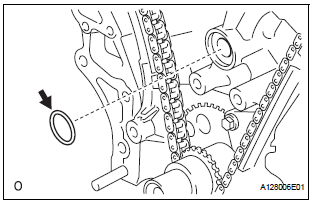
(c) Remove the gasket.
14. REMOVE TIMING CHAIN CASE OIL SEAL

(a) Using a screwdriver, pry out the oil seal.
HINT: Tape the screwdriver tip before use.
Test yourself
A quick Toyota Sienna quiz: every answer comes with an explanation and a link to the manual page.