Ecm
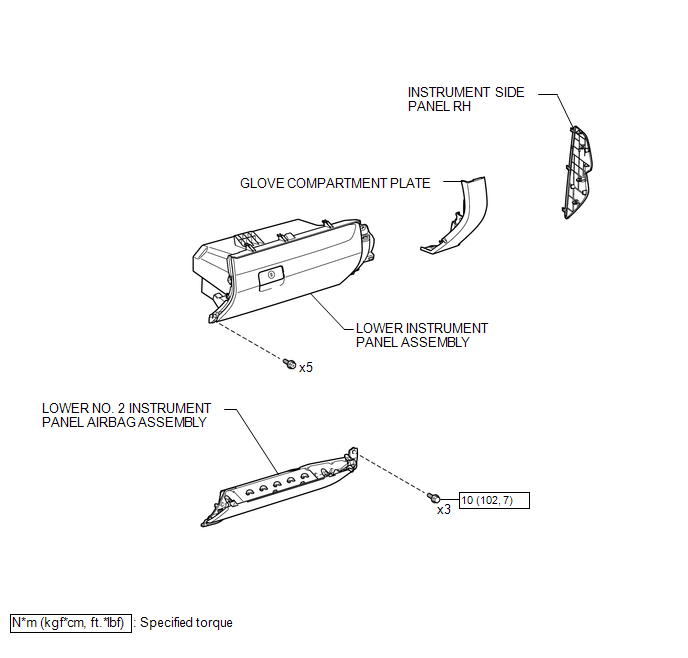 ILLUSTRATION
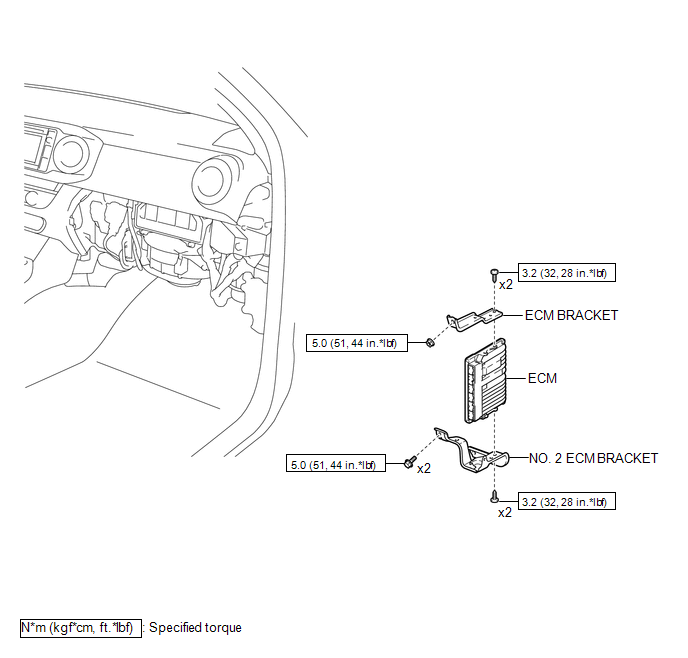 Installation INSTALLATION PROCEDURE
1. INSTALL NO. 2 ECM BRACKET
(a) Install the No. 2 ECM bracket to the ECM with the 2 screws.
Torque:
3,2 N·m {33 kgf·cm, 28 in·lbf}
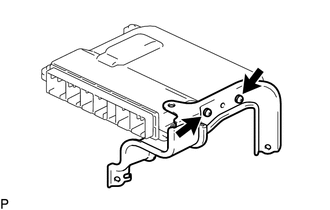
2. INSTALL ECM BRACKET
(a) Install the ECM bracket to the ECM with the 2 screws.
Torque:
3,2 N·m {33 kgf·cm, 28 in·lbf}
3. INSTALL ECM
(a) Install the ECM to the instrument panel reinforcement assembly with the 2 bolts and nut.
Torque:
5 N·m {51 kgf·cm, 44 in·lbf}
(b) Connect the 6 connectors.
(c) Engage the clamp to install the wire harness.
4. INSTALL LOWER INSTRUMENT PANEL ASSEMBLY

5. INSTALL LOWER NO. 2 INSTRUMENT PANEL AIRBAG ASSEMBLY
6. INSTALL GLOVE COMPARTMENT PLATE
7. INSTALL INSTRUMENT SIDE PANEL RH
8. CONNECT CABLE TO NEGATIVE BATTERY TERMINAL
Torque:
5,4 N·m {55 kgf·cm, 48 in·lbf}
NOTICE:
When disconnecting the cable, some systems need to be initialized after the cable is reconnected.
Click here
9. PERFORM SRS WARNING LIGHT
(See page )
10. PERFORM INITIALIZATION
Click here
1. PRECAUTION
CAUTION:
Be sure to read Precaution thoroughly before servicing (See page  ).
NOTICE:
After turning the ignition switch off, waiting time may be required before disconnecting the cable from the negative (-) battery terminal. Therefore, make sure to read the disconnecting the cable from the negative (-) battery terminal notices before proceeding with work (See page ).
2. DISCONNECT CABLE FROM NEGATIVE BATTERY TERMINAL
NOTICE:
When disconnecting the cable, some systems need to be initialized after the cable is reconnected.
Click here
3. REMOVE INSTRUMENT SIDE PANEL RH
4. REMOVE GLOVE COMPARTMENT PLATE
5. REMOVE LOWER NO. 2 INSTRUMENT PANEL AIRBAG ASSEMBLY
6. REMOVE LOWER INSTRUMENT PANEL ASSEMBLY
7. REMOVE ECM
(a) Disengage the clamp to separate the wire harness. |
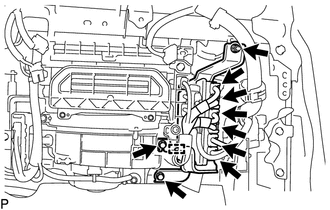 |
(b) Disconnect the 6 connectors.
(c) Remove the 2 bolts, nut and ECM from the instrument panel reinforcement assembly.
8. REMOVE ECM BRACKET
(a) Remove the 2 screws and ECM bracket from the ECM. |
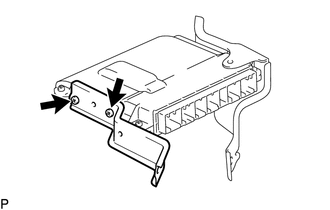 |
9. REMOVE NO. 2 ECM BRACKET
(a) Remove the 2 screws and No. 2 ECM bracket from the ECM. |
 |
Test yourself
A quick Toyota Tacoma quiz: every answer comes with an explanation and a link to the manual page.