Deck Board Rail
Components
COMPONENTS
ILLUSTRATION
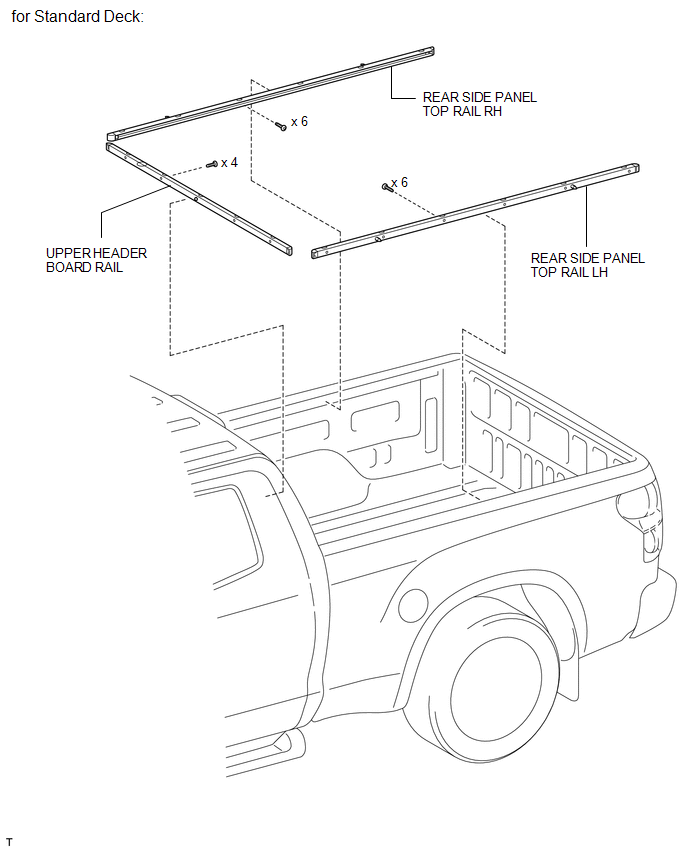
ILLUSTRATION
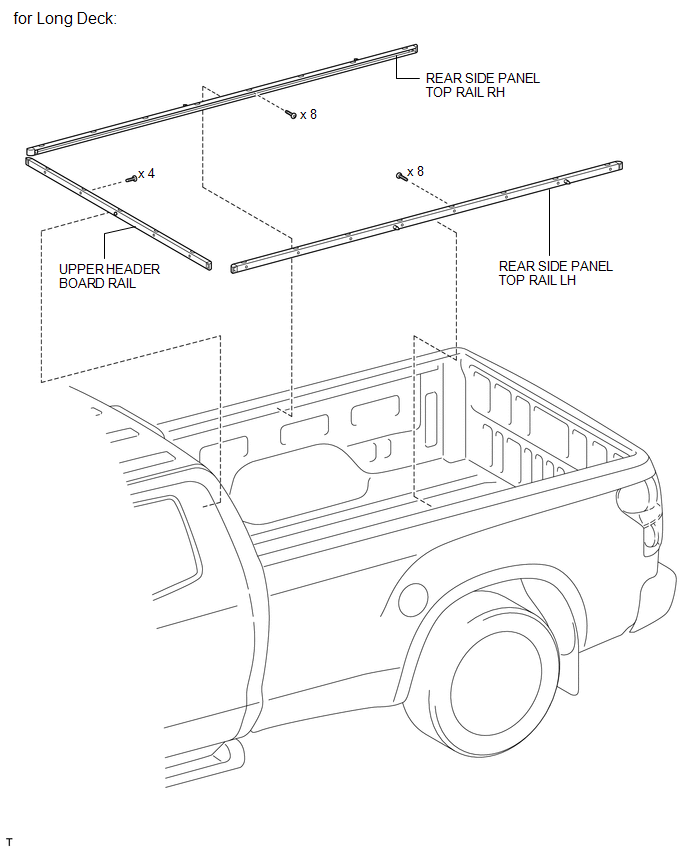
ILLUSTRATION
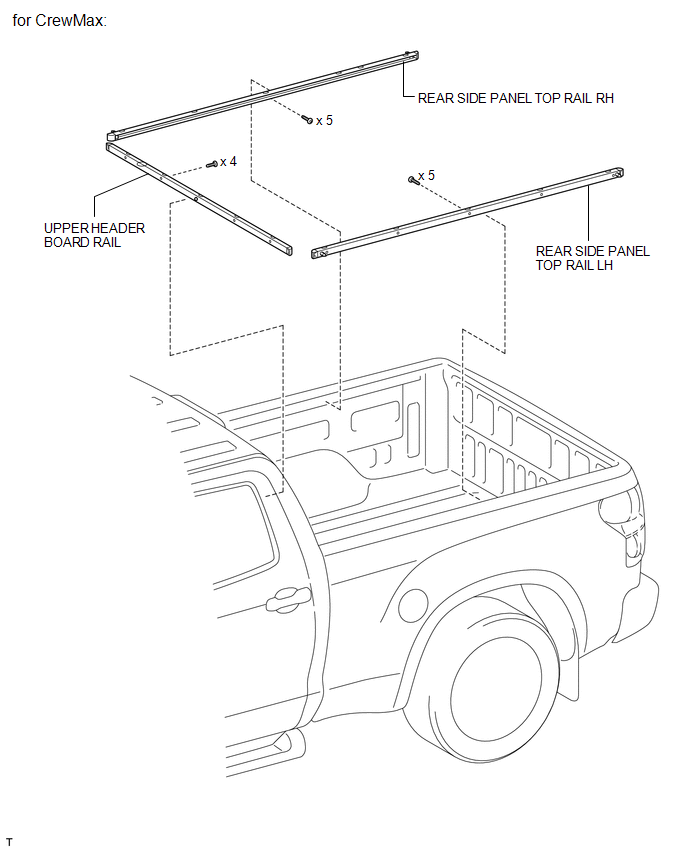
Installation
INSTALLATION
PROCEDURE
1. INSTALL UPPER HEADER BOARD RAIL
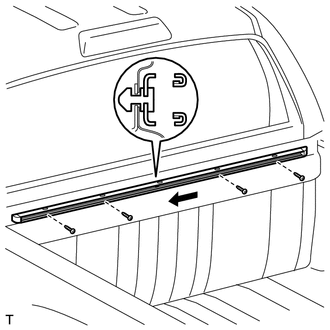
(a) Slide the rail in the direction shown in the illustration to install it.
(b) Using a T30 "TORX" socket, install the 4 bolts.
2. INSTALL REAR SIDE PANEL TOP RAIL LH
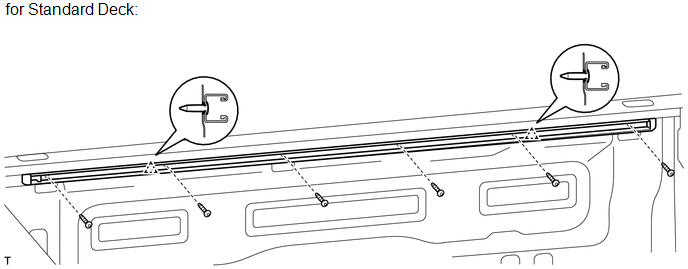
(a) for Standard Deck:
Install the rear side panel top rail.
(1) Attach the 2 clips to install the rail.
(2) Using a T30 "TORX" socket, install the 6 bolts.
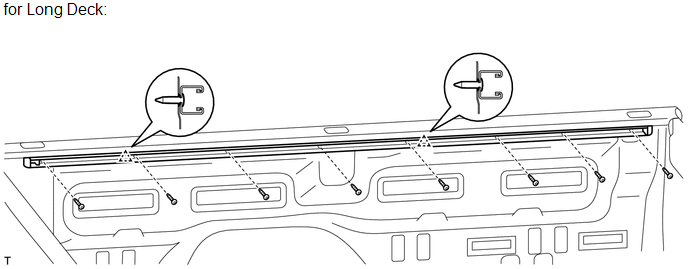
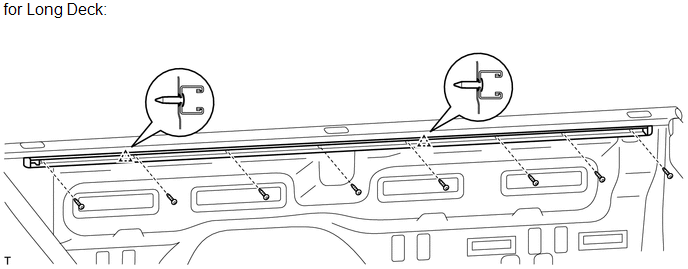
(b) for Long Deck:
Install the rear side panel top rail.
(1) Attach the 2 clips to install the rail.
(2) Using a T30 "TORX" socket, install the 8 bolts.
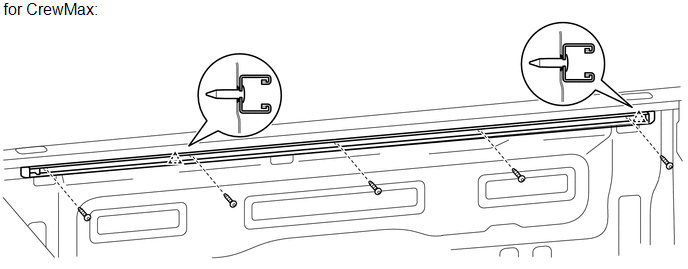
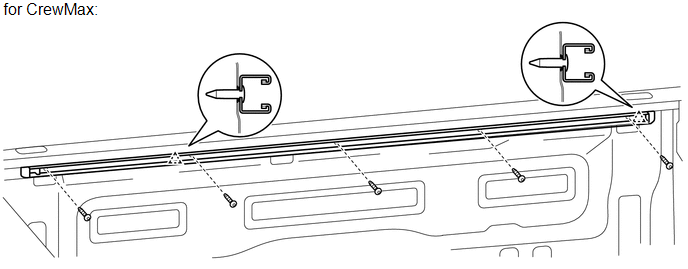
(c) for CrewMax:
Install the rear side panel top rail.
(1) Attach the 2 clips to install the rail.
(2) Using a T30 "TORX" socket, install the 5 bolts.
3. INSTALL REAR SIDE PANEL TOP RAIL RH
HINT:
Use the same procedures described for the LH side.
Removal
REMOVAL
PROCEDURE
1. REMOVE REAR SIDE PANEL TOP RAIL LH
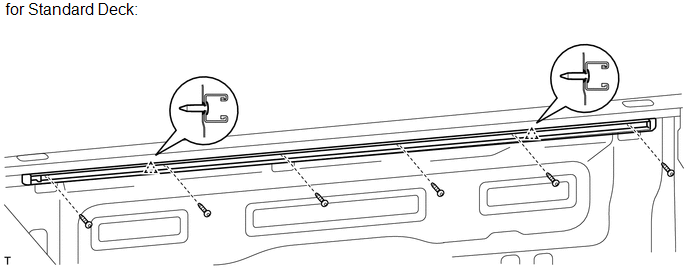
(a) for Standard Deck:
Remove the rear side panel top rail.
(1) Using a T30 "TORX" socket, remove the 6 bolts.
(2) Detach the 2 clips and remove the rail.
(b) for Long Deck:
Remove the rear side panel top rail.
(1) Using a T30 "TORX" socket, remove the 8 bolts.
(2) Detach the 2 clips and remove the rail.
(c) for CrewMax:
Remove the rear side panel top rail.
(1) Using a T30 "TORX" socket, remove the 5 bolts.
(2) Detach the 2 clips and remove the rail.
2. REMOVE REAR SIDE PANEL TOP RAIL RH
HINT:
Use the same procedures described for the LH side.
3. REMOVE UPPER HEADER BOARD RAIL
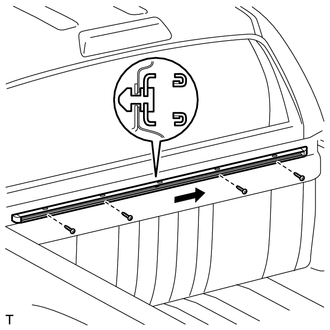
(a) Using a T30 "TORX" socket, remove the 4 bolts.
(b) Slide the rail in the direction shown in the illustration to remove it.