Engine Oil Cooler
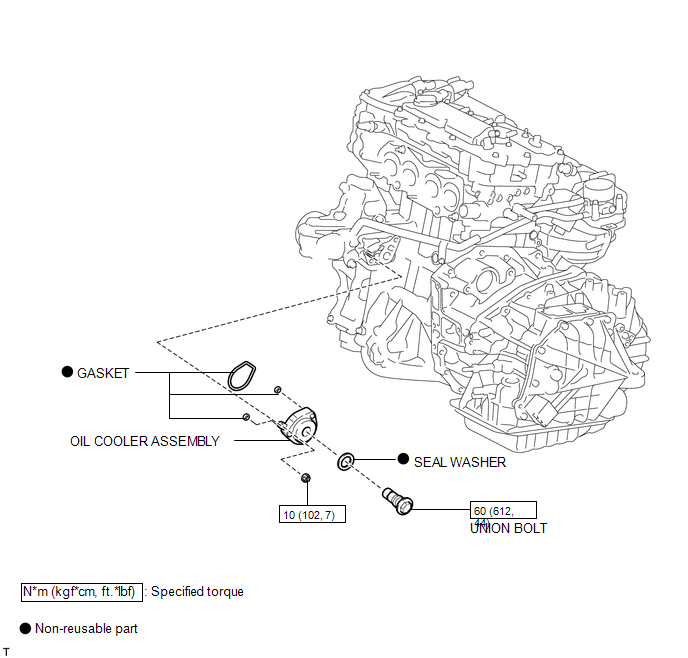
Removal REMOVAL PROCEDURE
1. REMOVE EXHAUST MANIFOLD ASSEMBLY
HINT:
See page 
2. DRAIN ENGINE OIL
3. DRAIN ENGINE COOLANT
4. REMOVE OIL COOLER ASSEMBLY
(a) Remove the nut, union bolt, seal washer and oil cooler assembly. |
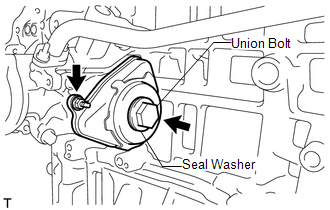 |
(b) Remove the 3 gaskets from the oil cooler assembly.
Inspection INSPECTION PROCEDURE1. INSPECT ENGINE OIL COOLER
(a) Visually check the engine oil cooler for cracks or damage.
If cracks or damage are found, replace the engine oil cooler.
Installation INSTALLATION PROCEDURE1. INSTALL OIL COOLER ASSEMBLY
(a) Clean the oil cooler contact surface on the cooler mounting.
(b) Apply a light coat of engine oil to 3 new gaskets.
(c) Install the 3 new gaskets to the oil cooler assembly.
(d) Temporarily install the oil cooler assembly with the union bolt, nut and a new seal washer.
(e) Tighten the bolt and nut in several steps, in the sequence shown in the illustration. Torque: Union Bolt : 60 N·m {612 kgf·cm, 44 ft·lbf} Nut : 10 N·m {102 kgf·cm, 7 ft·lbf} |
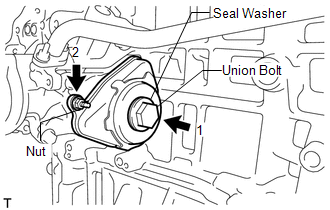 |
2. INSTALL EXHAUST MANIFOLD ASSEMBLY
HINT:
See page 
3. ADD ENGINE OIL
4. ADD ENGINE COOLANT
5. INSPECT FOR OIL LEAK
6. INSPECT ENGINE OIL LEVEL
Test yourself
A quick Toyota Venza quiz: every answer comes with an explanation and a link to the manual page.