Oil Pressure Switch
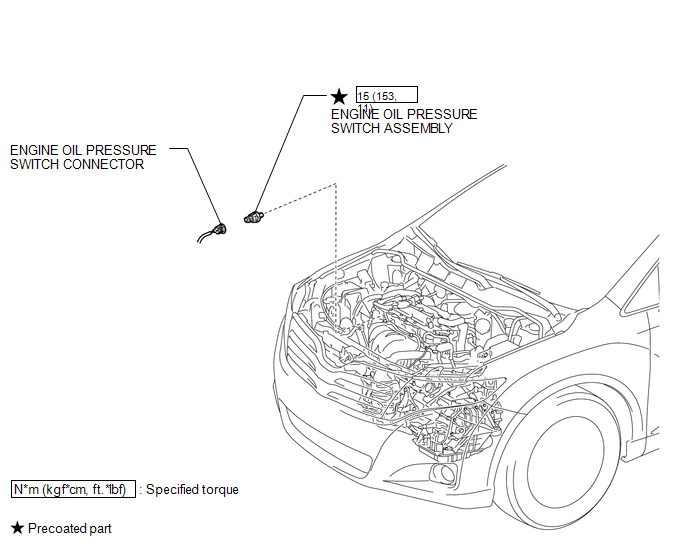
Inspection INSPECTION PROCEDURE
1. INSPECT ENGINE OIL PRESSURE SWITCH ASSEMBLY
(a) Disconnect the oil pressure switch connector.
(b) Start the engine.
(c) Measure the resistance according to the value(s) in the table below. Standard Resistance:
If the result is not as specified, replace the oil pressure switch assembly. |
 |
1. REMOVE ENGINE OIL PRESSURE SWITCH ASSEMBLY
(a) Disconnect the oil pressure switch connector. |
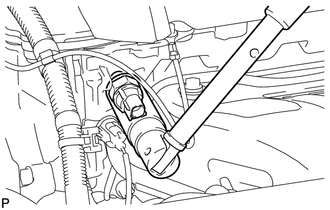 |
(b) Using a 24 mm deep socket wrench, remove the oil pressure switch.
Installation INSTALLATION PROCEDURE1. INSTALL ENGINE OIL PRESSURE SWITCH ASSEMBLY
(a) Apply adhesive to 2 or 3 threads of the oil pressure switch. Adhesive: TOYOTA Genuine Adhesive 1344, Three Bond 1344 or equivalent. NOTICE: Do not let adhesive adhere to the oil hole. |
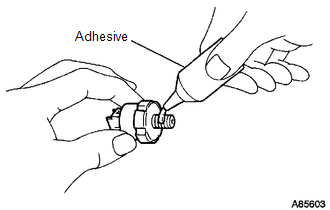 |
(b) Using a 24 mm deep socket wrench, install the oil pressure switch. Torque: 15 N·m {153 kgf·cm, 11 ft·lbf} NOTICE: Do not start the engine within 1 hour of installation. |
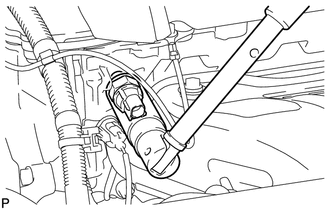 |
(c) Connect the oil pressure switch connector.
2. INSPECT FOR OIL LEAK

3. INSPECT ENGINE OIL LEVEL
Test yourself
A quick Toyota Venza quiz: every answer comes with an explanation and a link to the manual page.