Front Passenger Side Power Window Switch
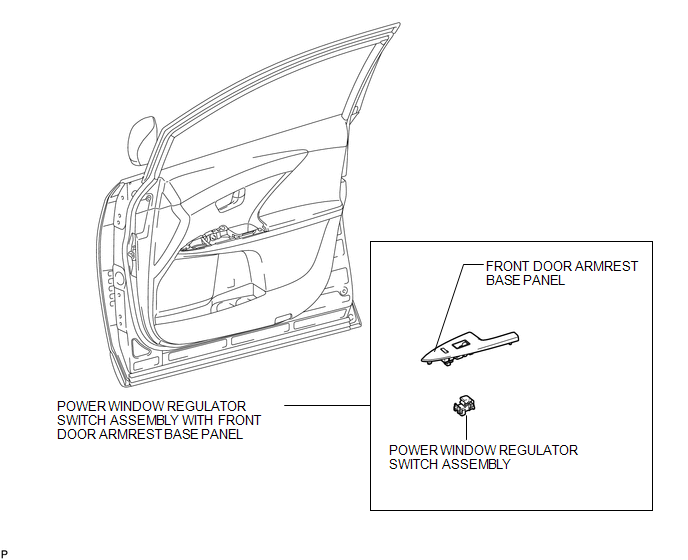
Removal REMOVAL PROCEDURE
1. REMOVE POWER WINDOW REGULATOR SWITCH ASSEMBLY WITH FRONT DOOR ARMREST BASE PANEL
(a) Using a moulding remover, disengage the 2 clips and 4 claws. |
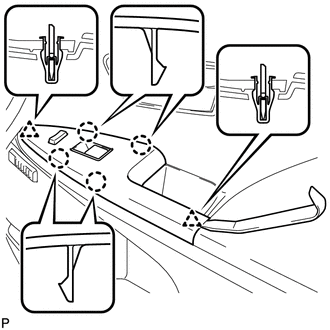 |
(b) Disconnect the connector and remove the power window regulator switch assembly with front door armrest base panel.
2. REMOVE POWER WINDOW REGULATOR SWITCH ASSEMBLY
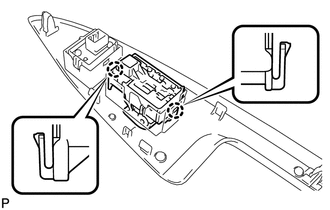
(a) Disengage the 2 claws and remove the power window regulator switch assembly. |
 |
1. INSPECT POWER WINDOW REGULATOR SWITCH ASSEMBLY
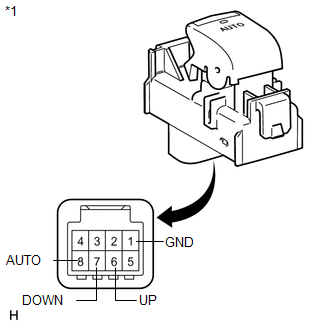
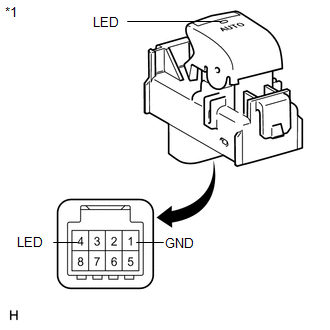
(a) Check the switch function. (1) Measure the resistance according to the value(s) in the table below. Standard Resistance:
If the result is not as specified, replace the power window regulator switch assembly (for front passenger side). |
 |
(b) Check that the LED illuminates. (1) Apply battery voltage to the power window regulator switch assembly and check that the LED illuminates. OK:
If the result is not as specified, replace the power window regulator switch assembly (for front passenger side). |
 |
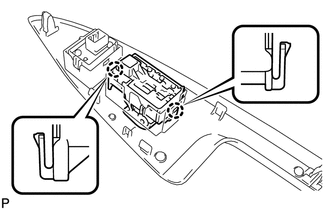
1. INSTALL POWER WINDOW REGULATOR SWITCH ASSEMBLY
(a) Engage the 2 claws to install the power window regulator switch assembly. |
 |
2. INSTALL POWER WINDOW REGULATOR SWITCH ASSEMBLY WITH FRONT DOOR ARMREST BASE PANEL
(a) Connect the connector. |
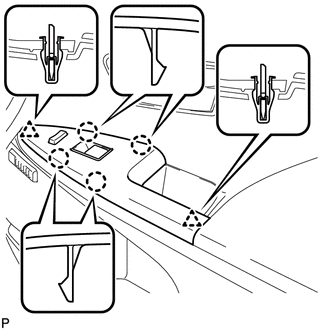 |
(b) Engage the 2 clips and 4 claws, and install the power window regulator switch assembly with front door armrest base panel.
Test yourself
A quick Toyota Venza quiz: every answer comes with an explanation and a link to the manual page.