Rear Center Seat Inner Belt Assembly
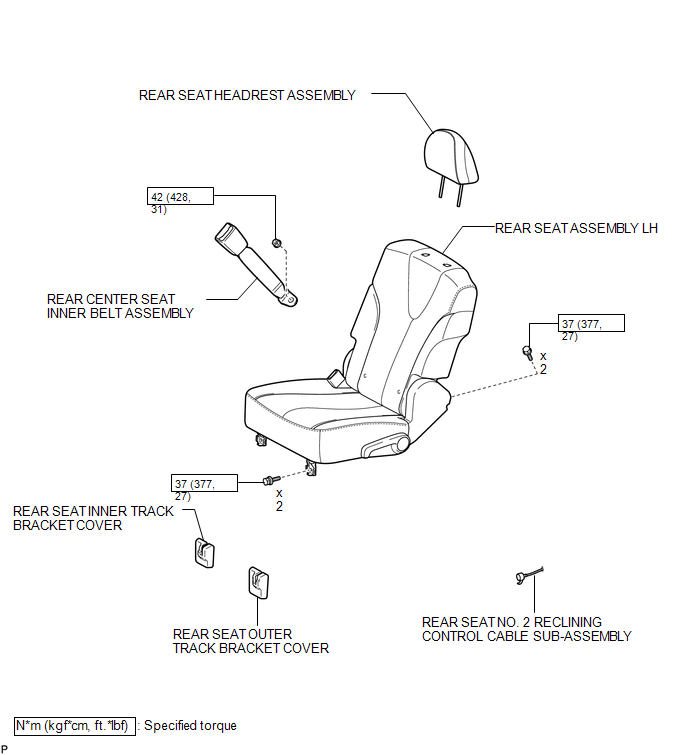
Removal REMOVAL PROCEDURE
1. REMOVE REAR SEAT HEADREST ASSEMBLY

2. REMOVE REAR SEAT INNER TRACK BRACKET COVER
3. REMOVE REAR SEAT OUTER TRACK BRACKET COVER
4. DISCONNECT REAR SEAT NO. 2 RECLINING CONTROL CABLE SUB-ASSEMBLY
5. REMOVE REAR SEAT ASSEMBLY LH
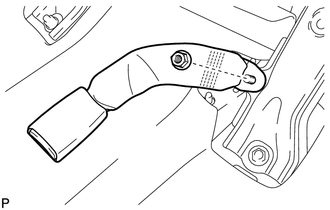
6. REMOVE REAR CENTER SEAT INNER BELT ASSEMBLY
(a) Remove the nut and the rear center seat inner belt assembly. |
 |
1. INSTALL REAR CENTER SEAT INNER BELT ASSEMBLY
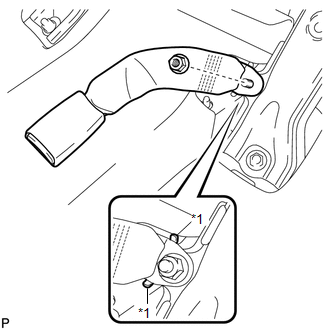
(a) Install the rear center seat inner belt assembly with the nut. Text in Illustration
Torque: 42 N·m {428 kgf·cm, 31 ft·lbf} NOTICE: Do not allow the anchor part of the rear seat outer belt assembly to overlap the protruding part of the floor panel. |
 |
2. INSTALL REAR SEAT ASSEMBLY LH

3. CONNECT REAR SEAT NO. 2 RECLINING CONTROL CABLE SUB-ASSEMBLY
4. INSTALL REAR SEAT INNER TRACK BRACKET COVER
5. INSTALL REAR SEAT OUTER TRACK BRACKET COVER
6. INSTALL REAR SEAT HEADREST ASSEMBLY
Test yourself
A quick Toyota Venza quiz: every answer comes with an explanation and a link to the manual page.