Reassembly
1. INSTALL NO. 1 SUNSHADE TRIM SUB-ASSEMBLY
(a) Slide and install the No. 1 sunshade trim sub-assembly. |
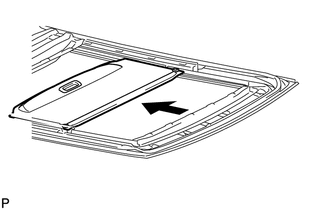 |
2. INSTALL NO. 2 SUNSHADE TRIM SUB-ASSEMBLY
(a) Slide and install the No. 2 sunshade trim sub-assembly. |
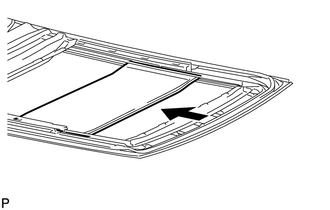 |
3. INSTALL NO. 3 SUNSHADE TRIM SUB-ASSEMBLY
(a) Slide and install the No. 3 sunshade trim sub-assembly. |
 |
4. INSTALL NO. 4 SUNSHADE TRIM SUB-ASSEMBLY
(a) Slide and install the No. 4 sunshade trim sub-assembly. |
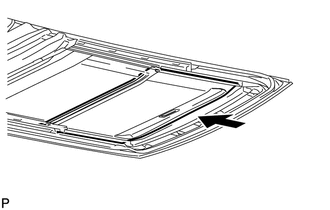 |
(b) Install the front sliding roof sunshade stopper LH with the screw. HINT: Use the same procedure for the RH side and the LH side. |
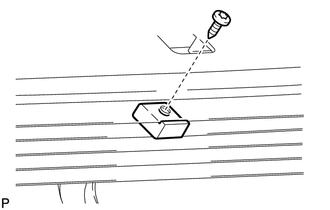 |
(c) Install the center sliding roof sunshade stopper LH with the screw. HINT: Use the same procedure for the RH side and the LH side. |
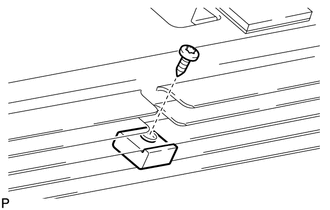 |
(d) Install the rear sliding roof sunshade stopper LH with the screw. HINT: Use the same procedure for the RH side and the LH side. |
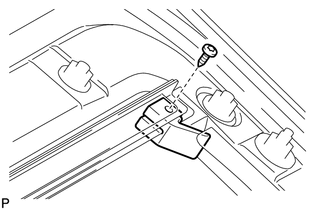 |
5. INSTALL SLIDING ROOF HOUSING CENTER FRAME
(a) Install the sliding roof housing center frame with the 2 nuts. Torque: 7 N·m {71 kgf·cm, 62 in·lbf} |
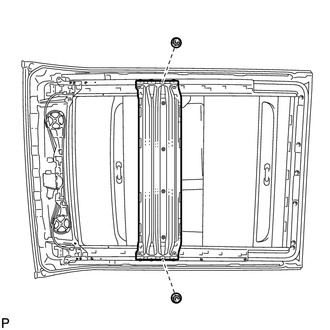 |
Test yourself
A quick Toyota Venza quiz: every answer comes with an explanation and a link to the manual page.