Removal
CAUTION:
- Wear protective gloves when removing the exhaust pipe.
- The exhaust pipe is extremely hot immediately after the engine has stopped.
- Confirm that the exhaust pipe has cooled down before removing it.
1. REMOVE NO. 1 ENGINE UNDER COVER
2. REMOVE NO. 2 ENGINE UNDER COVER
3. REMOVE FRONT EXHAUST PIPE ASSEMBLY
(a) Disconnect the heated oxygen sensor connector. |
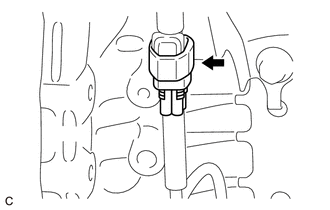 |
(b) Remove the 4 bolts, 2 compression springs and front exhaust pipe assembly from the exhaust manifold converter sub-assembly and center exhaust pipe assembly. |
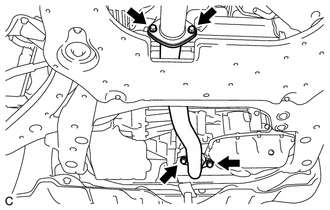 |
(c) Remove the 2 gaskets from the exhaust manifold converter sub-assembly and center exhaust pipe assembly.
4. REMOVE AIR FUEL RATIO SENSOR

5. REMOVE MANIFOLD STAY
(a) Remove the bolt, nut and manifold stay from the exhaust manifold converter sub-assembly and stiffening crankcase assembly. |
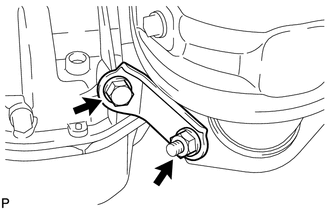 |
6. REMOVE NO. 2 MANIFOLD STAY
(a) Remove the bolt, nut and No. 2 manifold stay from the exhaust manifold converter sub-assembly and stiffening crankcase assembly. |
 |
7. REMOVE NO. 1 EXHAUST MANIFOLD HEAT INSULATOR
(a) Remove the 4 bolts and No. 1 exhaust manifold heat insulator from the exhaust manifold converter sub-assembly. |
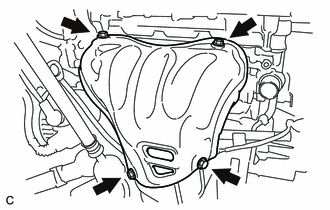 |
8. REMOVE EXHAUST MANIFOLD CONVERTER SUB-ASSEMBLY
(a) Remove the 5 nuts and exhaust manifold converter sub-assembly from the cylinder head sub-assembly. |
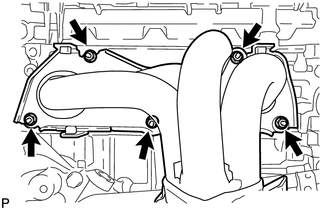 |
(b) Remove the gasket from the cylinder head sub-assembly. |
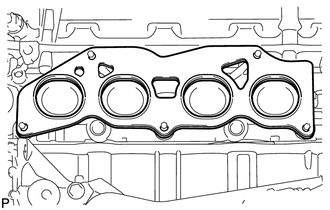 |
9. REMOVE NO. 2 EXHAUST MANIFOLD HEAT INSULATOR
(a) Remove the 2 bolts and No. 2 exhaust manifold heat insulator from the exhaust manifold converter sub-assembly. |
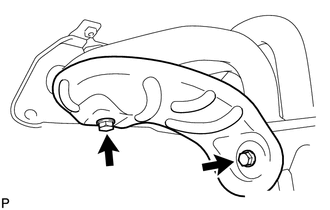 |
10. REMOVE NO. 1 MANIFOLD CONVERTER INSULATOR
(a) Remove the 4 bolts and No. 1 manifold converter insulator from the exhaust manifold converter sub-assembly. |
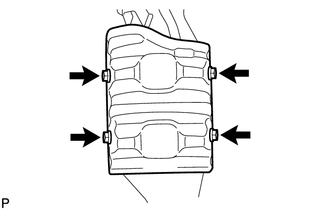 |
Test yourself
A quick Toyota Venza quiz: every answer comes with an explanation and a link to the manual page.