Transfer Case Rear Oil Seal
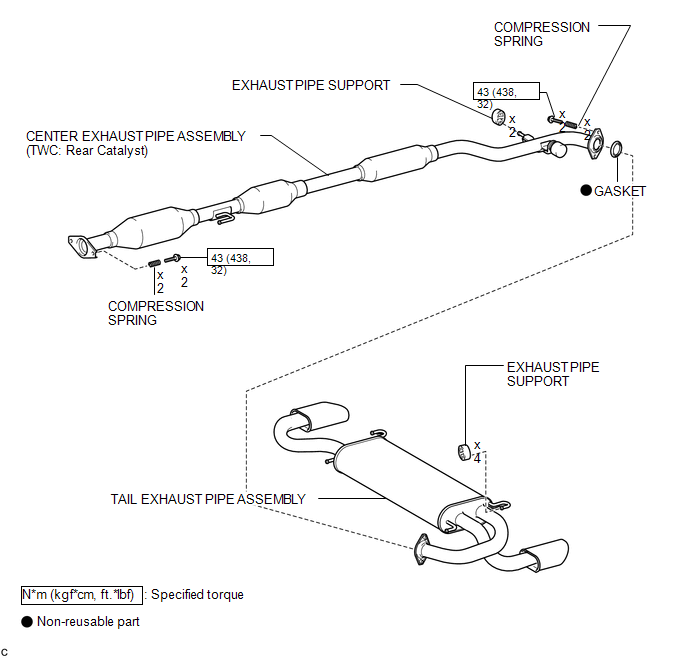
ILLUSTRATION
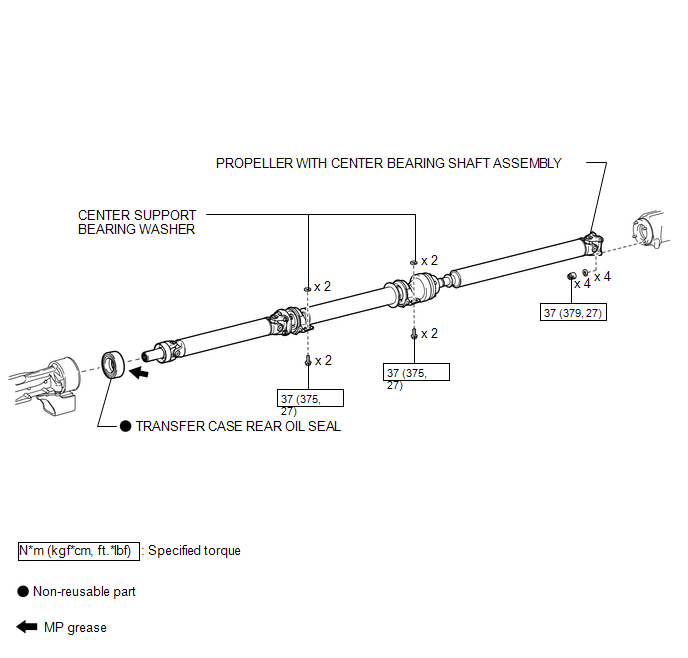
Replacement REPLACEMENT PROCEDURE
1. REMOVE TAIL EXHAUST PIPE ASSEMBLY

2. REMOVE CENTER EXHAUST PIPE ASSEMBLY
3. REMOVE PROPELLER WITH CENTER BEARING SHAFT ASSEMBLY
4. REMOVE TRANSFER CASE REAR OIL SEAL
(a) Using SST, remove the transfer case rear oil seal from the transfer extension housing sub-assembly. SST: 09308-00010 NOTICE: Be careful not to damage the oil seal contact surface or the inside surface of the oil seal. |
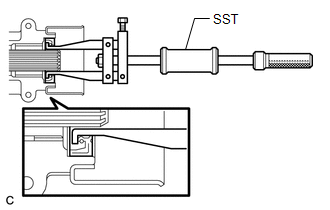 |
5. INSTALL TRANSFER CASE REAR OIL SEAL
(a) Using SST and a hammer, drive in a new transfer case rear oil seal into the transfer extension housing sub-assembly until it reaches the position shown in the illustration. SST: 09325-20010 Drive in depth: 1.1 to 1.9 mm (0.0433 to 0.0748 in.) NOTICE: Do not tilt the oil seal during installation. |
 |
(b) Apply a small amount of MP grease to the lip of the oil seal.
6. TEMPORARILY TIGHTEN PROPELLER WITH CENTER BEARING SHAFT ASSEMBLY
7. FULLY TIGHTEN PROPELLER WITH CENTER BEARING SHAFT ASSEMBLY
8. INSTALL CENTER EXHAUST PIPE ASSEMBLY
9. INSTALL TAIL EXHAUST PIPE ASSEMBLY
10. INSPECT TRANSFER OIL
11. INSPECT EXHAUST GAS LEAK
Test yourself
A quick Toyota Venza quiz: every answer comes with an explanation and a link to the manual page.