Washer Nozzle(for Rear Side)

On-vehicle Inspection ON-VEHICLE INSPECTION PROCEDURE
1. INSPECT REAR WASHER NOZZLE
(a) With the engine running, check where the washer fluid hits the windshield.
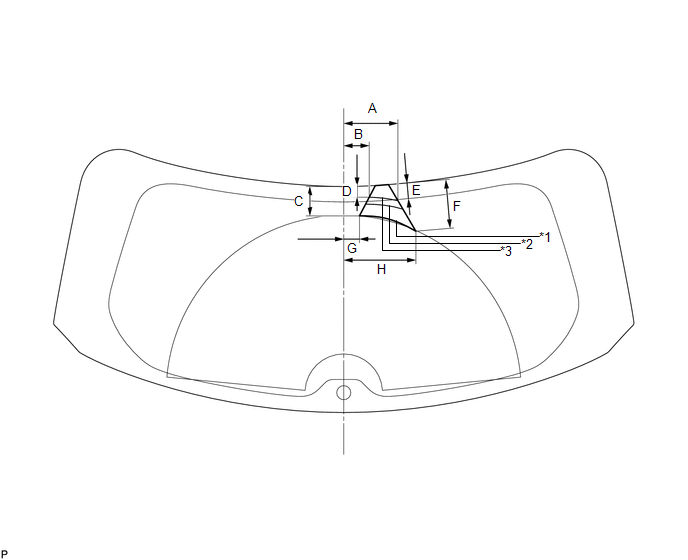 Standard Measurement
Area | Dimension | Area | Dimension |
|---|---|---|---|
A |
134.4 mm (5.29 in.) |
B |
63.5 mm (2.50 in.) |
C |
75.4 mm (2.97 in.) |
D |
28.2 mm (1.11 in.) |
E |
38.1 mm (1.50 in.) |
F |
120 mm (4.72 in.) |
G |
38.7 mm (1.52 in.) |
H |
180.1 mm (7.09 in.) |
*1 |
Minimum Spray |
*2 |
Maximum Spray |
*3 |
Nominal Spray |
- |
- |
OK:
Washer fluid hits the windshield in the area shown in the illustration.
Adjustment ADJUSTMENT PROCEDURE1. ADJUST REAR WASHER NOZZLE
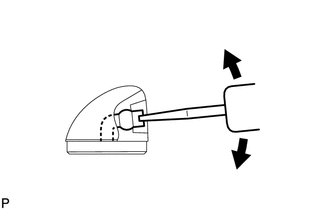
(a) Using a screwdriver, adjust the direction of the rear washer nozzle. NOTICE: Do not use a safety pin or other pointed tools. Doing so may damage the inside of the washer nozzle. HINT: Use a thin-bladed screwdriver with an approximately 1 mm (0.0394 in.) thick tip. |
 |
1. REMOVE UPPER BACK WINDOW PANEL TRIM

2. REMOVE REAR SPOILER ASSEMBLY
3. REMOVE REAR WASHER NOZZLE
(a) Disconnect the washer hose. |
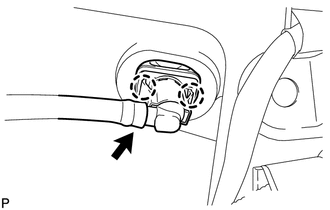 |
(b) Disengage the 2 claws and remove the rear washer nozzle.
Installation INSTALLATION PROCEDURE1. INSTALL REAR WASHER NOZZLE
(a) Engage the 2 claws to install the rear washer nozzle. |
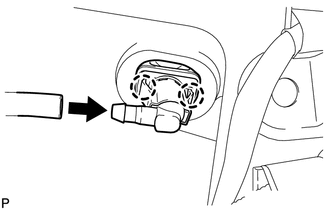 |
(b) Connect the washer hose.
2. INSPECT REAR WASHER NOZZLE

3. ADJUST REAR WASHER NOZZLE
4. INSTALL REAR SPOILER ASSEMBLY
5. INSTALL UPPER BACK WINDOW PANEL TRIM
Test yourself
A quick Toyota Venza quiz: every answer comes with an explanation and a link to the manual page.