Seam Sealing, Body Rear
Note
- When repairing, seam sealing is to be replicated according to its original conditions in appearance and layer thickness.
- Sealing seams near attachments to be installed must be applied smoothly In order to avoid damage and malfunctions.
- Water drain holes must remain free.
- All threaded pins and weld nuts with M-threads, as well as all other pins and contact surfaces for the assembly must be functional after the sealant application.
- The sealing material cannot be applied on blank but rather on filled surfaces.
Rear Underbody Seam Sealing
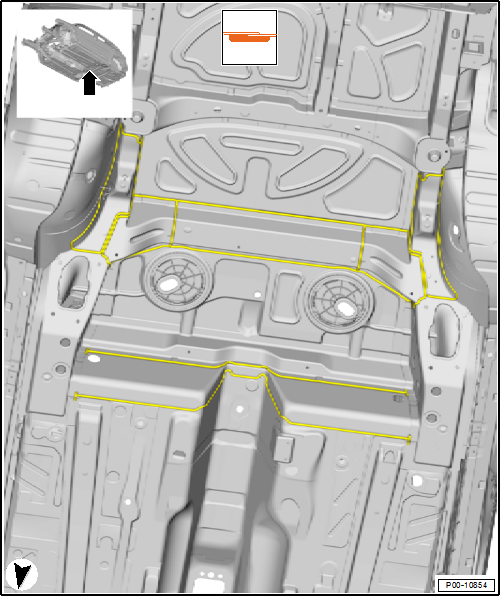
- Coarse Seam Sealing
- For coarse seam sealing, the projection must be a total 8 mm and a height of 2 mm must be ensured.
Rear Underbody Seam Sealing
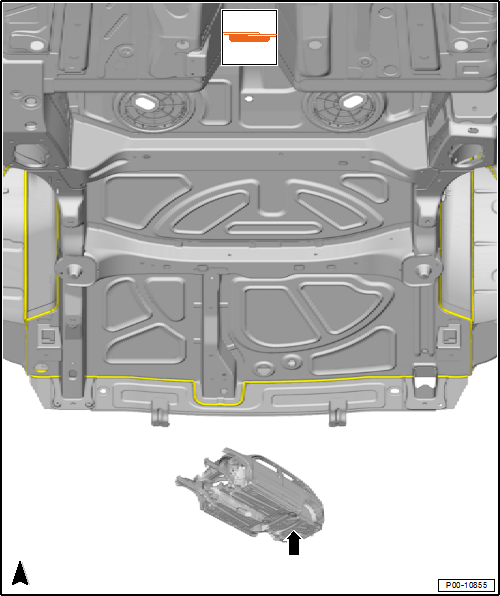
- Coarse Seam Sealing
- For coarse seam sealing, the projection must be a total 8 mm and a height of 2 mm must be ensured.
Rear Lid Exterior View Seam Seal
Left side shown, right side is a mirror image
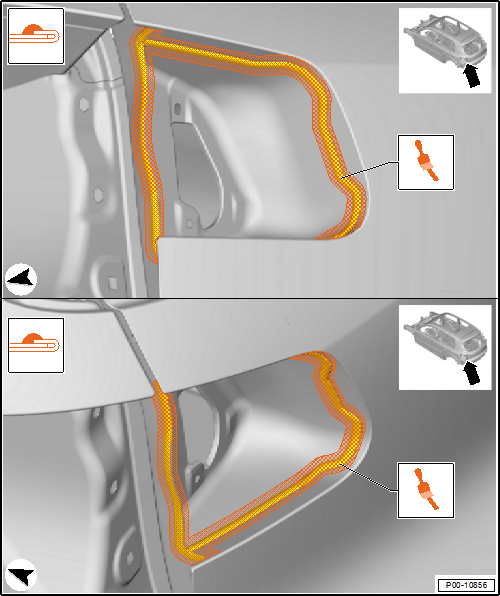
- Fine Seam Sealing
- For fine seam sealing, the projection of the sealant must be least 3 mm in diameter and a height of 0.5 mm must be ensured.
- Spreading the Seal
- After applying the sealant in the designated area it must be spread.
Note
Make sure that the protected areas do not become uncovered when spreading the seal seam. Enough PVC layer must cover the panel.
Rear Lid Seam Seal, Interior View
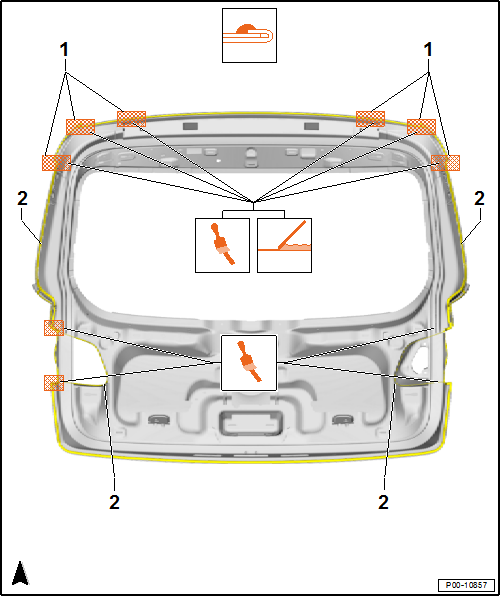
- Fine Seam Sealing
- For fine seam sealing, the projection of the sealant must be least 3 mm in diameter and a height of 0.5 mm must be ensured.
- Smoothing the Seal
- The designated area must be smoothed after applying sealant.
- Spreading the Seal
- After applying the sealant in the designated area it must be spread.
- Smoothing or Spreading is Permitted in the Marked Areas.
- The Seal Runs all Around in the Marked Areas
Rear Lid End Seam Seal in the Sealing Channel Area
Left side shown, right side is a mirror image
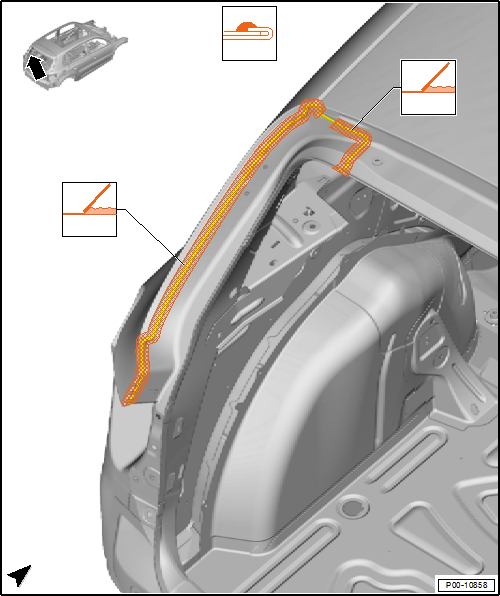
- Fine Seam Sealing
- For fine seam sealing, the projection of the sealant must be least 3 mm in diameter and a height of 0.5 mm must be ensured.
- Smoothing the Seal
- The designated area must be smoothed after applying sealant.
Note
Make sure that the protected areas do not become uncovered when smoothing the seam seal. Enough PVC layer must cover the panel.
Left Rear Side Panel Seam Seal
Left side shown, right side is a mirror image
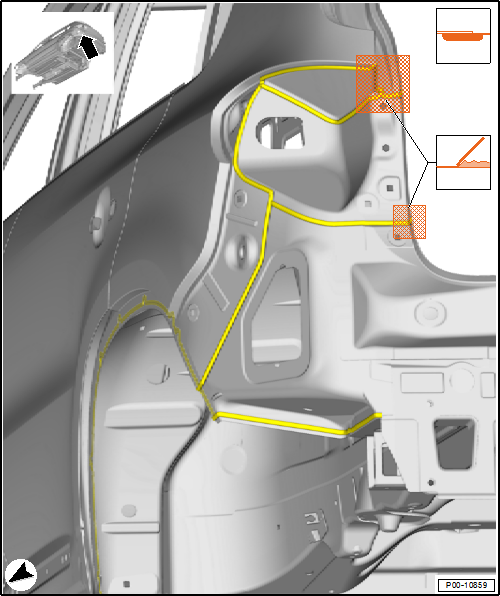
- Coarse Seam Sealing
- For coarse seam sealing, the projection must be a total 8 mm and a height of 2 mm must be ensured.
- Smoothing the Seal
- The designated area must be smoothed after applying sealant.
Note
Make sure that the protected areas do not become uncovered when smoothing the seam seal. Enough PVC layer must cover the panel.
Seal in the Rear Lid End Area
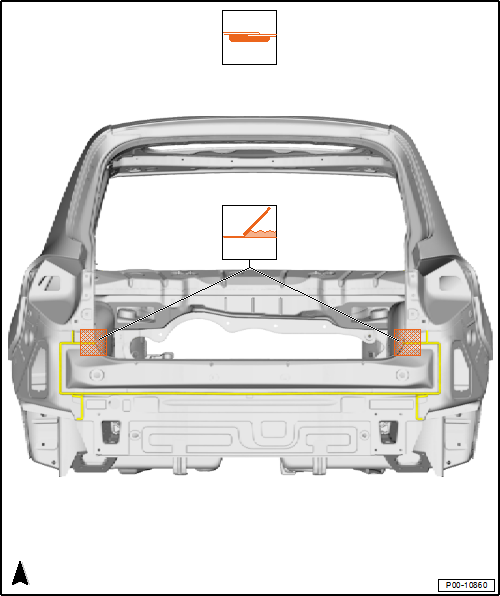
- Coarse Seam Sealing
- For coarse seam sealing, the projection must be a total 8 mm and a height of 2 mm must be ensured.
- Smoothing the Seal
- The designated area must be smoothed after applying sealant.
Note
Make sure that the protected areas do not become uncovered when smoothing the seam seal. Enough PVC layer must cover the panel.
Seam Seal in Left Rear Wheel Housing
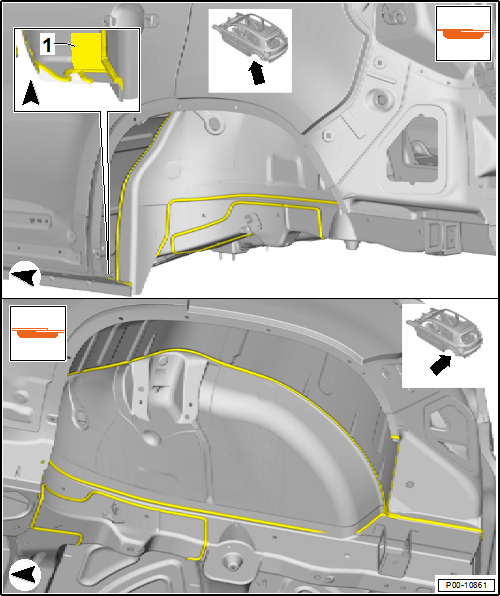
- Coarse Seam Sealing
- For coarse seam sealing, the projection must be a total 8 mm and a height of 2 mm must be ensured.
- Flat Seam Sealing
Right Rear Wheel Housing Seam Seal
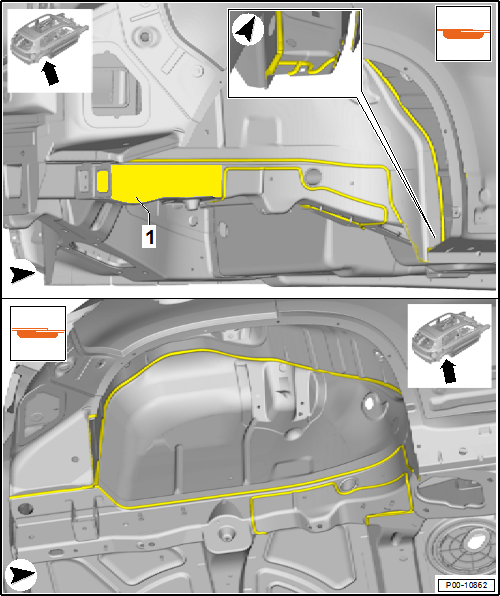
- Coarse Seam Sealing
- For coarse seam sealing, the projection must be a total 8 mm and a height of 2 mm must be ensured.
- Flat Seam Sealing
Inner Left Rear Wheel Housing Seam Seal
Left side shown, right side is a mirror image
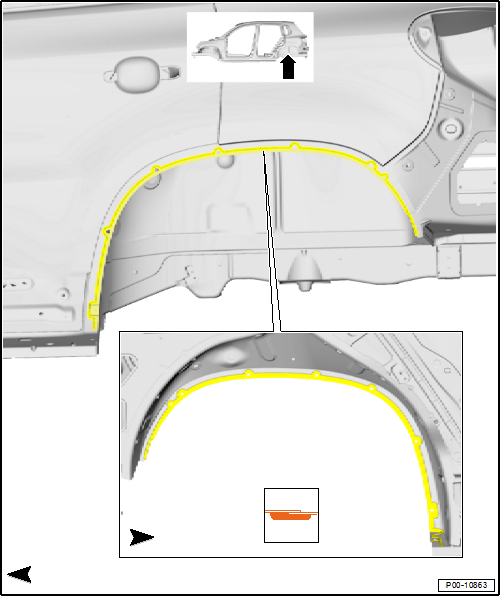
- Coarse Seam Sealing
- For coarse seam sealing, the projection must be a total 8 mm and a height of 2 mm must be ensured.
Seam Sealing in Fuel Filler Neck Area
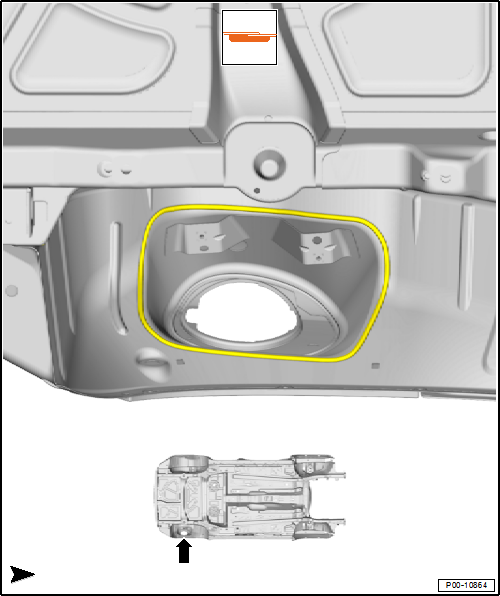
- Coarse Seam Sealing
- For coarse seam sealing, the projection must be a total 8 mm and a height of 2 mm must be ensured.
Test yourself
A quick Volkswagen Tiguan quiz: every answer comes with an explanation and a link to the manual page.