Chassis
Installing the front brake caliper
In this manual: Chassis
~2min read
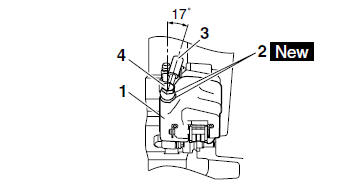
1. Install:
- Brake caliper "1" (temporarily)
- Copper washers "2"

- Brake hose "3"
- Brake hose union bolt "4"

Proper brake hose routing is essential to insure safe vehicle operation. Refer to "CABLE ROUTING" on page 2-33.
CAUTION:- Install the brake hose at a 17 angle to the front brake caliper as shown in the illustration.
- While holding the brake hose, tighten the union bolt.
2. Remove:
- Brake caliper
3. Install:
- Brake pad spring
- Brake pads
- Brake caliper
- Brake hose holder
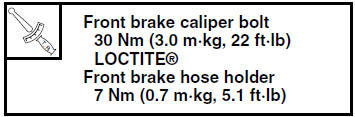
Refer to "REPLACING THE FRONT BRAKE PADS" on page 4-22.
4. Fill:
- Brake master cylinder reservoir (with the specified amount of the recommended brake fluid)

- Use only the designated brake fluid. Other brake fluids may cause the rubber seals to deteriorate, causing leakage and poor brake performance.
- Refill with the same type of brake fluid that is already in the system. Mixing brake fluids may result in a harmful chemical reaction, leading to poor brake performance.
- When refilling, be careful that water does not enter the brake master cylinder reservoir.
Brake fluid may damage painted surfaces and plastic parts. Therefore, always clean up any spilt brake fluid immediately.
5. Bleed:
- Brake system Refer to "BLEEDING THE HYDRAULIC BRAKE SYSTEM" on page 3-20.
6. Check:
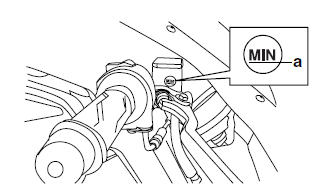
- Brake fluid level Below the minimum level mark "a"

Add the recommended brake fluid to the proper level.
7. Check:
Brake lever operation Soft or spongy feeling → Bleed the brake system.
Refer to "BLEEDING THE HYDRAULIC BRAKE SYSTEM" on page 3-20.
Test yourself
A quick Yamaha YZF-R125 quiz: every answer comes with an explanation and a link to the manual page.
Was this page helpful?