Wheel Speed Sensor R&R
Front
|
Rear
- Raise and support the vehicle.
- Remove the tire and wheel.
- Remove the park brake shoes.
- Disconnect wheel speed sensor electrical connector.
- Remove wheel speed sensor bolt, Fig. 2.
- Release the wheel speed sensor electrical harness grommet from the backing plate, Fig. 2.
- Route the wheel speed sensor electrical harness through the backing plate, Fig. 2.
- Reverse procedure to install. Torque rear wheel speed sensor bolt to 71 inch lbs.
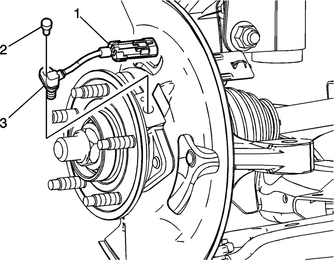
Fig. 1
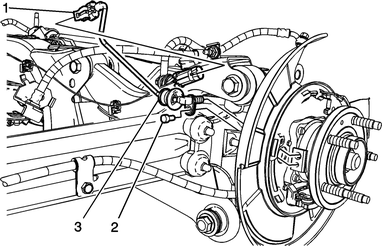
Fig. 2
Replacing the wheel speed sensor in a Chevrolet Captiva 2012 - 2014 involves a straightforward process that can be completed with basic tools. Begin by parking the vehicle on a flat surface, turning off the engine, and ensuring the parking brake is engaged. Use a jack to lift the vehicle and secure it with jack stands. Remove the wheel to access the wheel speed sensor.Locate the wheel speed sensor, typically found near the brake assembly. Use a socket set to remove the bolt securing the sensor to the hub. Gently disconnect the electrical connector from the sensor. Carefully remove the old sensor from its position. Install the new wheel speed sensor by connecting the electrical connector first, then securing it with the bolt. Ensure it is firmly in place and properly aligned. Reattach the wheel, lower the vehicle, and test drive to ensure the sensor is functioning correctly. This process ensures accurate wheel speed readings, which are crucial for the vehicle's ABS and traction control systems.
Test yourself
A quick Chevrolet Captiva quiz: every answer comes with an explanation and a link to the manual page.