Chevrolet Cruze Repair Manual
Removal Procedure
In this manual: Chevrolet Cruze Repair Manual
9steps
~54min
2/5difficulty
Done 0 of 9
Warning: Refer to Approved Equipment for Collision Repair Warning in the Preface section.
Warning: Refer to Glass and Sheet Metal Handling Warning in the Preface section.
- Disable the SIR System. Refer to SIR Disabling and Enabling.
- Disconnect the negative battery cable. Refer to Battery Negative Cable Disconnection and Connection.
- Remove all related panels and components.
- Visually inspect the damage. Repair as much of the damage as possible.
- Remove the sealers and anti-corrosion materials from the repair area, as necessary. Refer to Anti-Corrosion Treatment and Repair.
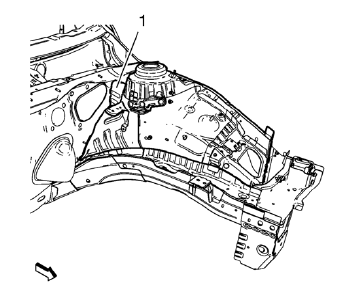
Note: Front wheelhouse rear panel brace (1) remains to the body.
- Locate and mark all the necessary factory welds of the front wheelhouse.
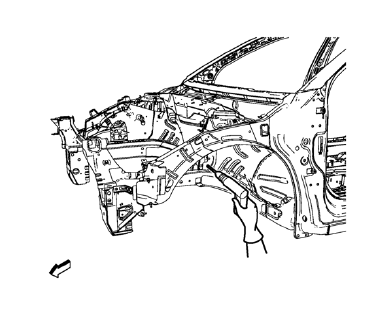
- Drill all factory welds. Note the number and location of welds for installation of the service assembly.
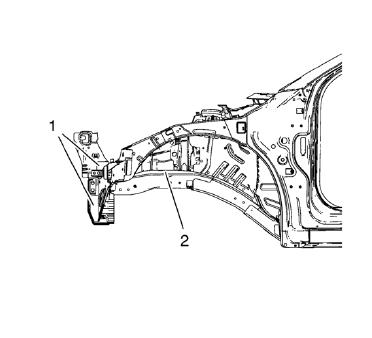
- Cut the adhesive in the front area (1) and where the front wheelhouse and the front compartment side rail overlap (2) with an appropriate tool.
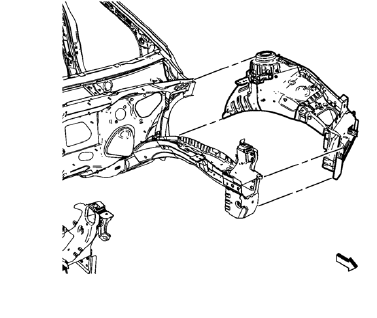
- Remove the front wheelhouse.
Test yourself
A quick Chevrolet Cruze quiz: every answer comes with an explanation and a link to the manual page.
Was this page helpful?