Body and Paint
Removal and Installation — Liftgate
In this manual: Body and Paint
10steps
~60min
3/5difficulty
Done 0 of 10
Removal
- Remove the liftgate trim panel.
Refer to: Liftgate Trim Panel (501-05 Interior Trim and Ornamentation, Removal and Installation). - Remove the D-pillar trim panel.
Refer to: D-Pillar Trim Panel (501-05 Interior Trim and Ornamentation, Removal and Installation).
Refer to: D-Pillar Trim Panel - Police (501-05 Interior Trim and Ornamentation, Removal and Installation). - Remove the following components:
- Disconnect the electrical connectors.
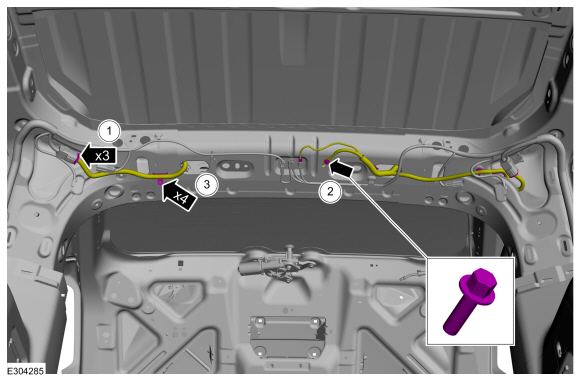
- Remove the bolt.
- Disconnect the wiring harness retainers and route the wiring harness through the liftgate.
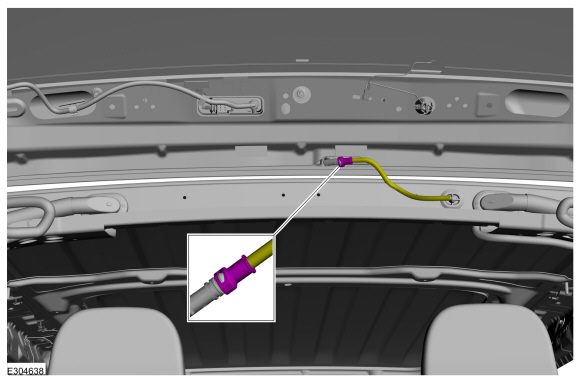
- Disconnect the rear wiper washer hose connector.
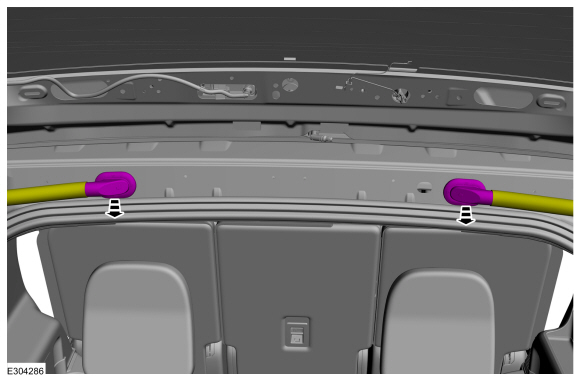
- Remove the grommet and route the wiring harness out of the liftgate.
- Mark the location of the liftgate hinge bolts.
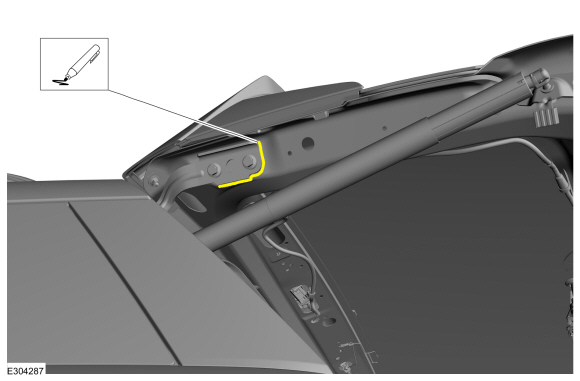
- On both sides.
Remove the clips retaining the liftgate struts or the liftgate power motor and set them aside.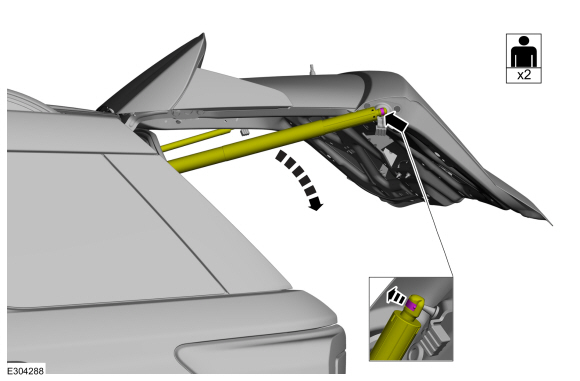
- Remove the liftgate bolts and remove the liftgate from the vehicle.
Torque: 22 lb-ft (30 N·m)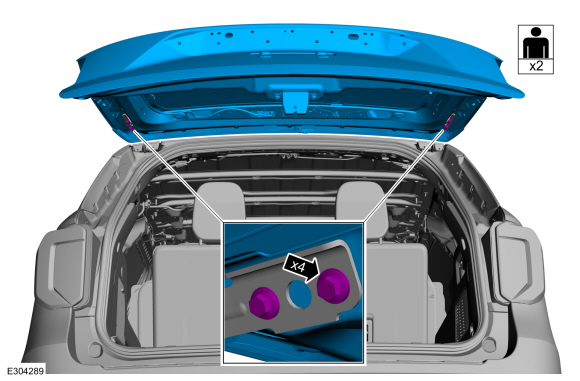
Installation
- To install, reverse the removal procedure.
- If necessary, align the liftgate.
Refer to: Liftgate Alignment (501-03 Body Closures, General Procedures).
Power Liftgate Vehicles
- Perform the power liftgate initialization.
Refer to: Power Liftgate Initialization (501-03 Body Closures, General Procedures).
Test yourself
A quick Ford Explorer quiz: every answer comes with an explanation and a link to the manual page.
Was this page helpful?