Installation
Engine
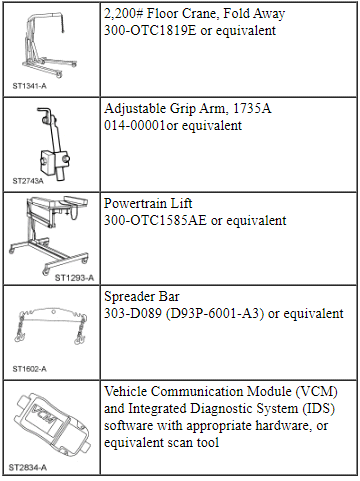
Special Tool(s)
Material
All vehicles
- Using the Floor Crane and Spreader Bar, align the transaxle to the engine.
- Install the 5 transaxle-to-engine bolts.
- Tighten to 48 N·m.
- Install the 2 engine-to-transaxle bolts.
- Tighten to 48 N·m.
- Using the Floor Crane and Spreader Bar, position the engine and transaxle onto the Powertrain Lift table.
- NOTE: Position a block of wood under the transaxle.
Install the Powertrain Lift and Adjustable Grip Arms.
- Attach the 2 EPAS wiring harness retainers to the transaxle.
- Attach the transaxle control wire harness retainer to the transaxle stud bolt.
- Connect the transaxle control electrical connector.
- Install the starter, the stud bolt and bolt.
- Tighten to 27 N·m.
- Connect the wiring harness retainer to the starter motor stud bolt.
- Attach the starter wire terminals and install the 2 nuts.
- Tighten the B+ terminal nut to 12 N·m.
- Tighten the S-terminal nut to 5 N·m.
- Install the starter motor solenoid cover.
- Using the Powertrain Lift and Adjustable Grip Arms, raise the engine and transaxle assembly into the vehicle.
- Install the engine mount and the 3 bolts.
- Tighten to 90 N·m.
- Install the 4 engine mount nuts.
- Tighten to 63 N·m.
- Install the transaxle support insulator bracket, 3 nuts and the bolt.
- Tighten the transaxle support insulator bracket nuts to 63 N·m.
- Tighten the transaxle support insulator bolt to 80 N·m.
- Install the transaxle support insulator through bolt and nut.
- Tighten to 175 N·m.
All-Wheel Drive (AWD) vehicles
- Discard the specified component. Follow local disposal regulations.
- Install a new compression seal.
- NOTE: A new Power Transfer Unit (PTU) intermediate shaft seal and deflector must be installed whenever the intermediate shaft is removed.
Install a new PTU intermediate shaft seal and deflector. For additional information, refer to Section 308-07B.
- Position the PTU in place and install the 5 bolts.
- Tighten to 90 N·m.
- Position the PTU support bracket in place and install the 5 bolts.
- Tighten to 70 N·m.
- Install the catalytic converter - RH manifold. For additional information, refer to Section 309-00.
All vehicles
- Install the 4 oil pan-to-transaxle bolts.
- Tighten to 48 N·m.
- Install 3 new torque converter bolts by rotating the crankshaft clockwise.
- Tighten to 55 N·m.
- Install the inspection cover and the 2 fasteners.
- Connect the transaxle cooler tubes and install the 2 secondary latches.
- If equipped, connect the 2 oil cooler coolant hoses.
- Install the RH halfshaft support bracket and the 2 bolts.
- Tighten to 40 N·m.
- Install the 2 halfshaft support bracket studs.
- Tighten to 10 N·m.
- NOTICE: The circlips are unique in size and shape for each shaft. Make sure to use the specified circlip for the application or vehicle damage may occur.
Install the correct new circlip on the inboard stub shaft.
- NOTICE: The sharp edges on the stub shaft splines can slice or puncture the oil seal. Use care when inserting the stub shaft into the transmission or damage to the component may occur.
NOTE: After insertion, pull the halfshaft inner end to make sure the circlip is locked.
Push the stub shaft into the transmission so the circlip locks into the differential side gear. - Rotate the LH wheel knuckle into position and insert the LH halfshaft into the wheel hub.
- Install the intermediate and halfshaft assembly and the 2 nuts.
- Tighten to 25 N·m.
- Rotate the RH wheel knuckle into position and insert the RH halfshaft into the wheel hub.
- NOTE: Do not lubricate the engine oil filter gasket with oil.
Install a new engine oil filter.
- Tighten to 5 N·m and then rotate an additional 180 degrees.
- Install the front subframe. For additional information, refer to Section 502-00.
- Install the transaxle support insulator - anti-roll. For additional information, refer to Section 307-01A.
AWD vehicles
- Line up the index marks on the rear driveshaft to the index marks on the PTU flange made during removal and install the 4 new bolts.
- Tighten to 70 N·m.
All vehicles
- Position the RH brake hose bracket and install the bolt.
- Tighten to 30 N·m.
- NOTICE: Do not tighten the wheel hub nut with the vehicle on the ground. The nut must be tightened to specification before the vehicle is lowered onto the wheels. Wheel bearing damage will occur if the wheel bearing is loaded with the weight of the vehicle applied.
NOTE: Apply the brake to keep the halfshaft from rotating.
NOTE: LH shown, RH similar.
Using the previously removed LH and RH wheel hub nuts, seat the halfshaft.- Tighten to 350 N·m.
- Remove and discard the wheel hub nuts.
- NOTICE: The wheel hub nut contains a one-time locking chemical that is activated by the heat created when it is tightened. Install and tighten the new wheel hub nut to specification within 5 minutes of starting it on the threads. Always install a new wheel hub nut after loosening or when not tightened within the specified time or damage to the components can occur.
NOTE: Apply the brake to keep the halfshaft from rotating.
NOTE: LH shown, RH similar.
Install a new RH and LH wheel hub nut.- Tighten to 350 N·m.
- If equipped, attach the engine block heater harness to the radiator support.
- Attach the wiring harness pin-type retainer to the shift cable bracket and connect the transaxle control cable to the shift cable bracket.
- Connect the transaxle control cable to the control lever.
- Connect the upper radiator hose, lower radiator hose and 2 heater hoses to the thermostat housing.
- Install the ground wire to the RH shock tower and install the bolt.
- Tighten to 10 N·m.
- Install the engine wiring harness retainer to the bulkhead.
- Slide the wiring harness in the bulkhead.
- Make sure the wiring harness retainer tab is below the bulkhead lip.
- Connect the engine harness electrical connector.
- Attach the wiring harness retainer.
- Connect the 2 PCM electrical connectors.
- Connect the Evaporative Emission (EVAP) tube and the fuel supply tube quick connect coupling. For additional information, refer to Section 310-00.
- Connect the brake booster vacuum hose to the upper intake manifold.
- Install the degas bottle. For additional information, refer to Section 303-03.
- Connect the coolant hose to the coolant inlet pipe.
- Remove the hose clamp pliers.
- Using a new O-ring seal and gasket seal, connect the upper A/C tube to the condenser and install the nut.
- Tighten to 15 N·m.
- Connect the A/C pressure switch electrical connector.
- Using a new O-ring seal and gasket seal, connect the A/C tube and install the nut.
- Tighten to 15 N·m.
- Install the front wheels and tires. For additional information, refer to Section 204-04.
- Install the accessory drive belt. For additional information, refer to Section 303-05.
- Connect the engine wiring harness electrical connector.
- Install the ground wire cable and the retainer.
- Tighten to 10 N·m.
- Connect the 2 battery feed cables to the positive battery terminal and install the nut.
- Tighten to 5 N·m.
- Install the battery tray. For additional information, refer to Section 414-01.
- Install the engine Air Cleaner (ACL) and ACL outlet pipe. For additional information, refer to Section 303-12.
- Install the strut tower brace and the 4 nuts.
- Tighten to 35 N·m.
- Install the cowl panel grille. For additional information, refer to Section 501-02.
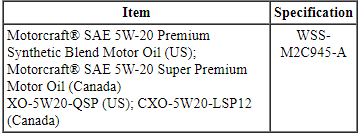
- Fill the engine with clean engine oil.
- Fill and bleed the cooling system. For additional information, refer to Section 303-03.
- If equipped, install the skid plate and the 10 retainers.
- Tighten to 70 N·m.
- If equipped, install the underbody shield and attach the 4 retainers.
- Recharge the A/C system. For additional information, refer to Section 412-00.
- After completing the repairs, use the scan tool to perform the Misfire Monitor Neutral Profile Correction procedure following the on-screen instructions.
Camshaft
Special Tool(s)

Material
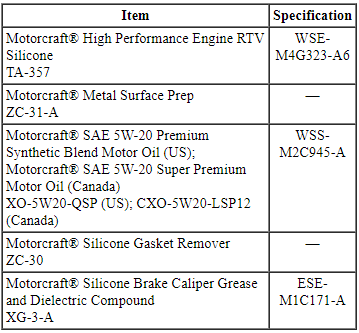
RH camshafts
- NOTE: Coat the camshafts with clean engine oil prior to installation.
Position the camshafts onto the RH cylinder head in the neutral position as shown.
- NOTICE: The crankshaft must remain in the freewheeling position (crankshaft dowel pin at 9 o'clock) until after the camshafts are installed and the valve clearance is checked/adjusted. Do not turn the crankshaft until instructed to do so. Failure to follow this process will result in severe engine damage.
Rotate the crankshaft counterclockwise until the crankshaft dowel pin is in the 9 o'clock position.
- NOTICE: The camshaft seal gaps must be at the 12 o'clock position or damage to the engine may occur.
Position the 4 camshaft seals gaps as shown.
- NOTE: Cylinder head camshaft bearing caps are numbered to verify that they are assembled in their original positions.
Install the 6 camshaft caps, mega cap, valve train oil tube and the 15 bolts in the sequence shown.
- Tighten to 8 N·m then additional 45 degrees.
- Loosen the 4 camshaft caps bolts.
- Tighten the 4 camshaft caps bolts in the sequence shown.
- Tighten bolts 8, 9, 10 and 11 to 8 N·m then additional 45 degrees.
- NOTICE: If any components are installed new, the engine valve clearance must be checked/adjusted or engine damage may occur.
NOTE: Use a camshaft sprocket bolt to turn the camshafts.
Using a feeler gauge, confirm that the valve tappet clearances are within specification. If valve tappet clearances are not within specification, the clearance must be adjusted by installing new valve tappet(s) of the correct size. For additional information, refer to Valve Clearance Check in this section. - Remove the 3 bolts and the RH valve train oil tube.
- Rotate the RH camshafts to the TDC position as shown.
- NOTE: The Camshaft Holding Tool will hold the camshafts in the TDC position.
Install the Camshaft Holding Tool onto the flats of the RH camshafts.
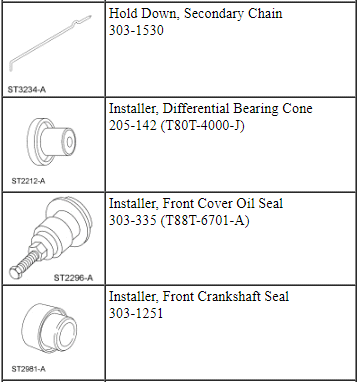
- Compress the RH secondary timing chain tensioner and install the Secondary Chain Hold Down to retain the tensioner in the collapsed position.
- Assemble the RH VCT assembly, the RH exhaust camshaft sprocket and the RH secondary timing chain.
- Align the colored links with the timing marks.
- NOTE: It may be necessary to rotate the camshafts slightly, to install the RH secondary timing assembly.
Position the 2 RH VCT assemblies and secondary timing chain onto the camshafts by aligning the holes in the VCT assemblies with the dowel pins in the camshafts.
- Install the 2 new RH VCT bolts and tighten in 4 stages.
- Stage 1: Tighten to 40 N·m.
- Stage 2: Loosen one full turn.
- Stage 3: Tighten to 25 N·m.
- Stage 4: Tighten an additional 180 degrees.
- NOTE: The 2 VCT oil control solenoids are removed for clarity.
Compress the RH secondary timing chain tensioner and remove the Secondary Chain Hold Down.
- Make sure the secondary timing chain is centered on the timing chain tensioner guides.
LH camshafts
- NOTE: Coat the camshafts with clean engine oil prior to installation.
Position the camshafts onto the LH cylinder head in the neutral position as shown.
- NOTICE: The crankshaft must remain in the freewheeling position (crankshaft dowel pin at 9 o'clock) until after the camshafts are installed and the valve clearance is checked/adjusted. Do not turn the crankshaft until instructed to do so. Failure to follow this process will result in severe engine damage.
Rotate the crankshaft counterclockwise until the crankshaft dowel pin is in the 9 o'clock position.
- NOTICE: The camshaft seal gaps must be at the 12 o'clock position or damage to the engine may occur.
Position the 4 camshaft seals gaps as shown.
- NOTE: Cylinder head camshaft bearing caps are numbered to verify that they are assembled in their original positions.
Install the 6 camshaft caps, mega cap, valve train oil tube and the 15 bolts in the sequence shown.
- Tighten to 8 N·m then additional 45 degrees.
- Loosen the 4 camshaft caps bolts.
- Tighten the 4 camshaft caps bolts in the sequence shown.
- Tighten bolts 8, 9, 10 and 11 to 8 N·m then additional 45 degrees.
- NOTICE: If any components are installed new, the engine valve clearance must be checked/adjusted or engine damage may occur.
NOTE: Use a camshaft sprocket bolt to turn the camshafts.
Using a feeler gauge, confirm that the valve tappet clearances are within specification. If valve tappet clearances are not within specification, the clearance must be adjusted by installing new valve tappet(s) of the correct size. For additional information, refer to Valve Clearance Check in this section. - Remove the 3 bolts and the LH valve train oil tube.
- Rotate the LH camshafts to the TDC position as shown.
- NOTE: The Camshaft Holding Tool will hold the camshafts in the Top Dead Center (TDC) position.
Install the Camshaft Holding Tool onto the flats of the LH camshafts.
- Compress the LH secondary timing chain tensioner and install the Secondary Chain Hold Down to retain the tensioner in the collapsed position.
- Assemble the 2 LH VCT assemblies and the LH secondary timing chain.
- Align the colored links with the timing marks.
- NOTE: It may be necessary to rotate the camshafts slightly, to install the LH secondary timing assembly.
Position the 2 LH VCT assemblies and secondary timing chain onto the camshafts by aligning the holes in the VCT assemblies with the dowel pins in the camshafts.
- Install the 2 new LH VCT bolts and tighten in 4 stages.
- Stage 1: Tighten to 40 N·m.
- Stage 2: Loosen one full turn.
- Stage 3: Tighten to 25 N·m.
- Stage 4: Tighten an additional 180 degrees.
- NOTE: The 2 VCT oil control solenoids are removed for clarity.
Compress the LH secondary timing chain tensioner and remove the Secondary Chain Hold Down.
- Make sure the secondary timing chain is centered on the timing chain tensioner guides.
All camshafts
- Rotate the crankshaft clockwise 60 degrees to the TDC position (crankshaft dowel pin at 11 o'clock).
- NOTE: It may be necessary to rotate the camshafts slightly, to align the timing marks.
Install the primary timing chain with the colored links aligned with the timing marks on the VCT assemblies and the crankshaft sprocket.
- Install the lower LH primary timing chain guide and the 2 bolts.
- Tighten to 10 N·m.
- Install the primary timing chain tensioner arm.
- Reset the primary timing chain tensioner.
- Release the ratchet detent.
- Using a soft-jawed vise, compress the ratchet plunger.
- Align the hole in the ratchet plunger with the hole in the tensioner housing.
- Install a suitable lockpin.
- NOTE: It may be necessary to rotate the camshafts slightly to remove slack from the timing chain to install the tensioner.
Install the primary tensioner and the 2 bolts.
- Tighten to 10 N·m.
- Remove the lockpin.
- As a post-check, verify correct alignment of all timing marks.
- There are 48 links in between the RH intake VCT assembly colored link (1) and the LH intake VCT assembly colored link (2).
- There are 35 links in between LH intake VCT assembly colored link (2) and the 2 crankshaft sprocket links (3).
- NOTICE: Do not use excessive force when installing the Variable Camshaft Timing (VCT) oil control solenoid. Damage to the mega cap could cause the cylinder head to be inoperable. If difficult to install the VCT oil control solenoid, inspect the bore and VCT oil control solenoid to ensure there are no burrs, sharp edges or contaminants present on the mating surface. Only clean the external surfaces as necessary.
NOTE: A slight twisting motion will aid in the installation of the VCT oil control solenoid.
NOTE: Keep the VCT oil control solenoid clean of dirt and debris.
Install the LH intake VCT oil control solenoid and the bolt.- Tighten to 8 N·m then an additional 20 degrees.
- NOTICE: Do not use excessive force when installing the Variable Camshaft Timing (VCT) oil control solenoid. Damage to the mega cap could cause the cylinder head to be inoperable. If difficult to install the VCT oil control solenoid, inspect the bore and VCT oil control solenoid to ensure there are no burrs, sharp edges or contaminants present on the mating surface. Only clean the external surfaces as necessary.
NOTE: A slight twisting motion will aid in the installation of the VCT oil control solenoid.
NOTE: Keep the VCT oil control solenoid clean of dirt and debris.
Install the RH intake VCT oil control solenoid and the bolt.- Tighten to 8 N·m then an additional 20 degrees.
- Remove the RH Camshaft Holding Tool.
- Install the RH valve train oil tube and the 3 bolts and tighten in 2 stages.
- Stage 1: Tighten to 8 N·m.
- Stage 2: Tighten an additional 45 degrees.
- Remove the LH Camshaft Holding Tool.
- Install the LH valve train oil tube and the 3 bolts and tighten in 2 stages.
- Stage 1: Tighten to 8 N·m.
- Stage 2: Tighten an additional 45 degrees.
- NOTICE: Only use a 3M Roloc Bristle Disk (2-in white, part number 07528) to clean the engine front cover. Do not use metal scrapers, wire brushes or any other power abrasive disk to clean front cover.
Clean the engine front cover using a 3M Roloc Bristle Disk (2-in white, part number 07528) in a suitable tool turning at the recommended speed of 15,000 rpm.
- Thoroughly wash the engine front cover to remove any foreign material, including any abrasive particles created during the cleaning process.
- NOTICE: Place clean, lint-free shop towels over exposed engine cavities. Carefully remove the towels so foreign material is not dropped into the engine. Any foreign material (including any material created while cleaning gasket surfaces) that enters the oil passages or the oil pan, may cause engine failure.
NOTICE: Do not use wire brushes, power abrasive discs or 3M Roloc Bristle Disk (2-in white part number 07528) to clean the sealing surfaces of engine block, cylinder heads, and oil pan. These tools can cause contamination that will cause premature engine failure. Remove all traces of the gasket.
Clean the sealing surfaces of the cylinder heads, the cylinder block and the oil pan in the following sequence.- Remove any large deposits of silicone or gasket material.
- Apply silicone gasket remover and allow to set for several minutes.
- Remove the silicone gasket remover. A second application of silicone gasket remover may be required if residual traces of silicone or gasket material remain.
- Apply metal surface prep to remove any remaining traces of oil or coolant and to prepare the surfaces to bond. Do not attempt to make the metal shiny. Some staining of the metal surfaces is normal.
- Make sure the 2 locating dowel pins are seated correctly in the cylinder block.
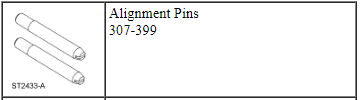
- Install the Alignment Pins.
- NOTICE: Failure to use Motorcraft High Performance Engine RTV Silicone may cause the engine oil to foam excessively and result in serious engine damage.
NOTE: The engine front cover and bolts 7, 8, 15, 17, 18, 21 and 22 must be installed within 4 minutes of the initial sealant application. The remainder of the engine front cover bolts must be installed and tightened within 35 minutes of the initial sealant application. If the time limits are exceeded, the sealant must be removed, the sealing area cleaned and sealant reapplied. To clean the sealing area, use silicone gasket remover and metal surface prep. Failure to follow this procedure can cause future oil leakage.
Apply a 3.0 mm (0.11 in) bead of Motorcraft High Performance Engine RTV Silicone to the engine front cover sealing surfaces including the 4 inner bolt bosses.- Apply a 5.5 mm (0.21 in) bead of Motorcraft High Performance Engine RTV Silicone to the oil pan-to-cylinder block joint and the cylinder head-to-cylinder block joint areas of the engine front cover in 5 places as indicated.
- NOTE: Make sure the 2 locating dowel pins are seated correctly in the cylinder block.
Install the engine front cover and bolts 7, 8, 15, 17, 18, 21 and 22.
- Tighten in sequence to 3 N·m.
- Remove the Alignment Pins.
- NOTE: Do not tighten the bolt at this time.
Install the M6 engine front cover bolt.
- NOTE: Do not tighten the bolts at this time.
Install the 3 upper M10 engine front cover bolts.
- NOTICE: Do not expose the Motorcraft High Performance Engine RTV Silicone to engine oil for at least 90 minutes after installing the engine front cover. Failure to follow this instruction may cause oil leakage.
Install the remaining engine front cover bolts. Tighten all of the engine front cover bolts in the sequence shown in 7 stages:
- Stage 1: Tighten bolts 1 thru 22 to 10 N·m.
- Stage 2: Tighten bolts 23, 24 and 25 to 15 N·m.
- Stage 3: Tighten bolt 26 to 10 N·m.
- Stage 4: Loosen bolt 26 one full turn.
- Stage 5: Tighten bolts 23, 24 and 25 to 30 N·m plus an additional 90 degrees.
- Stage 6: Tighten bolts 1 thru 22 to 20 N·m plus an additional 45 degrees.
- Stage 7: Tighten bolt 26 to 10 N·m plus an additional 45 degrees.
- Install the fuel supply tube-to-engine front cover bolt.
- Tighten to 10 N·m.
- Position the generator and install the stud and nut.
- Tighten the stud to 8 N·m.
- Tighten the nut to 47 N·m.
- Tighten the bolt to 47 N·m.
- NOTE: Installation of new seals is only required if damaged seals were removed.
Using the VCT Spark Plug Tube Seal Installer and Handle, install new spark plug tube seals.
- NOTE: Installation of new seals is only required if damaged seals were removed.
Using the Differential Bearing Cone Installer and Handle, install new VCT solenoid seal(s).
- NOTICE: Failure to use the correct Motorcraft High Performance Engine RTV Silicone may cause the engine oil to foam excessively and result in serious engine damage.
NOTE: If the valve cover is not installed and the fasteners tightened within 4 minutes, the sealant must be removed and the sealing area cleaned. To clean the sealing area, use silicone gasket remover and metal surface prep. Failure to follow this procedure can cause future oil leakage.
Apply an 8 mm (0.31 in) bead of Motorcraft High Performance Engine RTV Silicone to the engine front cover-to-RH cylinder head joints. - Using a new gasket, install the RH valve cover and tighten the 4 bolts and 7 stud bolts.
- Tighten in the sequence shown to 10 N·m.
- Make sure the VCT seals in the valve cover are below the top of the VCT oil control solenoid electrical connector or the VCT seal may leak oil.
- Install the engine wiring harness to the RH valve cover.
- Position the wiring harness and attach the 9 wiring harness retainers to the RH valve cover and stud bolts.
- Connect the CHT sensor wiring harness jumper electrical connector.
- Connect the 3 fuel injector electrical connectors.
- Connect and attach the RH CMS electrical connector.
- Connect the 2 VCT oil control solenoid electrical connectors.
- Install the PCV crankcase vent tube.
- NOTE: Apply a small amount of dielectric grease to the inside of the ignition coil-on-plug boots before attaching to the spark plugs.
Install the 3 RH coil-on-plugs and the 3 bolts.
- Tighten to 7 N·m.
- Connect the 3 coil-on-plug electrical connectors.
- Using a new gasket, install the intake manifold and the 7 bolts.
- Tighten in the sequence shown in 2 stages.
- Stage 1: Tighten to 10 N·m.
- Stage 2: Tighten an additional 45 degrees.
- Tighten in the sequence shown in 2 stages.
- Install the upper intake manifold support bracket bolt.
- Tighten to 10 N·m.
- Attach the 2 coolant tube retainers to the upper intake manifold.
- Connect the crankcase ventilation hose to the upper intake manifold.
- Connect the EVAP vapor tube to the EVAP canister vent solenoid. For additional information, refer to Section 310-00.
- Attach the EVAP vapor tube to the 2 retainers.
- Connect the EVAP canister vent solenoid and throttle body electrical connectors.
- Attach the wiring harness pin-type retainer to the upper intake manifold.
- NOTE: Installation of new seals is only required if damaged seals were removed.
Using the VCT Spark Plug Tube Seal Installer and Handle, install new spark plug tube seals.
- NOTE: Installation of new seals is only required if damaged seals were removed.
Using the Differential Bearing Cone Installer and Handle, install new VCT solenoid seal(s).
- NOTICE: Failure to use Motorcraft High Performance Engine RTV Silicone may cause the engine oil to foam excessively and result in serious engine damage.
NOTE: If the valve cover is not installed and the fasteners tightened within 4 minutes, the sealant must be removed and the sealing area cleaned. To clean the sealing area, use silicone gasket remover and metal surface prep. Failure to follow this procedure can cause future oil leakage.
Apply an 8 mm (0.31 in) bead of Motorcraft High Performance Engine RTV Silicone to the engine front cover-to-LH cylinder head joints. - Using a new gasket, install the LH valve cover and tighten the 4 bolts and 7 stud bolts.
- Tighten in the sequence shown to 10 N·m.
- Make sure the VCT seals in the valve cover are below the top of the VCT oil control solenoid electrical connector or the VCT seal may leak oil.
- Install the engine wiring harness to the LH valve cover.
- Position the wiring harness and attach the 11 wiring harness retainers to the LH valve cover and stud bolts.
- Connect the 3 fuel injector electrical connectors.
- Connect and attach the LH HO2S electrical connector.
- Connect the 2 VCT oil control solenoid electrical connectors.
- Install the ground wire bolt to the engine front cover.
- Tighten to 10 N·m.
- NOTE: Apply a small amount of dielectric grease to the inside of the ignition coil-on-plug boots before attaching to the spark plugs.
Install the 3 LH -coil-on-plugs and the 3 bolts.
- Tighten to 7 N·m (62 lb-in.
- Connect the 3 coil-on-plug electrical connectors.
- Install the oil level indicator.
- Install the crankcase vent tube. For additional information, refer to the quick connect coupling procedure in Section 310-00.
- Install the accessory drive belt tensioner and the 3 bolts.
- Tighten to 11 N·m.
- NOTE: Apply clean engine oil to the crankshaft front seal bore in the engine front cover.
Using the Crankshaft Vibration Damper Replacer and Front Crankshaft Seal Installer, install a new crankshaft front seal.
- NOTE: Lubricate the outside diameter sealing surfaces with clean engine oil.
Using the Crankshaft Vibration Damper Replacer and Front Cover Oil Seal Installer, install the crankshaft pulley.
- Using the strap wrench, install the crankshaft pulley washer and new bolt and tighten in 4 stages.
- Stage 1: Tighten to 120 N·m.
- Stage 2: Loosen one full turn.
- Stage 3: Tighten to 50 N·m.
- Stage 4: Tighten an additional 90 degrees.
- Using the Powertrain Lift and Adjustable Grip Arms, raise the engine and transaxle assembly into the vehicle.
- Install the engine mount and the 3 bolts.
- Tighten to 90 N·m.
- Install the 4 engine mount nuts.
- Tighten to 63 N·m.
- Install the transaxle support insulator bracket, the 3 nuts and the bolt.
- Tighten the bolt to 80 N·m.
- Tighten the 3 nuts to 63 N·m.
- Install the transaxle support insulator through bolt and nut.
- Tighten to 175 N·m.
- Connect the transaxle cooler tubes and install the 2 secondary latches.
- If equipped, connect the 2 oil cooler coolant hoses.
- Install the RH halfshaft support bracket and the 2 bolts.
- Tighten to 40 N·m.
- Install the 2 halfshaft support bracket studs.
- Tighten to 10 N·m.
- NOTICE: The circlips are unique in size and shape for each shaft. Make sure to use the specified circlip for the application or vehicle damage may occur.
Install the correct new circlip on the inboard stub shaft.
- NOTICE: The sharp edges on the stub shaft splines can slice or puncture the oil seal. Use care when inserting the stub shaft into the transmission or damage to the component may occur.
NOTE: After insertion, pull the halfshaft inner end to make sure the circlip is locked.
Push the stub shaft into the transmission so the circlip locks into the differential side gear. - Rotate the LH wheel knuckle into position and insert the LH halfshaft into the wheel hub.
All-Wheel Drive (AWD) vehicles
- NOTE: A new Power Transfer Unit (PTU) intermediate shaft seal and deflector must be installed whenever the intermediate shaft is removed.
Install a new PTU intermediate shaft seal and deflector. For additional information, refer to Section 308-07B.
All vehicles
- Install the intermediate and halfshaft assembly and the 2 nuts.
- Tighten to 25 N·m.
- Rotate the RH wheel knuckle into position and insert the RH halfshaft into the wheel hub.
- NOTE: Do not lubricate the engine oil filter gasket with oil.
Install a new engine oil filter.
- Tighten to 5 N·m and then rotate an additional 180 degrees.
- Install the front subframe. For additional information, refer to Section 502-00.
- Install the transaxle support insulator - anti-roll. For additional information, refer to Section 307-01A.
All-Wheel Drive (AWD) vehicles
- Line up the index marks on the rear driveshaft to the index marks on the PTU flange made during removal and install the 4 bolts.
- Tighten to 70 N·m.
All vehicles
- Position the RH brake hose bracket and install the bolt.
- Tighten to 30 N·m.
- NOTICE: Do not tighten the wheel hub nut with the vehicle on the ground. The nut must be tightened to specification before the vehicle is lowered onto the wheels. Wheel bearing damage will occur if the wheel bearing is loaded with the weight of the vehicle applied.
NOTE: Apply the brake to keep the halfshaft from rotating.
NOTE: LH shown, RH similar.
Using the previously removed LH and RH wheel hub nuts, seat the halfshaft.- Tighten to 350 N·m.
- Remove and discard the wheel hub nuts.
- NOTICE: The wheel hub nut contains a one-time locking chemical that is activated by the heat created when it is tightened. Install and tighten the new wheel hub nut to specification within 5 minutes of starting it on the threads. Always install a new wheel hub nut after loosening or when not tightened within the specified time or damage to the components can occur.
NOTE: Apply the brake to keep the halfshaft from rotating.
NOTE: LH shown, RH similar.
Install a new RH and LH wheel hub nut.- Tighten to 350 N·m.
- If equipped, attach the engine block heater harness to the radiator support.
- Attach the wiring harness pin-type retainer to the shift cable bracket and connect the transaxle control cable to the shift cable bracket.
- Connect the transaxle control cable to the control lever.
- Connect the upper radiator hose, lower radiator hose and 2 heater hoses to the thermostat housing.
- Install the ground wire to the RH shock tower and install the bolt.
- Tighten to 10 N·m.
- Install the engine wiring harness retainer to the bulkhead.
- Slide the wiring harness in the bulkhead.
- Make sure the wiring harness retainer tab is below the bulkhead lip.
- Connect the engine harness electrical connector.
- Attach the wiring harness retainer.
- Connect the 2 PCM electrical connectors.
- Connect the Evaporative Emission (EVAP) tube and the fuel supply tube quick connect coupling. For additional information, refer to Section 310-00.
- Connect the brake booster vacuum hose to the upper intake manifold.
- Install the degas bottle. For additional information, refer to Section 303-03.
- Connect the coolant hose to the coolant inlet pipe.
- Remove the hose clamp pliers.
- Using a new O-ring seal and gasket seal, connect the upper A/C tube to the condenser and install the nut.
- Tighten to 15 N·m.
- Connect the A/C pressure switch electrical connector.
- Using a new O-ring seal and gasket seal, connect the A/C tube and install the nut.
- Tighten to 15 N·m.
- Install the front wheels and tires. For additional information, refer to Section 204-04.
- Install the accessory drive belt. For additional information, refer to Section 303-05.
- Connect the engine wiring harness electrical connector.
- Install the ground wire cable and the retainer.
- Tighten to 10 N·m.
- Connect the 2 battery feed cables to the positive battery terminal and install the nut.
- Tighten to 5 N·m.
- Install the battery tray. For additional information, refer to Section 414-01.
- Install the engine Air Cleaner (ACL) and ACL outlet pipe. For additional information, refer to Section 303-12.
- Install the strut tower brace and the 4 nuts.
- Tighten to 35 N·m.
- Install the cowl panel grille. For additional information, refer to Section 501-02.
- Fill the engine with clean engine oil.
- Fill and bleed the cooling system. For additional information, refer to Section 303-03.
- If equipped, install the skid plate and the 10 retainers.
- Tighten to 70 N·m.
- If equipped, install the underbody shield and attach the 4 retainers.
- Recharge the A/C system. For additional information, refer to Section 412-00.
- After completing the repairs, use the scan tool to perform the Misfire Monitor Neutral Profile Correction procedure following the on-screen instructions.
Valve Tappets
Material
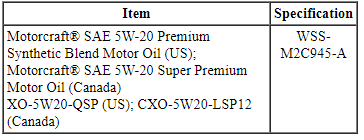
NOTICE: During engine repair procedures, cleanliness is extremely important. Any foreign material, including any material created while cleaning gasket surfaces that enters the oil passages, coolant passages or the oil pan, may cause engine failure.
- NOTE: The valve tappets must be installed in their original positions.
NOTE: Coat the valve tappets with clean engine oil prior to installation.
Install the valve tappets. - Depending on the valve tappets being serviced, install the LH and/or the RH camshafts. For additional information, refer to Camshaft in this section.
Valve Spring, Retainer and Seal
Special Tool(s)
Material

- NOTE: Apply the specified lubricant to the specified component.
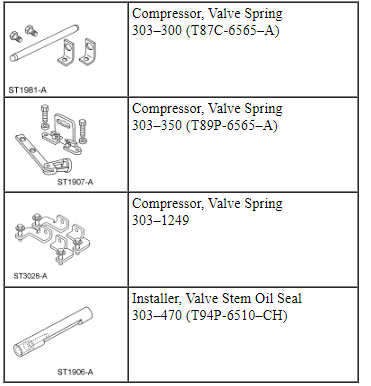
Using the Valve Stem Oil Seal Installer, install a new valve stem seal.
- Using the Valve Spring Compressors, install the valve spring, retainer and key.
- Install the valve tappets. For additional information, refer to Valve Tappets in this section.
Cylinder Head - RH
Material
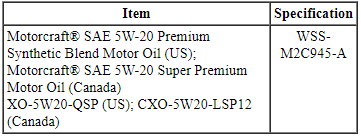
NOTICE: During engine repair procedures, cleanliness is extremely important. Any foreign material, including any material created while cleaning gasket surfaces that enters the oil passages, coolant passages or the oil pan, can cause engine failure.
NOTE: If the cylinder head is replaced, a new secondary timing chain tensioner will need to be installed.
NOTE: The valve tappets must be installed in their original positions. Coat the valve tappets with clean engine oil prior to installation.
- Install a new gasket, the RH cylinder head and 8 new bolts. Tighten in the sequence shown in 5 stages:
- Stage 1: Tighten to 20 N·m.
- Stage 2: Tighten to 35 N·m.
- Stage 3: Tighten 90 degrees.
- Stage 4: Tighten 90 degrees
- Stage 5: Tighten 45 degrees.
- Install the M6 bolt.
- Tighten to 10 N·m.
- NOTE: The valve tappets must be installed in their original positions.
NOTE: Coat the valve tappets with clean engine oil prior to installation.
Install the valve tappets. - Install and connect the CHT sensor jumper harness.
- NOTICE: If the engine is repaired or replaced because of upper engine failure, typically including valve or piston damage, check the intake manifold for metal debris. If metal debris is found, install a new intake manifold. Failure to follow these instructions can result in engine damage.
Using new intake manifold and thermostat housing gaskets, install the lower intake manifold and the 10 bolts.
- Tighten in the sequence shown to 10 N·m.
- Install the 2 thermostat housing-to-lower intake manifold bolts.
- Tighten to 10 N·m.
- NOTE: Align the bracket with the index mark made during removal.
Install the upper intake manifold bracket and the bolt.
- Tighten to 10 N·m.
- Install the engine lifting eye and the 2 bolts.
- Tighten to 24 N·m.
- Install the RH primary timing chain guide and the bolt.
- Tighten to 10 N·m.
- Install the RH cylinder block drain plug or if equipped, the block heater.
- Tighten the cylinder block drain plug to 10 N·m plus an additional 720 degrees.
- Tighten the block heater to 40 N·m.
- Install 6 new RH exhaust manifold studs.
- Tighten to 12 N·m.
- NOTICE: Failure to tighten the exhaust manifold nuts to specification a second time will cause the exhaust manifold to develop an exhaust leak.
Using a new gasket, install the RH exhaust manifold and 6 new nuts. Tighten in 2 stages in the sequence shown:
- Stage 1: Tighten to 20 N·m.
- Stage 2: Tighten to 25 N·m.
- Install the RH catalytic converter heat shield and the 4 bolts.
- Tighten to 10 N·m.
- Install the LH cylinder block drain plug.
- Tighten to 16 N·m plus an additional 180 degrees.
- Install the ground wire and the bolt on the RH cylinder.
- Tighten to 10 N·m.
- Install the 2 CMP sensors and the 2 bolts.
- Tighten to 10 N·m.
- Connect the 2 RH Camshaft Position Camshaft Position (CMP) sensor electrical connectors.
- If equipped, disconnect the block heater electrical connector.
- Install the block heater wiring harness to the engine.
- If equipped, install the block heater heat shield.
- Install the RH camshafts. For additional information, refer to Camshaft in this section.
Cylinder Head - LH
Material
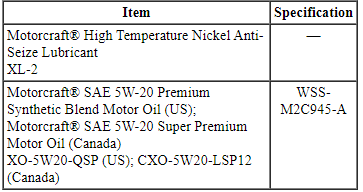
NOTICE: During engine repair procedures, cleanliness is extremely important. Any foreign material, including any material created while cleaning gasket surfaces that enters the oil passages, coolant passages or the oil pan, can cause engine failure.
NOTE: If the cylinder head is replaced, a new secondary timing chain tensioner will need to be installed.
NOTE: The valve tappets must be installed in their original positions. Coat the valve tappets with clean engine oil prior to installation.
- NOTE: If the cylinder head is replaced, a new secondary timing chain tensioner will need to be installed.
Install a new gasket, the LH cylinder head and 8 new bolts. Tighten in the sequence shown in 5 stages:
- Stage 1: Tighten to 20 N·m.
- Stage 2: Tighten to 35 N·m.
- Stage 3: Tighten 90 degrees.
- Stage 4: Tighten 90 degrees
- Stage 5: Tighten 45 degrees.
- Install the M6 bolt.
- Tighten to 10 N·m.
- NOTE: The valve tappets must be installed in their original positions.
NOTE: Coat the valve tappets with clean engine oil prior to installation.
Install the valve tappets. - Install the LH upper primary timing chain guide and the bolt.
- Tighten to 10 N·m.
- NOTICE: If the engine is repaired or replaced because of upper engine failure, typically including valve or piston damage, check the intake manifold for metal debris. If metal debris is found, install a new intake manifold. Failure to follow these instructions can result in engine damage.
Using new intake manifold and thermostat housing gaskets, install the lower intake manifold and the 10 bolts.
- Tighten in the sequence shown to 10 N·m.
- Install the 2 thermostat housing-to-lower intake manifold bolts.
- Tighten to 10 N·m.
- Install the RH cylinder block drain plug or, if equipped, the block heater.
- Tighten the cylinder block drain plug to 10 N·m plus an additional 720 degrees.
- Tighten the block heater to 40 N·m.
- Install the LH cylinder block drain plug.
- Tighten to 16 N·m plus an additional 180 degrees.
- Install 6 new LH exhaust manifold studs.
- Tighten to 12 N·m.
- Using a new gasket, install the LH catalytic converter manifold and 3 new lower LH catalytic converter manifold-to-cylinder head nuts.
- Install the 3 new upper LH catalytic converter manifold-to-cylinder head nuts and tighten to 25 N·m.
- Tighten the 3 lower LH catalytic converter manifold-to-cylinder head nuts to 25 N·m.
- Install the LH exhaust heat shield and the 3 bolts.
- Tighten to 10 N·m.
- Connect the Engine Oil Pressure (EOP) switch electrical connector and the wiring harness pin-type retainer.
- Install the generator stud, generator and the nut and bolt.
- Tighten the stud to 8 N·m.
- Tighten the nut and bolt to 47 N·m.
- Connect the generator B+ cable and install the nut.
- Tighten to 17 N·m.
- Position back the generator B+ cable cover and connect the generator electrical connector.
- Install the A/C compressor, the 2 stud bolts and the nut.
- Tighten to 25 N·m.
- Connect the 2 A/C compressor electrical connectors.
- Attach the A/C wiring harness retainer.
- Install the wiring harness retainer to the rear of the LH cylinder head.
- NOTE: Lubricate the 2 CMP sensor O-ring seals with clean engine oil.
Install the 2 LH CMP sensors and the 2 bolts.
- Tighten to 10 N·m.
- Connect the 2 LH CMP sensors electrical connectors.
- If equipped, connect the block heater electrical connector.
- Install the block heater wiring harness to the engine.
- If equipped, install the block heater heat shield.
- Install the LH camshafts. For additional information, refer to Camshaft in this section.
Test yourself
A quick Ford Taurus quiz: every answer comes with an explanation and a link to the manual page.